# StudyFetch Academy — full documentation
Published guides in site navigation order.
Index: https://studyfetch-academy.honen.com/llms.txt
## Create and access a Study Set
Source: https://studyfetch-academy.honen.com/docs/6a542d542911612bb96214ee
Product tutorial
StudyFetch app
This page is for the StudyFetch app and is product knowledge for [StudyFetch.com](https://studyfetch.com).
## Creating a New Study Set
1. On the lefthand side of your Dashboard, click **My Sets** (or use **+ Create Study Set** directly from the My Sets list page).
My Study Sets. Click the Create Study Set tile, or the Create Study Set button above the grid.
1. Choose **+ Create Study Set**.
2. Enter a name for your Study Set in the **Study Set Name** field.
3. Optionally add a description in the **Description** field.
4. Click **+ Create Study Set** to finish.
Create Study Set modal. Type a Study Set Name, add an optional Description, then click Create Study Set.
## Accessing an existing Study Set
There are several ways to get back into a Study Set — pick whichever is fastest for you:
- On your main dashboard, the **Jump back in** section surfaces the Study Sets you most recently reviewed — click any card to open it.
- Click **My Sets** in the left sidebar to see every Study Set you have, then select one.
- Use the left/right arrow control in the sidebar to switch quickly between recently accessed Study Sets without leaving the page you're on.
Home, with Home selected in the sidebar. Click a card under Your Study Sets to reopen a recent study set.
Product knowledge
This page is for the StudyFetch app and is product knowledge for [StudyFetch.com](https://studyfetch.com).
## Creating Folders Tutorial
Source: https://studyfetch-academy.honen.com/docs/6a5457251b01fcf0352020a0
Product tutorial
StudyFetch app
This page is for the StudyFetch app and is product knowledge for [StudyFetch.com](https://studyfetch.com).
Use folders to organize Study Sets so students can keep related materials together and find what they need faster.
### Create a folder
Start from My Sets, name the folder, then create it.
### Organize Study Sets
Drag Study Sets into the right folder and open folders to view their contents.
### Manage folders
Rename or delete folders from the folder menu.
## How to organize Study Sets into folders
1. On the left-hand side of your dashboard, click **My Sets**. Existing folders appear at the top of the Study Set grid, alongside **Create Folder** and **Create Study Set**.
 My Study Sets, with two folders above the Study Set cards. Create Folder and Create Study Set sit at the top right.
2. Click **Create Folder**, enter a name, and click **Create**.
 Create Study Set Folder, with Name set to Fall Semester 2026. The reader clicks Create.
3. Drag and drop a Study Set card onto the folder where it belongs. A confirmation toast appears, and the folder's Study Set count updates.
 My Study Sets, after a drag. The toast reads Study set moved to folder successfully and 2026 Spring Semester now reads 3 Study Sets.
4. Click a folder to view the Study Sets inside it. Click **Exit Folder** to return to the main list.
 My Study Sets, inside an open folder. Exit Folder returns the reader to the main list.
5. Click any Study Set inside the folder to open it to its home dashboard, same as opening a Study Set from the main grid.
## Managing your folders
### Rename a folder
1. From **My Sets**, click the **three-dot menu** in the top right corner of the folder card, then select **Edit Folder**.
 My Study Sets, folder menu open on 2026 Spring Semester. The reader picks Edit Folder to rename it.
2. Update the name in the dialog and click **Update Folder**.
### Delete a folder
1. From the same three-dot menu, select **Delete Folder**.
2. Confirm the deletion in the browser's native confirmation dialog. Study Sets inside the folder are not deleted — only the folder itself is removed.
Warning
### Deleting a folder cannot be _undone_.
Study Sets inside the folder are not deleted, but the folder itself is removed.
## Next steps
- Upload your materials and create Study Sets.
- Create notes for more comprehensive study materials.
- Try QuizFetch for a fun, interactive way to test your knowledge.
Product knowledge
This page is for the StudyFetch app and is product knowledge for [StudyFetch.com](https://studyfetch.com).
## Full StudyFetch Tutorial Video
Source: https://studyfetch-academy.honen.com/docs/6a563c15f5c9d6009d358966
Product tutorial
StudyFetch app
This page is for the StudyFetch app and is product knowledge for [StudyFetch.com](https://studyfetch.com).
Your browser cannot play this video. Open the [Platform Overview](https://studyfetchcdn.studyfetch.com/landing/demo-horizontal.mp4).
Platform Overview
### Complete Platform Tutorial
This video provides a comprehensive overview of the entire StudyFetch platform, demonstrating how all features work together to enhance your learning experience.
#### What You'll Learn
In this full tutorial, you'll see demonstrations of all StudyFetch features:
- Creating and organizing Study Sets
- Generating AI Notes from your materials
- Creating Flashcards for effective memorization
- Using the Test and QuizFetch features for self-assessment
- Audio Recap for auditory learning
- Tutor Me for personalized AI assistance
- Chat feature with Sparky
- Video Explainers for visual learning
- Essay grading with instant feedback
- Calendar and organization tools
- Live Lecture recording and transcription
#### Feature-Specific Tutorials
If you need more detailed instructions on specific features, check out our dedicated tutorials:
- Creating a Study Set Tutorial
- Notes Tutorial
- Flashcards Tutorial
- Test Tutorial
- QuizFetch Tutorial
- Audio Recap Tutorial
- Tutor Me Tutorial
- Chat Feature Tutorial
- Explainers Tutorial
- Essay Grading Tutorial
- Creating Folders Tutorial
- Calendar Tutorial
- Live Lecture Tutorial
Product knowledge
This page is for the StudyFetch app and is product knowledge for [StudyFetch.com](https://studyfetch.com).
## Manage Study Sets
Source: https://studyfetch-academy.honen.com/docs/6a54305b4aad29a96f070b61
Product tutorial
StudyFetch app
This page is for the StudyFetch app and is product knowledge for [StudyFetch.com](https://studyfetch.com).
## Managing Your Study Sets
### Viewing Your Study Set
Opening a Study Set now lands you on a **Study Plan** view: recommended topics, quick access to QuizFetch, Flashcards, and Tutor for the current topic, plus **Add your syllabus** and **Exam Dates** panels on the right. Scroll down to **Or start learning your own way** for direct actions like Add More Materials, Take a Quiz, or Create a Flashcard Set. Uploaded materials remain listed under **Your Notes** in the left sidebar.
Study set page, Recommended from your Study Plan. The open topic offers Guided Chat, QuizFetch and Flashcards.
### **Editing an Existing Study Set**
1. Open the Study Set you want to edit, then click the **gear icon** next to its title.
2. In the **General** tab, update the **Cover Image**, **Title**, **Description**, and **Visibility** (Private or Public) all from one screen.
Edit Study Set modal, General tab. Update Cover Image, Title, Description and Visibility, then click Save Changes.
1. In the **Delete** tab, type the Study Set's exact name to confirm, then click **Delete Study Set**.
2. When done editing, click **Save Changes**.
Edit Study Set modal, Delete tab. Type the study set's name to confirm, then click Delete Study Set.
Warning
Use this carefully — deleting a Study Set removes all of its materials, flashcards, quizzes, chat history, and progress permanently, and cannot be undone.
Product knowledge
This page is for the StudyFetch app and is product knowledge for [StudyFetch.com](https://studyfetch.com).
## Next steps
Source: https://studyfetch-academy.honen.com/docs/6a542bc646359b5223e8e093
Product tutorial
StudyFetch app
This page is for the StudyFetch app and is product knowledge for [StudyFetch.com](https://studyfetch.com).
## Next Steps
Now that you've created a Study Set, you can:
- Generate Flashcards to memorize key concepts
- Create Practice Tests to assess your knowledge
- Use Audio Recap to review material on the go
- Organize your Study Sets into folders
Product knowledge
This page is for the StudyFetch app and is product knowledge for [StudyFetch.com](https://studyfetch.com).
## Overview
Source: https://studyfetch-academy.honen.com/docs/6a542bb9346a6c4ead9692b8
Product tutorial
StudyFetch app
This page is for the StudyFetch app and is product knowledge for [StudyFetch.com](https://studyfetch.com).
## Introduction
Study Sets are the foundation and core organizational layer of your learning experience on StudyFetch. By grouping content into dedicated sets, you can upload materials and seamlessly generate AI-powered study aids like notes, flashcards, quizzes and practice exams, creating focused, structured study environments tailored to your learning.
Product knowledge
This page is for the StudyFetch app and is product knowledge for [StudyFetch.com](https://studyfetch.com).
## Upload method guides
Source: https://studyfetch-academy.honen.com/docs/6a542f744aad29a96f070b4e
Product tutorial
StudyFetch app
This page is for the StudyFetch app and is product knowledge for [StudyFetch.com](https://studyfetch.com).
## Material Upload Options — Step-by-Step Guide
The **Upload any files from Class** box supports several methods. Click **View more upload types** to see the full list.
Upload Materials, View more upload types expanded. The extra tiles are Create Blank Notes, No Material, Google Docs, Handwritten Notes and Paste Notes.
### **Upload Documents**
Add school-provided files: PDF, DOCX, PPTX, TXT, PNG, and JPEG. After selecting a file, toggle **Extract images from document** to have AI pull and interpret embedded images, toggle **Generate Study Notes** and pick a format (Summarized, In-Depth, or Comprehensive), and under **Advanced** choose a **Chapter Splitting** option. When ready, click **Upload file**.
### **Record Live Lecture**
Select **Start Recording** from the material upload screen to capture and transcribe a live lecture. See the separate [Live Lecture Tutorial page](https://www.studyfetch.com/docs/tutorial-doc-format/livelecture) for the full walkthrough.
### **YouTube Video**
Paste a link into the **YouTube Video URL** field, optionally toggle **Generate Study Notes**, then click **Import Video**.
Add YouTube Video modal, empty URL field. Paste a link into YouTube Video URL, then click Import Video.
### **No Material — Generate from Topic**
No materials? Tell Sparky what you want to learn instead. Enter a topic (or pick a suggested one), optionally add a subject area and skill level, then click **Generate Materials**. Sparky creates 3–8 study materials progressing from foundational concepts to advanced applications.
Generate Study Materials from Topic modal, step 1: What topic would you like to learn about? Enter a topic or pick a suggestion, then click Generate Materials.
### **Upload Audio / Upload Video**
Attach a pre-recorded lesson in MP3 (audio) or MP4 (video) format, optionally toggle **Generate Study Notes**, then click **Upload File**. The upload dialog mirrors the Documents flow above.
### **Handwritten Notes**
Scan the on-screen QR code with your phone camera to open a mobile capture page, take photos of your notes, review/retake as needed, then choose **In Depth Notes** or **Summarized Notes** (plus optional Flashcards or a Practice Test) and click **Upload to Set**. Uploaded photos appear under **Your Notes** in the sidebar.
Upload Handwritten Notes modal, waiting for photos. Scan the QR code with your phone camera, then take or select photos.
### **Paste Notes**
Already have notes saved elsewhere? Paste them into the **Your Notes** box and click **Create Materials** to have them organized automatically.
Paste Your Notes modal, empty notes box. Paste your notes into Your Notes, then click Create Materials.
### **Blank Document**
Select **Create Blank Notes** to open a new blank document for real-time note-taking while listening to a lesson.
### **Google Docs**
Select **Connect Google Drive** to link your Google account and import files directly from Google Drive without downloading them first.
### **Quizlet Set**
Paste a Quizlet link into the **Quizlet Set URL** field and click **Import Set** to use it as a reference.
### **Essay Grader**
Get instant feedback on your writing with the built-in essay grading tool.
### **Brightspace, Canvas, Blackboard**
If your school isn't using StudyFetch yet, this option generates an email template you can send to request LMS integration.
Product knowledge
This page is for the StudyFetch app and is product knowledge for [StudyFetch.com](https://studyfetch.com).
## Upload study materials
Source: https://studyfetch-academy.honen.com/docs/6a542e364aad29a96f070b20
Product tutorial
StudyFetch app
This page is for the StudyFetch app and is product knowledge for [StudyFetch.com](https://studyfetch.com).
## Uploading Study Materials
1. Add your materials by selecting **+ Upload** from the lefthand sidebar, or from the **Upload** prompt on your Study Set's dashboard. Just pick the option that works best for you.
2. On a brand-new Study Set, you may first see a **Sync with your Class** step offering to derive your topics from a syllabus — choose **Skip and Upload Documents** if you'd rather go straight to uploading materials.
Study set page, Sync with your Class. Click Skip and Upload Documents to go straight to uploading materials.
1. Select the desired file type from the listed **material upload options** in the **Upload any files from Class** box.
2. Click anywhere in the box to open your device's file finder and select a file, or drag and drop your file directly.
3. Below, you'll find step-by-step guides for each specific material upload method.
Upload Materials, Upload any files from Class. Click a file type tile, or click anywhere in the box to upload or drag and drop files.
Product knowledge
This page is for the StudyFetch app and is product knowledge for [StudyFetch.com](https://studyfetch.com).
## Calendar Tutorial
Source: https://studyfetch-academy.honen.com/docs/6a066a70da6aa7877d2de1dc
Product tutorial
StudyFetch app
This page is for the StudyFetch app and is product knowledge for [StudyFetch.com](https://studyfetch.com).
Use the Calendar to manage tasks and events manually or set an exam date to generate personalized study sessions that place review activities directly on your schedule.
### Open Calendar
Start from the left-hand navigation. You land on My Tasks by default, with Day, Week, and Month views alongside it.
### Add events
Create custom events or tasks from the Month view, and use Filters to focus what you see.
### Generate Study Sessions
Set an exam date and StudyFetch builds a personalized study schedule around it, right on your Calendar.
## Open Calendar
1. On the left-hand side of your dashboard, click **Calendar**.
 My Tasks, Tasks view with no tasks yet. The reader clicks Add Exam Date to start a study schedule.
2. Switch to **Month** to see the full calendar grid alongside an Events sidebar (Filters, Tags, Import, and Add Event).
 Calendar, Month view for August 2026. The Events sidebar holds Filters, Tags, Import, and + Add Event.
## Add events to Calendar
1. Click a day on the calendar, or click **+ Add Event** in the Events sidebar. Fill out the title, choose Event or Task, pick an icon and color, add a description, and set start/end times, then click **Add**.
 Create Event, with Event selected. The reader fills in the Event Title, icon, color and description, then clicks Add.
2. To find a specific event, click **Filters**. You can hide completed tasks, hide past events/tasks, or show only selected tags.
Calendar Filters, no changes made. The reader sets the filters, then clicks Apply Filters.
## Generate Study Sessions from an exam date
1. From My Tasks, click **Add Exam Date** (or the **+** next to Upcoming Exams). Enter an exam name, subject/topic, date, and time, then click **Next**.
 Set Exam Date, filled in for Physics Midterm on 08/15/2026. The reader clicks Next.
2. On **Generate Study Sessions**, review the days until your exam, pick which topics to include, choose your study activities (Flashcards, Quizzes, Tests, Audio Recap, Arcade, Tutor Me), and select which days and time slots to study. Click **Generate Study Sessions** when ready.
 Generate Study Sessions, set up for Physics Midterm. The reader picks topics and study activities, then clicks Generate Study Sessions.
3. The generated sessions are added to Calendar as scheduled events leading up to your exam date, each linked to the study activity you chose.
Product knowledge
This page is for the StudyFetch app and is product knowledge for [StudyFetch.com](https://studyfetch.com).
## Insights Tutorial
Source: https://studyfetch-academy.honen.com/docs/6a066a15ec6cd1436c204091
Product tutorial
StudyFetch app
This page is for the StudyFetch app and is product knowledge for [StudyFetch.com](https://studyfetch.com).
How to use the Insights feature.
If you’re looking to understand your performance better, the Insights feature is a powerful tool to track your progress and see where you stand. Here’s how to use it!
## How to use Insights:
1. On the lefthand side of the dashboard, go to **Insights**.
 Insights for Biology. The page opens with Strengths and Weaknesses, Created For You, and Study Set Progress.
1. You’ll instantly see insights generated from your past activity on a specific study set—whether from tests, flashcard sessions, or conversations with the AI Tutor.
**What it can show you: **
- Your **strengths and weaknesses** when it comes to understanding certain topics, ideas, or concepts will be explained.
 Insights for Biology, Strengths and Weaknesses. The panel lists three strengths and six weaknesses, with a View other reports link.
- **Suggested study tools** will be provided for you based on your past performance. If you're having trouble catching up with flashcards, then those can be created for maximum retention. Click on any of the suggested study tools to start studying!
 Created For You. The reader clicks one of the four suggested study tools to start studying.
- Your **Study Set Progress** will be tracked here, giving you a clear view of how far you’ve come and whether you’ve mastered the set.
 Study Set Progress. The panel shows Mastered 0% and the material Biology at 0%.
- You can also share your insights with your teacher or professor, allowing them to better support you in the areas where you need the most help.
 Share your Insights with your Teacher or Professor. The reader clicks Share Insights to send what is shown on this screen.
Product knowledge
This page is for the StudyFetch app and is product knowledge for [StudyFetch.com](https://studyfetch.com).
## Study Plan
Source: https://studyfetch-academy.honen.com/docs/6a519349893cd6f616be1054
Product tutorial
StudyFetch web app
This page covers the StudyFetch web experience at [StudyFetch.com](https://studyfetch.com).
Study Plan turns a Study Set into a guided, ordered path through every topic, organized into units and built around your syllabus and exam dates. It tracks what you have covered and mastered, and recommends what to study next so you always know where to pick up.
### A guided path
Topics are grouped into units and laid out in order, starting from "Start learning here" and moving through each unit.
### Built around your deadlines
Sync a syllabus and add exam dates so the plan reflects your real schedule and priorities.
### Tracks your mastery
Short assessments measure what you know, and topics are marked Covered and Mastered as you progress.
## Open your Study Plan
Your Study Plan lives inside each Study Set.
1. Open a Study Set from **My Sets**.
2. On the Study Set home, the **Recommended from your Study Plan** section shows the next topics to work on. Select **View Full Study Plan** to open the complete plan.
3. You can also open it from **Study Plan** in the left navigation.
 Study Plan for Physics. The path opens at Start learning here, with Customize your Study Plan above it and Your Progress at the right.
If a Study Set is new or empty, its home screen prompts you to add materials, a syllabus, or exam dates so a plan can be built.
 Study Plan for My First Study Set, nothing added yet. Sync with your Class offers Upload Syllabus or Skip and Upload Documents.
## Choose how the plan is built
The controls in the **Customize your Study Plan** bar at the top of the plan shape what it contains and how it is ordered.
### Study Mode
Choose how much depth the plan covers: Cram, Standard, or Comprehensive.
### Sort topics by
Recommended, Material, Exam, Syllabus, or Custom order.
### Filter topics by
Narrow the view to Saved Topics, or by Comprehension, Material, or Exam.
 Study Plan for Physics, Study Mode menu. The menu lists Cram, Standard and Comprehensive, with Comprehensive checked.  Study Plan for Physics, Sort Topics By menu. The menu lists Recommended, checked, then Material, Exam, Syllabus and Custom.  Study Plan for Physics, Filter Topics By menu. The menu lists Saved Topics, Comprehension, Material and Exam.
The settings menu also includes a **Show Topic Mastery Progress** toggle, which controls whether mastery indicators appear next to each topic.
## Add your syllabus and exams
Giving the plan your syllabus and exam dates lets it tailor the order and recommendations to your course.
### Add a syllabus
Select **Add Syllabus** to tailor the plan to your class schedule and priorities. Once it is processed, the Syllabus panel shows the course, instructor, and a "Synced with syllabus" status. StudyFetch then proposes topics drawn from the syllabus, which you can review and add.
### Add an exam
Select **Add Exam** to open a two step dialog:
1. **Date/Time.** Enter the exam name and date, with an optional time.
2. **Related Topics.** Search and select the topics the exam covers, then choose **Create Exam**.
 Add Exam, Date/Time. The reader enters the exam name and date, with an optional time, then clicks Next.
Exams appear as dated markers within the plan and in the **Exam Dates** panel. Select **View Schedule** to see them on your calendar.
## Work through your topics
The plan reads from top to bottom, starting at "Start learning here." Each unit groups related topics.
- **See what you already know** runs a short pre-assessment so the plan can skip what you have already mastered.
- **Make sure you know your stuff** confirms mastery at the end of a unit. Select **Lock In** to start it. Scores and the number of topics marked as Mastered appear inline.
- Each topic has an actions menu with **Save for Later**, **Skip this Topic**, **Move to** another unit, and **Remove topic from unit**. Under **Prove your comprehension** you can **Take a Practice Test**, **Start a QuizFetch**, or **Practice Flashcards**. **Give Feedback** and **Report Issue** are also available here.
- Select multiple topics to act on them at once, including Save for later, Skip, Practice Flashcards, Quiz Myself, and Test Myself.
 Study Plan for Physics, topic Actions menu. The menu lists Save for Later and Skip this Topic, then Take a Practice Test, Start a QuizFetch and Practice Flashcards under Prove your comprehension.
## Keep the plan up to date
The plan stays current as your materials change.
- When you upload new materials or sync a new syllabus, StudyFetch proposes new topics. A banner reading "You have N proposed new topics" and the "Topics proposed from..." dialog let you **Accept All** or add topics individually.
- Build your own unit with **Add Unit**: name it and choose its topics. A topic that already belongs to another unit is not available to add again.
- Newly added topics are flagged **New** until you review them.
## Track your progress
The **Your Progress** panel summarizes your **Topics**, **Covered**, and **Mastered** counts with a progress bar. Topic mastery indicators fill in as you demonstrate understanding, and the "Show Topic Mastery Progress" setting controls whether they are shown.
Tip
### Add your syllabus and exam dates _first_.
The plan's ordering and recommendations get sharper once it knows what your course covers and when your deadlines are.
Product knowledge
This page covers the StudyFetch web experience at [StudyFetch.com](https://studyfetch.com).
## Notes Tutorial
Source: https://studyfetch-academy.honen.com/docs/6a614c99e6cf0a17b3f206ad
Product tutorial
StudyFetch is an AI-native learning platform that turns your course materials into interactive study tools — flashcards, practice tests, guided chat, and more — all built around your own content.
Notes turns any uploaded material — a PDF, slide deck, video, or audio recording — into a clean, structured study document. StudyFetch reads the source, pulls out the key ideas, and organizes them with headings, bullet points, and bolded terms so you can study the material without re-reading the whole thing.
## Creating Notes
There are two ways to get Notes for a piece of material.
### During material upload
When you upload a file from **Add Material**, the upload dialog includes a **Generate Study Notes** toggle. Turn it on and you're asked what depth of notes to generate: **Summarized Notes**, **In-Depth Notes**, or **Comprehensive Notes**. An **Advanced** section below the format choices lets you control **Chapter Splitting** (Auto / On / Off) — whether a long document gets broken into separate materials by chapter before notes are generated.
 Upload Files, note options. Summarized Notes is selected and Chapter Splitting under Advanced is set to Auto.
### From an existing material
If a material was uploaded without notes, or you want to regenerate them, open the material and use the **Turn Into** menu to generate a Notes document from it — the same way you'd turn a material into Flashcards or a Practice Test.
## Using your generated notes
Once generated, Notes open in a document-style editor with a toolbar for formatting (bold, italic, lists, alignment) alongside history, print, and full-screen controls. You can view Notes on their own, or in **Split Screen** next to the source material — handy for checking a note against the original page it came from.
 newtons\_laws\_test.pdf, Split Screen. The source PDF sits on the left and the generated notes on the right, with page citation chips beside the key terms.
Notes are fully editable — click in and type just like a regular document. Smart formatting (headings, bullets, bold key terms) and math notation are preserved even after you edit, and a Notes document can include images extracted from the source material if you enabled that option at upload.
## Restoring a previous version
Every edit is saved automatically. Click the history icon in the toolbar to open **Version history**, which lists versions grouped by day and timestamp. Selecting a version shows its full content on the right; **Show changes** compares two versions, and **Restore this version** rolls the document back.
 Version history, one saved version. The list shows Jul 22, 2026 4:07:46 PM marked Current, and the reader clicks Restore this version or Show changes.
## Clarify and explore with Sparky
Highlight any passage in your notes and an **Edit With Sparky** action appears above the selection — use it to have Sparky rewrite, expand, or simplify that passage in place, without leaving the notes editor.
 newtons\_laws\_test.pdf, Split Screen. Selecting First Law (Law of Inertia): in the notes brings up an Edit With Spark.E button.
You can also open the Sparky chat directly and ask questions about the material generally — the same Sparky chat available throughout a Study Set.
## Features and capabilities
Notes documents include smart formatting (headings, bullets, bold key terms) applied automatically during generation, page-citation links back to the source material, support for math notation, and full text editability. Because Notes are just another material in your Study Set, you can use **Turn Into** to generate Flashcards, a Practice Test, QuizFetch questions, an Audio Recap, or other formats directly from your notes.
**Product knowledge:** Notes are generated from any material type (PDF, slides, video, audio) and can themselves be turned into Flashcards, Practice Tests, QuizFetch, Audio Recap, and other study formats via Turn Into — Notes sit alongside Live Lecture, Flashcards, and Practice Tests as one of the core generated-material types in a Study Set.
## Accessing Spark.E Chat
Source: https://studyfetch-academy.honen.com/docs/6a617efc609b2cff6eb182a1
Product tutorial
StudyFetch app
This page is for the StudyFetch app and is product knowledge for [StudyFetch.com](https://studyfetch.com).
## Accessing Sparky Chat
Sparky is your AI tutor, available throughout StudyFetch. Select **Chat** from the left navigation sidebar to open a new conversation.
 New Chat, opened from the sidebar. Select Chat in the left sidebar to reach the suggested prompts and the Personalities & Skillsets and Scenarios buttons.
From here, you can ask Sparky anything, select a suggested prompt, or start a Guided Session. Continue to [**Using Sparky Chat**](https://www.studyfetch.com/docs/tutorial-doc-format/chatfeature#using-spark-e-chat) for how to send messages and use chat tools.
### Accessing Sparky Chat Within Platform Features
Sparky's chat panel is also available inside most StudyFetch features, so you can ask questions without leaving what you're working on. Select the Sparky icon in the bottom-right corner of the screen to open the chat panel.
#### Notes & Materials
Open a study material, then select the Sparky icon to ask questions about the document you're viewing.
 newtons\_laws\_test.pdf, Split Screen view. The chat panel opens over the notes pane while the PDF stays on the left.
#### Tutor Me
During a Tutor Me session, the chat panel stays open so you can ask Sparky for help with the current lesson topic. See the [**Tutor Me tutorial**](https://www.studyfetch.com/docs/tutorial-doc-format/tutorme) for more.
 Newton's First Law & Inertia, slide 07 / 15. The Chat panel stays open on the right beside the lesson slide.
#### QuizFetch
From your QuizFetch practice list, open the chat panel to ask Sparky about a quiz topic before or after practicing. See the [**QuizFetch tutorial**](https://www.studyfetch.com/docs/tutorial-doc-format/quizfetch) for more.
 Practice, QuizFetch tab. The chat panel opens over the quiz cards.
#### Test
From your Test list, open the chat panel to get help understanding a topic before or after a practice test. See the [**Test tutorial**](https://www.studyfetch.com/docs/tutorial-doc-format/test) for more.
 Practice, Tests tab. The chat panel opens over the practice test cards.
#### Flashcards
From your Flashcards list, open the chat panel to ask Sparky about a set before or after studying. See the [**Flashcards tutorial**](https://www.studyfetch.com/docs/tutorial-doc-format/flashcards) for more.
 Flashcards, list view. The chat panel opens over the flashcard sets.
Product knowledge
This page is for the StudyFetch app and is product knowledge for [StudyFetch.com](https://studyfetch.com).
## Customizing Spark.E Chat
Source: https://studyfetch-academy.honen.com/docs/6a617f560654f88dbf04c0bd
Product tutorial
StudyFetch app
This page is for the StudyFetch app and is product knowledge for [StudyFetch.com](https://studyfetch.com).
## Customize Your Chat Experience
Customize how you chat with Sparky, your AI tutor, using powerful tools like plugins, dynamic personalities, and tailored scenarios.
### Personalities and Skillsets
Within the chat feature, click **Personalities & Skillsets** to choose from a variety of AI Tutor Persona Presets, each designed with a distinct teaching style to match your learning preferences.
#### Selecting Plugins for Chat
Customize how you interact in chat based on your personality preferences and learning goals with Chat Plugins.
1. Browse available plugins on the **Explore** page, where you'll find both StudyFetch Originals and community-created plugins. Use the category tabs, search field, or **Sort By** dropdown to narrow down your options.
 Explore Plugins, Explore tab. StudyFetch Originals lists Deep Learner Spark.E, Professor Spark.E, and Summarizer Spark.E above the Top Plugins grid.
2. Click a plugin to open its About page, which shows a full description and the prompts it uses for each feature (Chat, Flashcards, Tests, Quizzes). Select **+ Use Plugin**, then once it shows **✓ Using Plugin**, close the panel.
 Deep Learner Spark.E, plugin page. Select + Use Plugin at the top right to activate it.
3. Your AI tutor will immediately adjust how it responds based on the active plugin — here, Deep Learner Sparky gives a noticeably more thorough, structured explanation than the default tutor would.
 Kinetic Energy Explanatio... chat. The reply to Can you explain kinetic energy? sets out the formula and numbered sections.
#### Customize Your Own Chat Plugin
Don't see a plugin that fits your needs? Create your own to transform how you study with custom instructions, personalized learning preferences, and specialized techniques. Any plugins you build appear under the **My Plugins** tab alongside plugins you've previously created.
 Explore Plugins, My Plugins tab. Select Create Your Own Plugin to start a new one.
1. Select **+ Create Your Own Plugin**, then fill out the **Basic Information** step: give it a **Plugin Name** and optional **Description**, choose a **Skill Level** (High School, AP, College, or Professional), and set its **Visibility** to Private or Public. A live preview card updates on the right as you type.
 Create Plugin, Basic Information step. Fill in the plugin details, then select Next.
2. Click **Next** to reach the **AI Behavior** step. Describe the tutor's tone in **Base Personality**, then enter a **Custom Prompt for Chat** describing how you want it to behave. Optional tabs let you add separate prompts for Flashcards, Tests, and Quizzes. When you're finished, click **Create Plugin**.
 Create Plugin, AI Behavior step. Fill in Base Personality and Custom Prompt for Chat, then select Create Plugin.
### Scenarios
The Scenario chat feature transforms studying into an interactive, real-world experience by placing you in customizable simulations tailored to any field. You can engage with dynamic scenarios, apply your knowledge in real time, and receive detailed feedback to strengthen your understanding and decision-making skills.
#### Accessing Scenarios
After opening a new chat, select the **Scenarios** button. The Scenario Library will load, showing StudyFetch Official Scenarios and Community Scenarios, organized by category (Medical, Business, Legal, Technology, and more) with a search field to find something specific.
 Scenario Library, Explore tab. Official Scenarios and Community Scenarios sit below the category filters.
#### Selecting and Starting a Scenario
1. Click a scenario card to open its detail page, which lists the **Scenario Description**, your **Goal**, and the **Characters** involved. When you're ready, click **Start Scenario**.
 Primary Care Visit: College Student with Persistent Cough. Read the description, goal, and characters, then select Start Scenario.
2. A greeting message starts the interaction, and a panel on the right lists the scenario's characters (and tools, if any) for reference. Type your response in the chat box, or use the microphone icon to dictate, then press Enter to send. As the scenario progresses, the AI automatically has the right character respond to what you say.
 Primary Care Visit: College Student with Persistent Cough, two replies in. Type in the Reply to the scenario box to answer the characters.
3. When you're finished, either select **Submit Scenario**, or, if the scenario requires a final answer, expand the **Submit Your Final Answer** prompt, enter your response, and click **Submit Answer**.
 Primary Care Visit: College Student with Persistent Cough, in progress. Select Submit Your Final Answer to expand the final answer box.
#### Interpreting Scenario Feedback and Trying Again
After you submit, you'll receive detailed feedback based on the scenario's rubric criteria: an overall score, a breakdown of how you did on each criterion, and specific strengths and areas for growth.
 Scenario Completed!, scored 52%. Criteria Assessment breaks the score down by criterion.
Scroll down to see your submitted final answer alongside a **Strengths** and **Areas for Growth** summary. From here you can select **Try Again** to retry the scenario, **View Conversation** to review the full chat, or **Exit Scenario** to leave.
 Scenario feedback, lower section. Select Try Again, View Conversation, or Exit Scenario below Areas for Growth.
#### Generate AI Scenarios
Can't find a scenario that fits your needs? Use the **AI Generate** option (top of the Scenario Library) to let AI instantly create a personalized scenario. Enter a **Scenario Topic**, choose a **Difficulty Level** and **Scenario Type**, describe your **Learning Objectives**, and optionally build a custom grading rubric under **Evaluation Settings**. Click **Generate Scenario** when ready.
 Generate AI Scenario. Fill in the topic and settings, then select Generate Scenario.
After a few moments, your AI-generated scenario — complete with characters and, where relevant, scenario tools — loads directly into the chat, ready to start.
 The Physics of the Perfect Shot. Read the generated description, characters, and tools, then select Start Scenario.
#### Create a Scenario From Scratch
The **Create Scenario** option gives you full control over how your scenario is built and experienced — add detailed context, define characters and tools, and set requirements so the AI follows your instructions closely rather than improvising.
1. From the Scenario Library, select **Create Scenario**. Under **Basic Information**, enter a **Scenario Name**, **Description**, and a **Greeting Message** that will open the chat.
 Create New Scenario, Basic Settings tab. Enter the Scenario Name and Description in the Basic Information column.
2. Under **Scenario Configuration**, set the scene in **Scenario Context**, then select **+ Add Character** for each character in the scenario (name, role, and a description of how they should respond). Optionally add tools via **+ Add Tool**. Then describe the **Scenario Goal/Objective** and the **Requirements/Success Criteria** the learner needs to meet, and, if you want a graded final answer, enable **Require Final Answer Submission**.
 Create New Scenario, Basic Settings tab. Fill in Scenario Goal/Objective and Requirements/Success Criteria, then select Create Scenario.
3. Toggle **Public Scenario** on if you'd like to share it with other StudyFetch users, then check the **Advanced Settings** tab for optional response-format instructions. Click **Create Scenario** to finish — your new scenario appears under the **My Scenarios** tab of the library, ready to select and start.
 Scenario Library, My Scenarios tab. The scenarios you created are listed here, each with a gear button.
Product knowledge
This page is for the StudyFetch app and is product knowledge for [StudyFetch.com](https://studyfetch.com).
## Guided Chat
Source: https://studyfetch-academy.honen.com/docs/6a563d98e76d326fb26137b9
Product tutorial
StudyFetch app
This page is for the StudyFetch app and is product knowledge for [StudyFetch.com](https://studyfetch.com).
## How to start Guided Chat
Open **Chat** from the left navigation panel. At the bottom of the chat window, you will see a toggle button labeled **Guided**. Tap it to switch into Guided Chat mode — or click the **Start a Guided Session** card that appears above the message box. The same toggle lets you switch back to normal chat at any time — the two modes sit side by side, so moving between them is instant.
New Chat, Guided entry points. The reader clicks the Start a Guided Session card or the Guided toggle under the message box.
Once you are in Guided mode, Sparky will prompt you with "What would you like me to guide you through?" You can pick one of the suggested topics pulled from your Study Plan, or type "Something else..." to describe your own goal.
New Chat, Guided mode. The reader picks one of the three options in the I want to... picker.
## Introduction
Guided Chat turns Sparky from a chatbot that answers questions into a study coach that runs a session. Instead of waiting for the next prompt, Sparky helps the learner pick one topic, builds a short study plan around it, and then walks them through that plan one step at a time. The learner always knows what they are studying, what step they are on, and what comes next.
Takeaway
### Regular chat answers questions. Guided Chat runs a _plan_.
The learner picks a topic, accepts a plan, and Sparky routes them through each activity until the plan is done.
## How a session starts
After the learner picks a goal, Sparky looks at their study path, the materials available in the set, and how they have studied before, then proposes a personalized plan. A typical plan looks like this:
New Chat, Ready to begin? The reader clicks Accept Plan or Make some edits... under the proposed plan.
Before anything begins, the learner is in control of the plan. They can accept it as written, ask Sparky to change it, or add and remove steps. Nothing is locked in until they are happy with it.
## How it works
Once the learner accepts the plan, Guided Chat saves it as a real guided session. Each step becomes a tracked activity, and a step can be any of the platform's learning activities: reading material, flashcards, a quiz, a test, an audio recap, an explainer, or an arcade game.
Throughout the session, the system always knows:
- What topic the learner is studying
- Which step they are currently on
- Which steps are pending, in progress, done, or skipped
- What activity should open next
- Whether the full plan is complete
When the learner starts a step, Guided Chat routes them straight to the right activity page — a floating Sparky icon stays available in the corner throughout. When they finish, it records the result, asks whether they want to move on or stay where they are, and only advances when they choose to continue. The learner sets the pace; Sparky keeps the thread.
Guided: Introduction to Newton's First ... panel, currently on Review Newton's First Law notes. The reader studies the material and clicks I'm ready to move on.
## Sparky's role during a session
In Guided Chat, Sparky is not just chatting freely. It has a structured role that shifts depending on where the learner is in the plan.
### During setup
Builds and revises the study plan based on the learner's goal, materials, and history.
### During a step
Supports the current activity. If the learner asks about what is on screen, it reads the current page context first.
### During quizzes and tests
Holds back the answers. It focuses on hints and concept coaching instead of giving the solution away.
### At the end
Summarizes what the learner completed and suggests a sensible next move.
## The updated Study Plan
Guided Chat is paired with an updated Study Plan that gives learners a clearer, more personalized path through their study set. Instead of showing everything as one long list, it organizes topics into a guided learning path and highlights what to study next.
Learners can filter or sort by things like progress, materials, exams, and comprehension, so the view always matches what they are trying to do. At a glance they can see what they have not started, what they have covered, and what they have mastered, which means they always know where to focus next.
Why it matters
### The plan removes the hardest question in studying: _what now?_
By turning a pile of material into an ordered path with a clear next step, Guided Chat keeps learners moving instead of guessing.
Product knowledge
This page is for the StudyFetch app and is product knowledge for [StudyFetch.com](https://studyfetch.com).
## Managing Chat Sessions
Source: https://studyfetch-academy.honen.com/docs/6a617fa9fc99a4bce52c2f26
Product tutorial
StudyFetch app
This page is for the StudyFetch app and is product knowledge for [StudyFetch.com](https://studyfetch.com).
## Managing your Chat Sessions
### Viewing Chat History
1. Select **History** at the top of your chat to view all of your conversations. You can use the search field or scroll to view all previous sessions.
 Chat History, opened from the New Chat screen. Search sessions or scroll the list to reach an earlier conversation.
2. To switch back to a previous chat, simply click on the conversation you want to revisit. It will load, allowing you to pick up right where you left off.
### Starting a New Chat
1. Select **New** at the top of your chat to start a new conversation with Sparky.
 New Chat, empty state. The prompt reads How can I help? above the suggested prompts and the message box.
### Rename Your Chat Session
1. Open **History**, hover over the session you want to rename, and select the pencil icon that appears.
2. Edit the name inline, then confirm with the checkmark (or cancel with the X).
 Chat History, session name in edit mode. The row becomes a text box with cancel, confirm, and delete icons beside it.
### Share Your Chat Session
Found your chat conversation helpful? Feel free to share it with friends or classmates who may benefit from it as well.
1. Select **Share** from the top right of your chat.
 Share Chat with a Friend, Share this Chat tab. Select Copy link, or one of the three share icons beside it.
2. Copy the link directly, or select the WhatsApp, Telegram, or Text icon to share through your preferred app.
### Delete a Chat Session
1. Open **History**, hover over the session you wish to delete, and select the trash can icon that appears.
2. Confirm the deletion in the prompt that appears.
Warning
Be cautious as this cannot be undone!
Product knowledge
This page is for the StudyFetch app and is product knowledge for [StudyFetch.com](https://studyfetch.com).
## Using Spark.E Chat
Source: https://studyfetch-academy.honen.com/docs/6a61801a609b2cff6eb182aa
Product tutorial
StudyFetch app
This page is for the StudyFetch app and is product knowledge for [StudyFetch.com](https://studyfetch.com).
## Using Sparky Chat
### Sending Messages in Chat
1. Click the chat box labeled **Ask your AI tutor anything...** and type your message, or select one of the suggested prompts. Press **Enter** or click the arrow button to send.
2. Sparky responds with a personalized answer, citing your study materials by name when relevant.
### Chat Tools
Select the **+** icon to the left of the chat box to open the tools menu: Add image, Web Search, Academic Search, Materials, and Prompt Suggestions.
 New Chat, tools menu open. Select the + icon left of the message box to list Add image, Web Search, Academic Search, Materials, and Prompt Suggestions.
#### Add Image
Select **Add image** to upload an image from your device. A preview appears above the chat box, and Sparky will analyze it and respond to questions about it.
#### Web Search
Select **Web Search** to let Sparky search the internet for up-to-date information. Once enabled, the globe icon shows active next to the message box.
#### Academic Search
Select **Academic Search** to have Sparky pull from scholarly, peer-reviewed sources. Once enabled, ask your question — Sparky will search academic papers and cite what it finds.
 Physics of Inertia chat, after an Academic Search. One row reads Academic search failed and the next reads Found 3 papers, still collapsed.
#### Materials
Select **Materials** to choose uploaded study materials to guide the conversation.
 Select Materials, 0 selected. Check the materials you want, then select Confirm Selection.
Select the material(s) you want, then click **Confirm Selection**. Sparky will tailor its answers to the selected materials and cite the exact source location.
 Newton's First Law Explan... chat. The reply ends its opening line with a citation chip reading newtons\_laws\_te... (Page 1).
If you don't see the material you need, select **+ Upload New Material** from within the picker to add a new file to your study set, then return and select it.
### Turn Into
Once you've finished a chat session, select **Turn Into** at the top of the page to generate new study materials from the conversation.
 Newton's First Law Explai... chat, Turn Into menu open. The menu is headed Learn this another way... and runs from Flashcards to Mini Apps.
## Benefits of Sparky Chat
- **Real-Time AI Tutoring:** Sparky responds instantly to your questions, helping you clarify concepts as you study.
- **Personalized Explanations:** Get responses tailored to your selected plugin, learning style, and study goals.
- **Multimodal Support:** Ask questions using text, images, or your own uploaded materials.
- **Source-Based Learning:** When enabled, Sparky can pull from academic papers or the web to provide referenced information.
- **Integration with Other Tools:** Turn a chat session directly into flashcards, tests, and other study materials.
## Related Features
Once you've finished a Chat Session, you might want to:
- Generate [**Flashcards**](https://www.studyfetch.com/docs/tutorial-doc-format/flashcards) to memorize key concepts
- Create [**Practice Tests**](https://www.studyfetch.com/docs/tutorial-doc-format/test) to assess your knowledge
- Use [**Audio Recap**](https://www.studyfetch.com/docs/tutorial-doc-format/audiorecap) to review material on the go
Product knowledge
This page is for the StudyFetch app and is product knowledge for [StudyFetch.com](https://studyfetch.com).
## Create a Tutor Me Session
Source: https://studyfetch-academy.honen.com/docs/6a52d0b480aa1a08bac85025
Product tutorial
StudyFetch app
This page is for the StudyFetch app and is product knowledge for [StudyFetch.com](https://studyfetch.com).
Create a Tutor Me session from uploaded materials, a topic prompt, or Screenshare. After choosing a source, set your learning mode, goal, and language, then generate the lesson.
### Create from materials
Build a session from study materials you already uploaded or add a new file.
### Create from topic
Enter what you want to learn and StudyFetch creates a presentation for the lesson.
### Use Screenshare
Let Sparky help with what is on your screen after you allow microphone access.
## Start a new session
1. From the Tutor Me page, select **+ New Session** (either the card on the left, or the button in the top right).
2. Choose whether to create the session from **Materials**, a **Topic**, **Screenshare**, or **Share Camera**. Screenshare and Share Camera are Pro features.
 Start a Tutor Me Session. Pick Create from Materials, Create from Topic, Screenshare, or Share Camera.
## Create from materials
Choose the materials you want to include, or select **+ Upload New Material** to add a new file, then click **Next**. On the following step, select the page range you want the Tutor Me session to cover.
Note
### Tutor Me supports up to _40 pages_ per session.
If a material is longer than 40 pages, divide it into multiple focused sessions.
## Create from topic
Select **Create from Topic**, then type what you want to learn in **Topic Description**. Be as specific as possible — include key concepts or areas you'd like to focus on.
 Start a Tutor Me Session, 2 of 3. The Topic Description field holds Newton's First Law of Motion and the concept of inertia.
Click **Next**, then continue to setting your learning goals.
## Use Screenshare
After selecting **Screenshare**, allow microphone access when prompted. The setup screen checks your microphone before you join — if the check is red and the mic button says **Mic Off**, click the mic button until both indicators turn green, then click **Join Session**.
Warning
### Screenshare Tutor Me is still _experimental_.
Sparky may not always recognize or interpret everything displayed on your screen.
## Set goals and create the session
Select a learning mode — **Explore** for flexible, self-paced learning, or **Mastery** for a more guided session — optionally describe your learning goal, and choose the session language. All three fields live on the same screen:
 Start a Tutor Me Session, 3 of 3. Choose a Learning Mode and a language, then click Create Session.
Click **Create Session**. StudyFetch prepares the personalized tutoring experience — this can take up to a minute for a full lesson plan.
 Preparing your Tutor Me session. The dialog shows a spinner and the line This may take a moment..., and the button behind it reads Creating...
When the session is ready, review the title, goals, progress bar, and lesson plan, then click **Start Session**.
 Newton's First Law & Inertia, Ready to Start. Review the Lesson Plan, then click Start Session.
Product knowledge
This page is for the StudyFetch app and is product knowledge for [StudyFetch.com](https://studyfetch.com).
## Manage Tutor Me Sessions
Source: https://studyfetch-academy.honen.com/docs/6a52d33680aa1a08bac85048
Product tutorial
StudyFetch app
This page is for the StudyFetch app and is product knowledge for [StudyFetch.com](https://studyfetch.com).
Rename Tutor Me sessions to keep lessons easy to recognize, or delete sessions you no longer need from the Tutor Me feature page.
### Rename sessions
Open the session menu, choose Rename, edit the name, and save.
### Delete sessions
Use the three-dot menu from the Tutor Me page when a session should be removed.
## Rename a Tutor Me session
1. After opening a Tutor Me session, click the downward arrow next to the session name, then select **Rename**.
 Newton's First Law & Inertia, session name menu open. Click Rename.
2. Edit the current name or enter a new name in the **Name** field, then click **Save**.
 Rename Tutor Session. The Name field holds Newton's First Law & Inertia; edit it, then click Save.
## Delete a Tutor Me session
1. From the left side of your dashboard, click **Tutor Me**.
2. Select the three-dot button on the session card, then choose **Delete**.
 Tutor Me List, session card menu open. The menu on Newton's First La... shows Join Session and Delete.
3. If you are sure you want to delete the session, select **Delete** in the confirmation dialog.
 Delete Tutor Me Session? Click Delete to remove Newton's First Law & Inertia, or Cancel to keep it.
Warning
### Deleting a session cannot be _undone_.
Only delete a Tutor Me session when you no longer need to revisit that lesson.
Product knowledge
This page is for the StudyFetch app and is product knowledge for [StudyFetch.com](https://studyfetch.com).
## Navigate a Tutor Me Session
Source: https://studyfetch-academy.honen.com/docs/6a52d20a80aa1a08bac85035
Product tutorial
StudyFetch app
This page is for the StudyFetch app and is product knowledge for [StudyFetch.com](https://studyfetch.com).
Once a session starts, you can learn by speaking with Sparky, typing in chat, following the lesson plan, moving between pages, and pausing or ending the session when needed.
### Speak or type
Use your microphone for conversation or open Chat to type messages.
### Track progress
Use the progress bar and Plan panel to follow each lesson topic.
### Control the session
Move between pages, pause, resume, and end the lesson from the toolbar.
## Enable microphone access
Allow microphone access when your browser prompts you, then start the session with Sparky. To mute or unmute at any time, click the microphone icon next to the pause and play control.
 Newton's First Law & Inertia, Lesson 1 of 10. The bottom toolbar holds Pause, the microphone button, End Session, Chat, and Plan.
## Interact with Sparky
Speak directly through your microphone, or click **Chat** on the right side of the bottom toolbar to type instead. The chat panel keeps the full session transcript visible for review — to hide it, click the **X** in the top right of the panel.
## View the lesson plan and progress
Use the progress bar near the top left to see your current lesson topic and how far you've advanced. To view the full lesson plan, click **Plan** on the far right of the bottom toolbar, or click the progress bar itself.
 Newton's First Law & Inertia, Lesson Plan panel open. The panel reads 0/10 Lessons and lists the ten lesson topics.
To move to a topic, tell Sparky which topic you want or click the topic directly in the Lesson Plan panel. To hide the panel, click the **X** in the top right.
## Navigate pages and session controls
Use the page count and arrows in the top right to move between presentation pages, or ask Sparky to move to a page for you.
To pause the session, click **Pause** on the bottom toolbar — this also mutes your microphone.
 Newton's First Law & Inertia, paused. Play replaces Pause on the toolbar and the microphone button turns red.
To resume, click **Play** — your microphone automatically unmutes and the session continues. When finished, click **End Session**; you can return to it later from the Tutor Me page.
 Tutor Me List. The ended session, Newton's First La..., stays in the grid next to the New Session tile.
Product knowledge
This page is for the StudyFetch app and is product knowledge for [StudyFetch.com](https://studyfetch.com).
## Tutor Me Overview and Access
Source: https://studyfetch-academy.honen.com/docs/6a52d09780aa1a08bac8501f
Product tutorial
StudyFetch web app
This page covers the StudyFetch web experience at [StudyFetch.com](https://studyfetch.com).
Tutor Me turns your study materials, topics, or screen into a real-time tutoring session with Sparky. Use it when you want guided explanations, a structured lesson plan, and the option to speak or chat as you learn.
Platform availability
### Tutor Me is only available on the _web app_.
Tutor Me runs on the web at [StudyFetch.com](https://studyfetch.com). It is not available in the StudyFetch mobile app, so start your session from a web browser.
### Open Tutor Me
Start from your Study Set dashboard and choose Tutor Me from the left navigation.
### Review sessions
Existing sessions stay on the Tutor Me page so you can return to a lesson later.
### Create a session
Start from materials, a topic, or Screenshare depending on what you want to learn.
## Access Tutor Me
1. From the left side of your dashboard, click **Tutor Me**.
 Physics. Click Tutor Me in the left navigation rail, outlined here with the cursor on it.
2. Review any Tutor Me sessions already associated with the Study Set.
 Tutor Me List. One saved session, Newton's First La..., sits next to the New Session tile.
3. To open an existing Tutor Me session, click the name of the material or topic associated with that session.
Tip
### Sessions are named after the selected _material_ or topic.
This makes previous lessons easier to find when you return to Tutor Me.
Product knowledge
This page covers the StudyFetch web experience at [StudyFetch.com](https://studyfetch.com).
## Tutor Me Study Tips and Capabilities
Source: https://studyfetch-academy.honen.com/docs/6a52d639e694ed41fe73b2b6
Product Tutorial / Tutor Me
The best Tutor Me sessions are active. Ask questions, request clarification, confirm your understanding, and test yourself as you go — Sparky adapts to keep the session moving with you.
### Ask and clarify
Type any question into the chat panel while a lesson is on screen. Sparky answers using the current slide as context, then offers follow-up prompts to go deeper.
### Confirm your understanding
Ask Sparky to check your grasp of a concept. It will summarize back, ask a clarifying question, or point you to the section that covers it.
### Test yourself
Request a practice question at any point. Sparky generates one from the current material and gives instant feedback on your answer.
## Ask questions and request clarification
The chat panel stays open alongside the lesson. Ask a direct question — "Can you give me a real-world example of inertia?" — and Sparky answers using the slide you're on, then suggests a natural next question to keep the conversation going.
 Newton's First Law & Inertia, Chat panel. The typed question Can you give me a real-world example of inertia? sits above the tutor's reply.
Use the same chat to confirm your understanding — ask Sparky to explain a concept back to you, or to check whether your own explanation holds up. It responds conversationally and points back to the relevant part of the lesson when needed.
## Test your understanding
Ask for a practice question at any time. Sparky writes one from the material you're currently studying, you choose an answer, and it grades you immediately with an explanation.
 Newton's First Law & Inertia, Knowledge Check. The card asks why a door is easier to open at the handle and lists answers A through D, none selected yet.
## Features and capabilities
- Chat is context-aware — answers reference the slide you're currently viewing.
- Practice questions are generated on demand, not pre-scripted.
- Any session can be turned into another study format without losing your place.
- Sessions can be renamed, resumed, or deleted at any time from the sessions list.
 Newton's First Law & Inertia, Turn Into menu open. The menu lists Flashcards, Practice Test, QuizFetch, Audio Recap, Chat, Explainers, Arcade, and Mini Apps.
## Related study options
- Flashcards for spaced-repetition review of key terms.
- Practice Test for a formal, graded assessment.
- Audio Recap for a listen-only summary of the material.
## Create and Record a Live Lecture
Source: https://studyfetch-academy.honen.com/docs/6a564434d866323b6cee47da
Product tutorial
StudyFetch
StudyFetch is an AI-native learning platform that turns your course materials into interactive study tools — flashcards, practice tests, guided chat, and more — all built around your own content.
## **Creating a Live Lecture Session**
### Step 1: Create a New Live Lecture
1. From the Live Lecture List page, select **+ Create Live Lecture** from the top right. A new session opens automatically, ready to record.
Live Lecture session, new and not yet recording. The Transcript panel shows the Audio Quality and Internet indicators, the Mic selector, and Start Recording below them.
### Step 2: Start Recording
1. Click **Start Recording**. Before recording begins, confirm that all participants have consented to being recorded, then click **Yes** on the Recording Consent prompt.
Recording Consent prompt. Click Yes, record now once everyone has consented.
1. Once you confirm, Sparky immediately begins listening to your lecture and taking notes on the information discussed, while recording the audio and generating a transcript of the session.
Live Lecture session, recording in progress. The Transcript panel shows a Listening... indicator and the status bar shows the elapsed time.
Product knowledge
Once your session is recording, see [**Take Notes and Ask Sparky During Live Lecture**](https://www.studyfetch.com/docs/tutorial-doc-format/take-notes-and-ask-sparke-during-live-lecture) to learn how to add your own notes and ask questions in real time.
## Live Lecture Overview
Source: https://studyfetch-academy.honen.com/docs/6a56441ad866323b6cee47d4
Product tutorial
StudyFetch
StudyFetch is an AI-native learning platform that turns your course materials into interactive study tools — flashcards, practice tests, guided chat, and more — all built around your own content.
\
Introduction\
\
Missed one sentence that your professor said during your lesson? With Live Lecture, you're covered! Automatically record and transcribe your live lectures, and have notes automatically taken in real time!\
\
Accessing Live Lecture\
\ \
On the left-hand side of your Dashboard, click \Record Lecture\.\
\ \\\Study set page. Record Lecture is highlighted in the left sidebar.\\ \ \
All existing Live Lecture sessions associated with your Study Set can be found on this page.\
\ \\\Live Lecture List, Previous Sessions. The page lists the saved sessions for the study set.\\ \ \
To open an existing Live Lecture session, simply \click on the name\ of the desired Live Lecture session.\
\ \
## Manage Live Lecture Sessions
Source: https://studyfetch-academy.honen.com/docs/6a613e49a3a8fc3a9ab39ea7
Product tutorial
StudyFetch
StudyFetch is an AI-native learning platform that turns your course materials into interactive study tools — flashcards, practice tests, guided chat, and more — all built around your own content.
## Managing Your Live Lecture Session
### Rename Your Live Lecture Session
1. After opening the desired Live Lecture Session, click the **dropdown arrow** next to the session name at the top of the page, then click **Rename**.
Live Lecture session, session menu open. Click Rename to change the session name.
1. Enter the new name in the **Name** field, then click **Save**.
Rename Material modal. Type the new name in the Name field, then click Save.
### Share Your Live Lecture Session
Found your Live Lecture Session helpful? Feel free to share it with friends or classmates who may benefit from it as well.
1. Click the **dropdown arrow** next to your Live Lecture Session name, then select **Share**.
2. Choose whether to **Share this Live Lecture** or **Share this Study Set**, then copy the link or share directly via WhatsApp, Telegram, or Messages.
Share Live Lecture with a Friend modal, Share this Live Lecture tab. Click Copy link, or use one of the messaging app buttons beside it.
### Delete Your Live Lecture Session
Once a Live Lecture Session is completed, it is automatically saved to **Your Notes** in the left sidebar, marked with a microphone icon. To delete a session, hover over it in the sidebar and click the trash can icon that appears, then confirm the deletion.
Warning
Be cautious as this cannot be undone!
## Turn Your Session Into Other Study Materials
Your Live Lecture Session can be used to generate flashcards, tests, and other study materials. Select **Turn Into** at the top of the Live Lecture Session page and choose your desired study tool — Flashcards, Practice Test, QuizFetch, Tutor Me, Audio Recap, Chat, Explainers, Arcade, or a Mini App.
Turn Into menu, Learn this another way... Pick a study tool such as Flashcards, Practice Test, or QuizFetch.
Product knowledge
Anything you can "Turn Into" from a Live Lecture session — Flashcards, Practice Tests, Audio Recap, and more — draws on both the recording's transcript and your own notes.
## Review Enhanced Notes, Transcript, and Audio
Source: https://studyfetch-academy.honen.com/docs/6a614017ef92b4660b0734d6
Product tutorial
StudyFetch
StudyFetch is an AI-native learning platform that turns your course materials into interactive study tools — flashcards, practice tests, guided chat, and more — all built around your own content.
### Enhancing Your Live Lecture Notes with AI
To have Sparky automatically generate AI-enhanced notes from your live lecture recording, open the session and select **Enhance Notes**. Choose your preferred note format — **Summarized** (key points, for a quick review), **In-Depth** (expanded context and explanations), or **Comprehensive** (retains every detail) — and optionally specify your current skill level on the topic, then confirm to have Sparky analyze your lecture and generate personalized, enhanced notes.
Audio Recordings page, no enhanced notes yet. The greyed out Enhanced Notes tab shows the message No enhanced notes available. Click 'Enhance Notes' to create them.
### Editing and Customizing
Once generated, notes are fully editable, allowing you to customize content directly within the document. Simply click into the note to select, add, or delete text as needed, and use the editing tools at the top of the notes editor to further format your notes.
### Accessing the Live Lecture Transcript and Audio
To view the transcript of your Live Lecture session, click the **Transcript** tab in the bottom toolbar — the side panel opens on the right, where you can scroll through the entire transcript of your recording. To access the audio recording itself, click the **Audio Files** tab instead; you'll see every audio segment from the session, with play, scrub, pause, and download controls for each.
Audio Recordings page, Audio Files tab. The page lists the session's audio segments, each with play, scrub, and download controls.
### Resuming a Live Lecture Session
To resume a previous Live Lecture Session, select **Record Lecture** from the left sidebar, choose the session you'd like to continue, and click **Resume**. Confirm that all participants consent to being recorded, and Sparky will pick up right where you left off — continuing to capture audio, transcribe, and take notes within the same session.
Product knowledge
Anything generated from a Live Lecture — enhanced notes, transcript, or audio — can be turned into flashcards, practice tests, or other study materials via **Turn Into**, the same as with any other StudyFetch material.
## Take Notes and Ask Spark.E During Live Lecture
Source: https://studyfetch-academy.honen.com/docs/6a56444fd866323b6cee47e0
Product tutorial
StudyFetch
StudyFetch is an AI-native learning platform that turns your course materials into interactive study tools — flashcards, practice tests, guided chat, and more — all built around your own content.
## Navigating Your Live Lecture Session
### Taking Manual Notes During Live Lecture
During your Live Lecture session, Sparky automatically listens to your lecturer and takes notes for you in real time, so you can stay focused on the lecture without needing to type. If you prefer to take notes manually or want to quickly jot something down, you can still add your own notes during the session — just click anywhere inside the blank note area on the left that says **"Take your own notes here"** and start typing.
Live Lecture session, My Notes tab. The reader types their own notes in the editor beside the Transcript panel.
As you type, StudyFetch's AI analyzes both your notes and the exact moment in the recording when each note was created, so Sparky can later enhance your notes by expanding on key ideas and filling in missing information. If you switch to **Enhanced Notes** or **Audio Files**, you can return to your manual notes at any time via the **My Notes** tab in the bottom toolbar.
### Getting Help from Sparky
One of the most powerful features of Live Lecture is the ability to ask **Sparky** questions in real time while your lecture is happening. Open the chat by clicking the floating **Sparky** icon on the right side of the screen, then type your question and press **Enter** — or choose from the suggested prompts if you're not sure what to ask.
Live Lecture session, chat panel open. The reader types a question in the Ask your AI tutor anything... box and Sparky replies in the panel.
Sparky responds with a detailed explanation tailored to the material being discussed, so you can get help instantly without interrupting the lecture or waiting to ask your professor later.
### Pausing and Ending Your Session
To pause or end your recording, click the stop button next to the recording timer in the bottom toolbar. This stops the recording and saves your progress immediately, so you can safely leave the page. If you navigate away mid-session, StudyFetch will prompt you to confirm before stopping the recording. If you're taking a short break, you can resume a saved session at any time from the Live Lecture List — see [**Manage Live Lecture Sessions**](https://www.studyfetch.com/docs/tutorial-doc-format/manage-live-lecture-sessions).
Product knowledge
Sparky during Live Lecture is the same AI tutor used elsewhere in StudyFetch — the same chat also appears in Guided Chat sessions and while reviewing study materials.
## Access and Create Flashcards
Source: https://studyfetch-academy.honen.com/docs/6a55598e886bfe1f9e31ff5b
Product tutorial
StudyFetch app
This page is for the StudyFetch app and is product knowledge for [StudyFetch.com](https://studyfetch.com).
Create a new flashcard set from existing materials, a topic, Quizlet, Anki, or a blank set.
### Open Flashcards
Go to Practice, then Flashcards, to see all your sets for the current Study Set.
### Generate with AI
Create cards from materials, a topic, Quizlet, or an Anki deck.
### Start from scratch
Manually build cards term-by-term when you want full control.
### Accessing Flashcards
1. On the left-hand side of your dashboard, click **Practice**, then select **Flashcards**.
 Flashcards page. Click New Flashcard Set to start a set, or open a saved set to study it.
2. Click any existing set to study it, or click **New Flashcard Set** to create one.
## Generate Flashcards
1. Click **Create Flashcard Set**, then choose how you'd like to build your set: **Create from Scratch**, **Create from Materials**, **Create from Topic**, **Import Quizlet**, or **Import from Anki**.
 Create a flashcard set, 1 of 4. Choose Create from Scratch, Create from Materials, Create from Topic, Import Quizlet, or Import from Anki.
2. For **Create from Materials** or **Create from Topic**, select your materials (or type a topic), then choose the **type** and **quantity** of each flashcard type you want generated — Term & Definition, Audio, Multiple Choice, Fill in the Blank, or Cloze Deletion.
 Create a flashcard set, 3 of 4. Set a quantity for Term & Definition, Audio, Multiple Choice, Fill in the Blank, or Cloze Deletion, then click Next.
3. On the final step, optionally name your set, choose its language, and select a customization plugin (like Sparky variants) to tailor how cards are generated. Click **Create flashcards** when ready.
 Create a flashcard set, 4 of 4 Additional Settings. Enter a name, choose a language and a plugin, then click Create flashcards.
Note
Importing from Quizlet or Anki skips the type/quantity step — Quizlet imports as Term & Definition cards, and Anki imports preserve your original card formatting and fields where possible.
### Building a set from scratch
1. Choose **Create from Scratch** to build cards manually. Type a term and definition into each row, or click **Add card** for more.
 Create a flashcard set, 2 of 4. Type a term and a definition in each numbered row, or click Add card for another row.
2. When you're done adding cards, click **Next** to finish and save your set.
Product knowledge
This page is for the StudyFetch app and is product knowledge for [StudyFetch.com](https://studyfetch.com).
## Create Flashcard Types
Source: https://studyfetch-academy.honen.com/docs/6a5255e59f1499ded290856a
Product tutorial
StudyFetch app
This page is for the StudyFetch app and is product knowledge for [StudyFetch.com](https://studyfetch.com).
Build term and definition, cloze, fill-in-the-blank, multiple choice, and image occlusion flashcards.
### Recall cards
Use term and definition, cloze, or fill-in-the-blank cards.
### Exam practice
Create multiple choice cards with selectable correct answers.
### Visual learning
Use image occlusion for diagrams and labeled visuals.
## Creating Specific Types of Flashcards
_Whether building flashcards from scratch or enhancing existing sets, StudyFetch gives users full control to customize card types, helping learners match their study strategy to their unique learning preferences._
_Ensure you are on the Editing page of your flashcard set before proceeding, for steps on how to do this refer to the_ Opening the Editing View _above_. Every card type is set the same way: select it from the **Type** dropdown at the top of the flashcard editor, then fill in the fields that appear below.
### Term and Definition
_Term and Definition flashcards are the most common type of flashcard. They consist of a term on one side and a definition on the other._
 Flashcard set editing page, a card in Term and Definition type. The card type dropdown reads Term and Definition, with Term and Definition boxes, Term as Audio and Definition as Audio toggles, and Add Image under each box.
Tip
_Great for foundational learning, fast recall and memorizing terminology or vocabulary!_
1. In the box next to **Type**, select **Term and Definition**.
2. Type the Term in the **Term** box on the left and the Definition (answer) in the **Definition** box on the right.
3. Optionally add an image to either side with **Add Image**.
4. Toggle **Term as Audio** and/or **Definition as Audio** to have either side read aloud.
5. Toggle **Generate Reverse** to automatically create the reverse version of the card, then click **+ Add Flashcard**.
### Cloze
_Cloze flashcards hide specific words or phrases within a sentence or term. When reviewing the card, the hidden portions are concealed on the front, and flipping the flashcard reveals the complete text with the previously hidden words shown._
 Create Flashcard, Type set to Cloze. Enter your text in the Term field, then select a word and click + Hidden Word to hide it.
Tip
_Best for reinforcing key details within context, such as when learning stepwise processes and memorizing pathways or mechanisms._
1. In the box next to **Type**, select **Cloze** and enter the text for your flashcard under **Term**.
2. Highlight the word or phrase you want to hide and click the blue **{{...}}** button, or type it directly using `{{double curly braces}}`.
3. Optionally add an image, then click **+ Add Flashcard**. Use **Preview** to check how the hidden portion will appear (bolded).
### Fill in the Blank
_Fill-in-the-blank flashcards hide specific word(s) within a term, sentence, or concept. Learners must actively type the missing word(s) to reveal the correct answer._
 Create Flashcard, Type set to Fill in the blank. Enter your text in the Term field, then select a word and click + Blank to blank it out.
Tip
These flashcards encourage active recall, deeper cognitive processing, and accuracy. By moving beyond recognition-based cues, fill-in-the-blank cards strengthen precise memory retrieval and long-term retention!
1. In the box next to **Type**, select **Fill in the Blank** and enter the text for your flashcard under **Term**.
2. Highlight the word you want hidden and click **+ Blank**, or type it directly using `{{double curly braces}}`.
3. Optionally add an image, then click **+ Add Flashcard**. When studying, the learner types the exact response and clicks **Check Answers**.
### Multiple Choice
_Multiple Choice flashcards present learners with a question followed by two to four answer options. Learners select the option they believe is correct and immediately receive feedback showing whether their answer was correct, along with the correct response._
 Create Flashcard, Type set to Multiple choice. Type the question under Term, fill in the choices, and click the mark beside a choice to set the correct answer.
Tip
These are best for testing knowledge recognition, reinforcing understanding by comparing similar options, and simulating exam-style practice to help learners build confidence and assess their readiness.
1. In the box next to **Type**, select **Multiple choice** and type the question under **Term** (optionally add an image).
2. Under **Choices**, fill in Option 1 and Option 2, and click **+ Add Option** for up to two more choices. Use the trash icon to remove an option.
3. Click the **X** next to the answer choice you want marked correct — it will switch to a checkmark. Option 2 is marked correct by default until you change it.
4. Click **+ Add Flashcard** when done.
### Image Occlusion
_Image Occlusion flashcards allow learners to upload an image and cover specific areas with adjustable masks. Each masked area creates a covered zone that can be clicked to reveal what is hidden underneath, encouraging active recall through visual interaction._
 Create Flashcard, Type set to Image Occlusion. The image panel reads No image uploaded until you add an image.
Tip
Best used for visual learning, ideal for memorizing labeled diagrams, anatomical structures, pathways, or any image-based content.
1. In the box next to **Type**, select **Image Occlusion** and click **Upload an Image** (or drag and drop) to choose a diagram, chart, map, or labeled image.
2. Click and drag on the image to draw an occlusion zone. Click a zone to select it, use the corner handles to resize it, and drag it to reposition it.
3. Click the pencil icon in the center of a zone to add or edit its label. To remove a zone, select it and click **Delete Zone**.
4. Repeat to add as many zones as needed, then click the **X** in the top-right to close the editor and **+ Add Flashcard** to save.
Note
The Image Occlusion flashcard preview may display staggered zones — this is normal and expected.
Product knowledge
This page is for the StudyFetch app and is product knowledge for [StudyFetch.com](https://studyfetch.com).
## Flashcard Study Tips
Source: https://studyfetch-academy.honen.com/docs/6a52637502a11a95bc7fcc17
Product tutorial
StudyFetch app
This page is for the StudyFetch app and is product knowledge for [StudyFetch.com](https://studyfetch.com).
Use active recall, spaced repetition, interleaving, customization, and related StudyFetch tools to get more from flashcards.
### Review over time
Use spaced repetition to improve long-term retention.
### Practice recall
Try to remember the answer before flipping the card.
### Build context
Add images, diagrams, and related study materials.
## Flashcard Study Tips
Here are some effective ways to use your flashcards:
- **Spaced Repetition**: Review cards at increasing intervals to improve long-term retention
- **Active Recall**: Test yourself by viewing the term first, then attempt to recall the definition
- **Interleaving**: Mix up different types of content rather than focusing on one topic at a time
- **Customize Your Cards**: Add images, diagrams, or additional context to enhance your learning
- **Integration with Other Tools**: Your flashcards can be used to generate practice tests, quizzes, and other study materials. You can generate study materials from within each feature section or directly from your flashcards by selecting **Turn Into** above the flashcard set and choosing your desired study tool
 Turn Into menu, headed Learn this another way... Pick Practice Test, QuizFetch, Tutor Me, Audio Recap, Chat, Explainers, Arcade, or Mini Apps.
## Related Features
Once you've created flashcards, you might want to:
- Take a **practice test** to assess your knowledge
- Create **notes** for more comprehensive study materials
- Try **QuizFetch** for a fun, interactive way to test your knowledge
Product knowledge
This page is for the StudyFetch app and is product knowledge for [StudyFetch.com](https://studyfetch.com).
## Get Help, View Statistics, and Share Flashcards
Source: https://studyfetch-academy.honen.com/docs/6a526a8969edd2562ff0c1e6
Product tutorial
StudyFetch app
This page is for the StudyFetch app and is product knowledge for [StudyFetch.com](https://studyfetch.com).
Use Sparky for questions, review flashcard statistics, and share sets with classmates.
### Ask Sparky
Use the chat while studying for explanations and visualizations.
### Read statistics
Review progress, heatmaps, and future due cards.
### Share sets
Copy a share link or send through supported apps.
### Get Help from Sparky
Have questions or need help clarifying something from your flashcards? Use the **Sparky chat** to get personalized support instantly!
 Chat panel, open beside the flashcard study screen. Pick a suggested prompt such as Explain this card or Quiz me, or type in Ask your AI tutor anything...
- As you study your flashcards, the Sparky chat is available on the right side for real-time support.
- You can ask questions by **typing** directly into the **chat box** and pressing **Enter**, or select from the suggested prompts like **Explain this card**, **Quiz me**, or **Make a test**.
- Ask anything from "make me a visualization of this card," to "explain this concept in more detail," or "what is the best way to memorize this?" Sparky will provide detailed, personalized responses tailored to your learning style.
 Chat panel, after a reply. The thread shows your message and the tutor's answer, with the message box below.
### Interpreting your Statistics
1. To view your flashcard set's study progress and statistics, click the **···** menu next to your flashcard set, and select **Stats**.
 Flashcards page, set options menu open. Choose Stats to open the study statistics for that set.
The Stats page shows your overall progress, a per-card breakdown (Easy, Good, Hard, Again, Unreviewed), and a yearly activity heatmap:
 Flashcard set statistics page, Heatmap tab. A progress ring, a Flashcards Stats panel and an activity calendar.
Above the heatmap, tabs let you switch between different views of your study data:
- **Heatmap:** A visual calendar of your study activity over time. Darker shading means more reviews completed that day; hover a square to see the exact count.
- **Hourly-Breakdown:** The number of flashcards reviewed during each hour of the day.
- **Ease-Factor:** How easy or difficult your flashcards are based on your ratings. Rating a card easier increases its ease factor so it appears less often; rating it harder decreases it so it appears more often.
- **Future-Due:** How many flashcards are coming up for review over the next 20 days.
- **Buttons-Pressed:** The total number of times each rating button (Again, Hard, Good, Easy) was selected.
 Flashcard set statistics page, Future-Due tab. The chart shows the flashcards due in the next 20 days.
Each flashcard also includes its own **Card Progress** bar further down the page, with shaded segments for each rating it's received. Hover over a shaded section to see the rating and date it was recorded.
### Sharing Your Flashcards
1. Click the **···** menu next to your flashcard set name, then select **Share**.
2. Copy the link by clicking directly on the URL, or select **Copy Link**, and share it with your study group. You can also share directly through supported apps — select the **WhatsApp**, **Telegram**, or **Text** icon to share via that app.
 Share Flashcard Set with a Friend modal. Click Copy link, or use the WhatsApp, Telegram, or message icon to send the set.
Product knowledge
This page is for the StudyFetch app and is product knowledge for [StudyFetch.com](https://studyfetch.com).
## Manage Flashcard Sets
Source: https://studyfetch-academy.honen.com/docs/6a525e4ba05383929bc8d0e8
Product tutorial
StudyFetch app
This page is for the StudyFetch app and is product knowledge for [StudyFetch.com](https://studyfetch.com).
Combine sets, open the editor, rename sets, save changes, and generate more cards.
### Combine sets
Merge related flashcard sets into one review flow.
### Edit details
Rename the set, update the description, and edit cards.
### Generate more
Add AI-generated cards to an existing set.
## Managing your Flashcards
### Combining Flashcard Sets
Combining flashcard sets allows you to merge multiple sets into one, making it easier to review related topics together.
 Flashcards page, set options menu open. Choose Merge With to merge this set with another.  Combine Flashcards modal. Select the sets you want, then click Re-order Flashcards.
1. After accessing your flashcards, click **Combine**.
2. Select the flashcard sets you want to combine, then choose **Re-order Flashcards** to continue.
3. Drag each set into your preferred order, then select **Continue to Options**.
4. By default the system combines your original set names into one — enter a new title in the **New Flashcard Set Name** field to customize it.
5. **Keep original flashcard sets** is checked by default; uncheck it if you don't want to keep the individual originals.
6. Select **Create Combined Set** to combine your selected flashcards.
### Opening the Editing View
There are a few ways to reach the editing page for a flashcard set:
 Flashcards page, set options menu open. The menu holds Rename, Share, Merge With, Edit, Stats, and Delete.
- To edit a set you're **actively studying**, click the dropdown arrow next to the flashcard name and choose **Edit**.
- To edit any set you're **not actively studying**, go to **Practice > Flashcards**, then click the **⋮** menu next to the set and choose **Edit**.
From the editor, you can review existing flashcards, edit current cards, or create new ones.
### Changing the Name of your Flashcard Set
Flashcard set names can be updated from either Study mode or Editing mode.
- **In Study Mode:** click the dropdown arrow next to the flashcard name, choose **Rename**, edit the name, and click **Save**.
- **In Editing Mode:** click the **Flashcard Set Settings** (gear) icon next to the set's title.
 Flashcard Set Settings modal. Edit the Title and Description, then click Save Changes.
Edit the **Title** and optionally the **Description**, then click **Save Changes**.
### Saving Changes after Editing Flashcards
After making any desired changes to your flashcards, make sure to click **Save All Changes** from the top or bottom toolbar of the editor.
### Generating more Flashcards
Need more flashcards? Create them manually, or have AI generate more automatically.
 Add a flashcard set, 1 of 4. Choose Create from Materials, Create from Topic, Import Quizlet, or Import from Anki.
1. In the editing view, select **Generate More Flashcards** from the toolbar.
2. Choose how you'd like to add cards: **Create from Materials**, **Create from Topic**, **Import Quizlet**, or **Import from Anki**.
3. Follow the steps for the method you selected. Your new flashcards are automatically added to the set.
Product knowledge
This page is for the StudyFetch app and is product knowledge for [StudyFetch.com](https://studyfetch.com).
## Use Flashcards
Source: https://studyfetch-academy.honen.com/docs/6a52628f02a11a95bc7fcc0e
Product tutorial
StudyFetch app
This page is for the StudyFetch app and is product knowledge for [StudyFetch.com](https://studyfetch.com).
Navigate through cards, choose a study mode, use spaced repetition, and review bookmarks.
### Navigate cards
Move, flip, shuffle, and jump through the set.
### Choose a mode
Use Standard, Spaced Repetition, or Bookmarked Flashcards.
### Track mastery
Use spaced repetition ratings and focus on bookmarked cards.
## Using your Flashcards
 Flashcard study screen, Standard mode, card front. The card shows the Term, with Previous, Flip and Next below it.
### Navigation Keys
- To navigate between flashcards click the **← Previous** or **Next →** buttons below the flashcard, or use the **left and right arrow keys** on your keyboard.
- To flip a flashcard and reveal the back, **click anywhere on the card**, select the **Flip** button below the flashcard, or **press the space bar on your keyboard**. Use any of these methods again to return to the front of the card.
- Above your flashcards, you'll see a **progress bar** made up of dots. Each dot represents an individual flashcard and fills in as you move through the set. You can also click any dot to jump directly to that flashcard.
 Flashcard study screen, Standard mode, card flipped. The back shows the Definition, with thumbs up, thumbs down and bookmark icons above the card.
- Select the **Shuffle** button in the top right toolbar to randomize the order of your flashcards.
- How do you like your flashcards? Use the **thumbs up** or **thumbs down** buttons above your flashcards to provide feedback on AI-generated flashcards. The more feedback provided, the better the flashcards become over time.
### Choosing a Study Mode
On the **top left of the toolbar** above your flashcards, you can choose how you want to study. Click the **downward arrow** to select from the following study modes:
 Flashcard study screen, study mode dropdown open. Choose Standard, Spaced Repetition, or Bookmarked Flashcards.
- **Standard:** Review all flashcards in order. Ideal for initial learning or quick review sessions.
- **Spaced Repetition:** Uses smart scheduling based on how well you know each card. Cards you struggle with appear more frequently to optimize retention.
- **Bookmarked Flashcards:** Focus only on flashcards you've bookmarked. Perfect for reviewing challenging topics you want to master.
### How to use Spaced Repetition Study Mode
Spaced repetition strengthens long-term memory through timed review intervals. Follow the steps below to activate this mode while studying your flashcards in StudyFetch.
1. To start studying with spaced repetition, select **Spaced Repetition** from the top left of the toolbar.
 Flashcard study screen, Spaced Repetition mode, first run. The mode selector reads Spaced Repetition and a walkthrough step 1 of 6 opens with a Let's go button.
1. While studying, once you flip a flashcard or reveal the answer, you will be asked to rate your confidence level using **Again**, **Hard**, **Good**, or **Easy**.
 Flashcard study screen, Spaced Repetition mode, card flipped. Rate the card with Again now, Hard 6m, Good 10m, or Easy 3d.
Rate each flashcard using the buttons below the card or by pressing the **1, 2, 3, or 4** keys on your keyboard. Your selection determines when the card will appear again:
- **Again (1):** Shows again in **1 minute**
- **Hard (2):** Shows again in **10 minutes**
- **Good (3):** Shows again in **1 hour**
- **Easy (4):** Shows again in **24 hours**
In spaced repetition mode, the **progress bar** appearance of each dot updates based on your ratings to reflect your learning progress. Cards will continue to reappear at scheduled intervals until you've mastered all flashcards.
When you're finished studying, switch to a different study mode from the toolbar, or simply leave the page — your progress is automatically saved, so you can return to Spaced Repetition mode anytime and continue right where you left off.
### Using Bookmarks
When studying flashcards in **Standard mode**, you can use **bookmarks** to tag cards you want to review later — ideal for mastering challenging topics.
1. Bookmark flashcards you want to revisit by selecting the **bookmark icon** located in the top right above your flashcard. When bookmarked, the icon will turn dark and a confirmation appears.
 Flashcard study screen, Standard mode, card bookmarked. The bookmark icon above the card is filled in and a Flashcard bookmarked message appears in the bottom right.
1. To review your bookmarked flashcards, click the downward arrow next to the current mode and select **Bookmarked Flashcards**. This will switch your study session to focus only on your bookmarked cards.
Note
The number next to **Bookmarked Flashcards** in the dropdown represents the total amount of flashcards you have bookmarked.
 Flashcard study screen, Bookmarked Flashcards mode. The session holds only the cards you bookmarked.
1. After you've mastered a flashcard, **remove the bookmark** by selecting the same **bookmark icon** above the flashcard. The card is taken out of your Bookmarked Flashcards rotation, but it's still available in Standard mode.
2. Once all bookmarks have been removed, you'll see an empty state with a shortcut back to Standard mode.
 Bookmarked Flashcards study mode, empty. The screen reads No Saved Flashcards, with a Go to Standard Mode button.
Product knowledge
This page is for the StudyFetch app and is product knowledge for [StudyFetch.com](https://studyfetch.com).
## Create a QuizFetch Quiz
Source: https://studyfetch-academy.honen.com/docs/6a61588a457ace81fcedf3b1
Product tutorial
StudyFetch app
This page is for the StudyFetch app and is product knowledge for [StudyFetch.com](https://studyfetch.com).
## Creating Your Quiz
### Step 1: Start a New Quiz
From **Practice > QuizFetch**, select **+ New QuizFetch** (or click the arrow next to **+ Create** and choose **Create QuizFetch**). You'll then choose how to build your quiz: **Create from Materials** generates questions from your study materials, while **Create from Flashcards** generates a quiz from an existing flashcard set.
Create Quiz, 1 of 4. Pick Create from Materials or Create from Flashcards.
### Step 2: Select Materials and Customize Question Types
If creating from materials, choose which uploaded material(s) to generate from (or upload something new) and click **Next**. Then customize your quiz by choosing how many questions of each format to include: **Multiple Choice**, **True/False**, **Fill in the Blank**, **Short Answer**, **Free Response**, and **Multi-Layered Passage**, using the **-** / **+** controls or preset buttons. Under **Exam-Specific Question Types** you can also align questions to a real exam format (USMLE Step 1, MCAT, NCLEX, AP Exams, and more) — see [**Exam-Specific Question Types**](https://www.studyfetch.com/docs/tutorial-doc-format/exam-specific-question-types-tutorial) for details. Each selected type appears as its own card on the right with a running question count.
Create Quiz, 3 of 4. Set how many questions of each type with the minus and plus controls, then click Next.
### Step 3: Optional Settings
Optionally name your quiz (StudyFetch will name it for you if left blank), choose the quiz's language, and select a customization plugin from **Summarizer Sparky**, **Professor Sparky**, **Deep Learner Sparky**, or explore other plugins. You can also specify a focus topic to tailor the generated questions to your learning goals.
Create Quiz, 4 of 4 Additional Settings. Name the quiz, set the language, choose a plugin, then click Create quiz.
### Step 4: Generate Your Quiz
Select **Create quiz** and StudyFetch will automatically generate your customized quiz from the selected materials and settings.
Newton's Laws Quiz, Quiz Time card 1 of 5. Click Let's go to start answering.
Note
Creating a quiz from flashcards instead of materials skips the question-type customization step — it automatically generates a 20-question multiple choice quiz from the selected flashcard set(s). For more advanced customization, use the Create from Materials method described above.
Product knowledge
This page is for the StudyFetch app and is product knowledge for [StudyFetch.com](https://studyfetch.com).
## Manage and Share QuizFetch Quizzes
Source: https://studyfetch-academy.honen.com/docs/6a61597e457ace81fcedf3cc
Product tutorial
StudyFetch app
This page is for the StudyFetch app and is product knowledge for [StudyFetch.com](https://studyfetch.com).
## Managing Your Quiz
### Rate Your Questions
Use the thumbs up or thumbs down buttons in the top right above each question to give feedback on your AI-generated quiz questions — a thumbs up means the question is helpful, a thumbs down means it needs improvement. The more feedback you give, the better future questions become.
### Rename, Share, and View Stats
Click the quiz name at the top of the page (or the dropdown arrow next to your quiz name while taking it or on the Stats page) to open a menu with **Rename**, **Share**, **Stats**, and **Create Practice Quiz**.
Newton's Laws Quiz, quiz name menu open on question 2 / 20. Choose Rename, Share, Stats or Create Practice Quiz.
Selecting **Rename** opens a dialog where you can edit the quiz name and click **Save**.
Rename Quiz dialog. Edit the Name field, then click Save.
### Share Your Quiz
Found your quiz helpful? Select **Share** to open the share dialog, where you can share the quiz itself or the underlying study set, copy the link directly, or share through WhatsApp, Telegram, or text. Recipients can view the quiz without needing to sign up.
Share Quiz with a Friend dialog, Share this Quiz tab. Click Copy link, or use the WhatsApp, Telegram or message buttons.
From the Quiz Results page you can also share your quiz along with your score to challenge friends: choose **Help a Friend** to share without your results, **Challenge** to share your score and see if a friend can beat it, or **Celebrate** to highlight your achievement — then copy the link or share directly through the same social options.
### Share Your Results
From the Quiz Results page, select **Share your results** to choose how to share: **Help a Friend** shares the quiz without your score, **Challenge** shares your score so a friend can try to beat it, and **Celebrate** highlights your achievement. Each option shows a live preview of the share card before you copy the link or send it via WhatsApp, Telegram, or text.
Share Your Results dialog, Celebrate selected. Click Copy Link, or pick one of the share buttons below it.
### Delete Your Quiz
From the QuizFetch feature page (**Practice > QuizFetch**), select the **⋮** button next to the quiz you want to remove and choose **Delete**. You'll be asked to confirm, since deleting a quiz cannot be undone.
Delete Quiz? dialog. Click Delete to remove the quiz, or Cancel to keep it.
Warning
Deleting a quiz cannot be undone.
### Turn Your Quiz Into Other Study Materials
Use the **Turn Into** button at the top of the quiz (available while taking a quiz or reviewing your stats) to generate new study materials from the same source: Flashcards, a Practice Test, a Tutor Me session, an Audio Recap, Chat, Explainers, Arcade, or Mini Apps.
Newton's Laws Quiz, Turn Into menu open on question 2 / 20. Pick a format to build from the same material.
## Benefits of QuizFetch
QuizFetch combines confidence ratings (so you can see which topics you're truly comfortable with), interactive feedback with immediate explanations, progress tracking over time, AI-powered help from Sparky whenever you're stuck, and customized learning-path recommendations based on your performance.
## Related Features
After using QuizFetch, you might want to try Practice Tests for a more formal assessment experience, Flashcards to reinforce concepts you struggled with, or Tutor Me for personalized instruction on difficult topics.
Product knowledge
This page is for the StudyFetch app and is product knowledge for [StudyFetch.com](https://studyfetch.com).
## QuizFetch Overview and Access
Source: https://studyfetch-academy.honen.com/docs/6a61583d457ace81fcedf3a8
Product tutorial
StudyFetch app
This page is for the StudyFetch app and is product knowledge for [StudyFetch.com](https://studyfetch.com).
\
Introduction\
\
QuizFetch takes your study experience to the next level by creating interactive quizzes based on your study materials. Unlike standard tests, QuizFetch adds a confidence rating system and provides real-time feedback, making assessment more engaging and informative.\
\
Accessing QuizFetch\
\ \
On the left-hand side of your Dashboard click \Practice\ and then select \QuizFetch\\
\ \\\Physics study set page. In the left sidebar, open Practice & Activities and click QuizFetch.\\ \ \
All existing quizzes associated with your Study Set can be found on this page.\
\ \\\Practice page, QuizFetch tab. The quizzes saved for the Physics set are listed next to the New QuizFetch tile.\\ \ \
To open a specific quiz, simply click on the name of the quiz you would like to view.\
\
To generate a new QuizFetch, follow the steps outlined below.\
\ \
## QuizFetch Results and Recommendations
Source: https://studyfetch-academy.honen.com/docs/6a61592a457ace81fcedf3c3
Product tutorial
StudyFetch app
This page is for the StudyFetch app and is product knowledge for [StudyFetch.com](https://studyfetch.com).
### Completing Your Quiz
QuizFetch quizzes are self-paced and don't require completion in a single session — your responses and confidence ratings save automatically, so you can pause and pick up progress toward mastery later. The dot icons in the progress bar and your overall mastery percentage update as you go, with mastery percentage tracked on the right side of the progress bar. Once mastery is reached across all questions, you're taken to a results page with a full performance breakdown and study recommendations.
### Too Many Questions Wrong?
If too many questions are answered incorrectly, QuizFetch temporarily pauses progression and recommends reviewing the material before continuing — an adaptive safeguard against reinforcing misunderstandings. An incorrect answer also resets that question's progress, and the feedback tells you how many additional correct responses are needed to re-master it.
Newton's Laws Quiz, question 8 / 20 answered incorrectly. Read the Keep Practicing explanation, then click Next.
## Reaching Mastery: Your Results Page
Once you've mastered every question, you land on the results page: an "Outstanding Performance!" (or similar) summary of your score, a percentage ring, and your correct-answer count out of the total. From here you can jump into **View Stats** for the full breakdown, use **Review Options** to reset your progress, or share your results — and the same "Continue Learning" recommendations appear below, suggesting other features (like Flashcards or Tutor) built from the same material.
Newton's Laws Quiz results, SCORE: 100%. Click View Stats for the breakdown, or open Review Options.
Select **Share your results** to choose how you want to share: **Help a Friend** shares the quiz without your score, **Challenge** shares your score so a friend can try to beat it, and **Celebrate** highlights your achievement — each shows a live preview of how the share card will look before you copy the link or send it via WhatsApp, Telegram, or text.
Share Your Results dialog, Celebrate selected. Click Copy Link, or pick one of the share buttons below it.
## Interpreting Your Stats Page
Whether you're mid-quiz or have paused due to repeated incorrect answers, the Stats page (accessible any time via the quiz's dropdown menu) gives you a detailed breakdown: a completion ring, a running tally of Correct / Needs Work / Unanswered questions, your overall accuracy, and a per-question history you can scroll through — each showing whether it was answered correctly and its confidence-rating progress bar.
Newton's Laws Quiz stats page, 25% Complete. Review the Correct, Needs Work and Unanswered counts and the per question results, or click Continue Quiz.
### Get Study Recommendations
Once you reach mastery or pause on a topic, StudyFetch surfaces a "Continue Learning" section suggesting additional features to reinforce topics that need more review — flashcards, a tutor session, or other study tools built from the same material — plus an option to explore more study tools directly. You can also select **Turn Into** at any point during or after the quiz to generate new study materials from the same source.
### Continuing Your Quiz
To pick up where you left off while keeping your existing statistics, open the quiz's **Stats** page and select **Continue Quiz**. If you'd rather start over and reset your statistics, use **Restart** from the quiz's **...** menu instead.
Product knowledge
This page is for the StudyFetch app and is product knowledge for [StudyFetch.com](https://studyfetch.com).
## Take and Navigate a QuizFetch Quiz
Source: https://studyfetch-academy.honen.com/docs/6a6158da457ace81fcedf3ba
Product tutorial
StudyFetch app
This page is for the StudyFetch app and is product knowledge for [StudyFetch.com](https://studyfetch.com).
## Taking Your Quiz
### Step 1: Select and Confirm an Answer
Choose your answer by clicking an option (or, for multiple choice, pressing the corresponding letter key). Type a response and press **Submit** or **Shift + Enter** for short-answer style questions, or select **I don't know** if you're unsure. Throughout the quiz, the Sparky Chat panel on the right stays available so you can ask questions or request clarification at any point.
Newton's Laws Quiz, question 1 / 20. Click an answer option, or choose E, I don't know.
After choosing an answer, review your selection in the confirmation box. Select **Change Answer** to go back and reselect, or continue on to rate your confidence.
### Step 2: Rate Your Confidence
QuizFetch pairs spaced repetition with a confidence rating: after each answer, rate yourself **Not Very Confident (1)**, **Somewhat Confident (2)**, or **Very Confident (3)** using the buttons or the 1/2/3 keys. Your accuracy and confidence together determine when the question will resurface — high confidence plus a correct answer moves you toward mastery fastest.
Newton's Laws Quiz, question 1 / 20 with an answer selected. Rate your confidence, or click Change Answer to pick again.
### Step 3: Review Your Feedback
Sparky explains the correct answer and, based on your accuracy and confidence, updates your mastery progress for that question — correct, confident answers can lock a question in as mastered right away, while incorrect answers reset or reduce progress and show how many additional correct responses are needed. Use the Sparky Chat to dig deeper into any explanation before moving on with **Next** or the **Enter** key.
Newton's Laws Quiz, feedback on question 1 / 20. Read the Locked In explanation, then click Next.
## Navigating Your Quiz
The progress bar at the top shows one dot per question, filling in green (correct) or updating as you answer; your overall mastery percentage is shown alongside it. Hover over any dot for details on that question's confidence rating and mastery status, or click the source number above a question to see exactly where it comes from in your materials. QuizFetch presents questions in an adaptive order based on confidence and spaced repetition, so you move forward with **Next** rather than jumping between questions freely. To start over, open the **...** menu in the top toolbar and select **Restart** — you'll be asked to confirm, since this resets all progress back to question 1.
Restart quiz? dialog. Click Restart to reset progress to question 1, or Cancel to keep your place.
Product knowledge
This page is for the StudyFetch app and is product knowledge for [StudyFetch.com](https://studyfetch.com).
## Track QuizFetch Progress and Stats
Source: https://studyfetch-academy.honen.com/docs/6a6159d5457ace81fcedf3d5
Product tutorial
StudyFetch app
This page is for the StudyFetch app and is product knowledge for [StudyFetch.com](https://studyfetch.com).
## Tracking Your Progress
A key feature of QuizFetch is the ability to review your performance statistics at any time — while taking the quiz, if the system pauses progression due to repeated incorrect answers, or after completing the quiz.
### Step 1: Open Your Stats
Click the dropdown arrow next to your quiz name and select **Stats**.
Newton's Laws Quiz, quiz name menu open on question 2 / 20. Click Stats in the menu.
### Step 2: Review Your Performance
The Stats page opens with a completion ring, a running tally of **Correct**, **Needs Work**, and **Unanswered** questions, and your overall **Accuracy** percentage.
Newton's Laws Quiz stats page, 25% Complete. Read the Correct, Needs Work and Unanswered counts and the ACCURACY tile.
Scroll down to review each question individually — whether it's been answered, whether it was correct, and its **Question Progress** bar showing confidence-rating history. Hover over a shaded segment to see the confidence rating and date it was recorded.
Newton's Laws Quiz stats page, question list. Scroll to each question and check its Question Progress bar.
### Step 3: Continue Your Quiz
Select **Continue Quiz** at the top of the Stats page to pick back up where you left off. Once you've answered every question correctly, this button updates to **Continue Learning**, and every question shows a green checkmark alongside a 100% completion ring.
Newton's Laws Quiz stats page, 100% Complete. Click Continue Learning to return to the study set.
Selecting **Continue Learning** guides you back to your Study Set dashboard. From there, you can return to **Practice > QuizFetch** at any time and select a quiz to keep working toward full mastery.
Product knowledge
This page is for the StudyFetch app and is product knowledge for [StudyFetch.com](https://studyfetch.com).
## Create a Practice Test
Source: https://studyfetch-academy.honen.com/docs/6a63bfe5ee9569d818eecc3c
Product tutorial
StudyFetch app
This page is for the StudyFetch app and is product knowledge for [StudyFetch.com](https://studyfetch.com).
## Introduction
The Test feature allows you to create customized practice tests based on your study materials. These tests help you assess your knowledge, identify areas that need improvement, and prepare for upcoming exams with personalized questions.
## Accessing the Test Feature
On the left-hand side of your Dashboard, click **Practice** and then select **Test**. All existing practice tests for your Study Set live here — click any of them to open it, or start a new one below.
 Practice, Tests tab. The + New Test tile sits alongside Create Folder and the tests already in this set.
## Creating Your Test
Select **+ New Test** to open the Create Practice Test flow, a guided 4-step wizard.
### Step 1: Choose your source
Choose **Create from Materials** to build a test from your study materials, or **Create from Flashcards** to generate one from an existing flashcard set.
 Create Practice Test, 1 of 4. Choose Create from Materials or Create from Flashcards.
### Step 2: Select your materials
Choose which uploaded materials to generate questions from, or select **+ Upload New Material** to add something new, then click **Next**.
 Create Practice Test, Step 2 of 4. Tick the materials the questions come from, then click Next.
Note
If the materials you select are empty or too short, StudyFetch shows a clear "Cannot create test" error at the final step and sends you back to reselect materials — it won't silently generate a broken test.
### Step 3: Choose your question types
Set the number of questions for each format — **Multiple Choice**, **True/False**, **Fill in the Blank**, **Short Answer**, **Free Response**, and **Multi-Layered Passage** — using the +/- controls or the quick preset buttons (-10/-5/-1/+1/+5/+10). A live preview of your question cards builds on the right as you go.
 Create Practice Test, 3 of 4. Set a count for each question type with the minus and plus buttons.
An **Exam-Specific Question Types** section sits below the standard types, collapsed by default. Expand it to generate questions formatted for a specific standardized exam (Medicine & Healthcare, Finance, Law School, AP Exams, and more).
 Create Practice Test, 3 of 4 with Exam-Specific Question Types shown. The categories in view are Medicine & Healthcare, Finance, and Law School.
For more details, see [**Exam-Specific Question Types**](https://www.studyfetch.com/docs/tutorial-doc-format/exam-specific-question-types-tutorial).
### Step 4: Additional settings
Name your test (StudyFetch will name it for you if you leave this blank), choose the test's language, and optionally customize it with a plugin like Summarizer Sparky, Professor Sparky, or Deep Learner Sparky — or select **Explore Plugins** to browse more or build your own.
 Create Practice Test, 4 of 4. Name the test, pick its language, and choose a plugin.
An **Advanced Settings** section, also collapsed by default, holds an optional **Focus Topic** field so you can steer the test toward specific concepts from your materials.
 Create Practice Test, 4 of 4 with Advanced Settings opened. The Focus Topic (Optional) field reads Newton's First Law and inertia.
Select **Create test** and StudyFetch will generate your customized practice test. The first time you open a generated test, a short "Test — Time to Shine" walkthrough introduces the test-taking controls.
 Test, Time to Shine dialog, 1 of 5. Select Let's go to start the walkthrough of the test controls.
Product knowledge
This page is for the StudyFetch app and is product knowledge for [StudyFetch.com](https://studyfetch.com).
## Exam-Specific Question Types Tutorial
Source: https://studyfetch-academy.honen.com/docs/6a56334f8bf6b7690658d8ba
Product tutorial
StudyFetch app
This page is for the StudyFetch app and is product knowledge for [StudyFetch.com](https://studyfetch.com).
## How Exam-Specific Questions work
Preparing for exams isn't just about reviewing content — it's about practicing the right questions in the right format.
The Exam-Specific Questions feature bridges that gap by transforming your study materials into targeted questions that mirror real exam experiences. Instead of relying on generic practice, this feature lets you generate questions aligned with specific exams — such as MCAT, NBOME, NBME, and AP — so you can practice with questions that match your actual exam's format and complexity.
## Accessing Exam-Specific Question Types
Exam-Specific Question Types are available whenever you create a QuizFetch quiz or a Practice Test. Both flows share the same question-type selection step described below.
1. Start creating a quiz or test as usual. On the question-type selection step, scroll down to **Exam-Specific Question Types** and click **Show**.
 Create Quiz, step 3 of 4: How many questions of each type? The reader clicks Show to open Exam-Specific Question Types.
2. Four top-level exam categories appear: **Medicine & Healthcare**, **Finance**, **Law School**, and **AP Exams**.
 Create Quiz, Exam-Specific Question Types expanded. The reader picks Medicine & Healthcare, Finance, Law School, or AP Exams.
## Medicine & Healthcare
Click **Medicine & Healthcare** to expand its specialties: Med School, Nursing, Physician Assistant, Dentistry, Optometry School, Podiatry School, Respiratory Therapy, Pharmacy, Physical Therapy, and Emergency Medical Services.
 Create Quiz, Medicine & Healthcare expanded. The reader picks a specialty such as Med School.
### Med School
Expanding **Med School** reveals its own subcategories: Pre-Med, D.O. (Osteopathic) NBOME Exams, and M.D. (Allopathic) NBME Exams.
 Create Quiz, Med School expanded. Its subcategories are Pre-Med, D.O. (Osteopathic) NBOME Exams, and M.D. (Allopathic) NBME Exams.
### Pre-Med
1. Select **Medicine & Healthcare** → **Med School** → **Pre-Med** to see the two available question types, each with an **Examples** link.
 Create Quiz, Pre-Med expanded. Its question types are MCAT discrete (Stand Alone) Questions and MCAT Passage-Based Questions, each with an Examples link.
- **MCAT discrete (Stand Alone) Questions** — Passage-based questions testing integration of natural sciences, research methods, and critical analysis. Focus on data interpretation and application of scientific concepts to biological systems and research scenarios.
- **MCAT Passage-Based Questions** — Research-based passages with progressive questions: **Recognition** (identify the concept or phenomenon), **Mechanism** (explain the scientific basis), and **Application** (apply to new scenarios or predict outcomes).
1. Click **Examples** next to a question type to preview sample questions before adding them to your quiz.
 MCAT discrete (Stand Alone) Questions, examples. The reader reads three sample questions with their answer choices.
2. Use the **+** and **−** controls to set how many questions of that type to generate, same as any other question type.
### D.O. (Osteopathic) NBOME Exams
- **COMLEX Level 1 Style** — Clinical vignette-based questions testing basic science mechanisms, pathophysiology, pharmacology, and osteopathic principles. Focus on integrating foundational medical concepts with osteopathic manipulative medicine (OMM) principles.
- **COMLEX Level 2 Cognitive Evaluation Style** — Patient-centered scenarios testing clinical knowledge, diagnosis, management, and osteopathic considerations. Focus on integrating OMM into comprehensive patient care and evidence-based clinical decision-making.
- **COMLEX Level 3 Style** — Complex clinical scenarios testing readiness for independent osteopathic practice. Focus on patient management over time, integrating OMM into comprehensive care plans, and demonstrating osteopathic philosophy in practice.
- **COMAT FBS Style** — Pre-clinical assessment covering foundational biomedical sciences with osteopathic integration. Tests basic science knowledge across body systems and disciplines including biochemistry, anatomy, microbiology, physiology, pharmacology, and neurosciences.
- **COMAT Clinical Subject Exam Style** — End-of-rotation clinical assessments integrating osteopathic principles with specialty knowledge. Tests clinical diagnosis, management, diagnostic interpretation, and application of osteopathic manipulative medicine across clinical disciplines.
### M.D. (Allopathic) NBME Exams
### Nursing
### Physician Assistant
### Dentistry
### Optometry School
### Podiatry School
### Respiratory Therapy
### Pharmacy
### Physical Therapy
### Emergency Medical Services
## Finance
## Law School
## AP Exams
Product knowledge
This page is for the StudyFetch app and is product knowledge for [StudyFetch.com](https://studyfetch.com).
## Manage and Share Practice Tests
Source: https://studyfetch-academy.honen.com/docs/6a63c0b06f4e994396e156e9
Product tutorial
StudyFetch app
This page is for the StudyFetch app and is product knowledge for [StudyFetch.com](https://studyfetch.com).
## Managing your Test
### Rate Your Questions
How do you like your practice test questions? Let us know what is working and what isn't. The more feedback provided, the better future questions become over time.
- Use the **thumbs up** or **thumbs down** buttons located in the top right above each question to provide feedback on your AI-generated practice test questions. A thumbs up indicates the question contains helpful content, while a thumbs down indicates the content needs improvement.
Test, question 1 card. The thumbs up and thumbs down buttons sit at the top right of each question.
### Changing the Name of Your Test
Test names can be updated **while taking a test** or from the **Test feature page**. Both lead to the same rename dialog.
**While taking a test:**
1. Click the **downward chevron** next to your test name in the breadcrumb to open the test menu, which offers **Rename**, **Share**, **Create Practice Test**, and a Recents list.
Test menu from the breadcrumb. It lists Rename, Share, Create Practice Test, and a Recents list.
1. Select **Rename**, edit the name in the field, and click **Save**.
Rename Test dialog. Edit the Name field, which reads Projectile Motion Practice Test, then select Save.
**From the Test feature page:**
1. Navigate to **Practice → Test** from the left-hand dashboard. Select the **⋮** button on the desired test card and choose **Rename**, **Share**, or **Delete** — all three actions live in this one menu.
Practice, Tests tab. The three-dot menu on a test card holds Rename, Share, and Delete.
### Share Your Test
Found your test helpful? Share it **during the test** or from the **Test Results** page, and optionally include your score to challenge friends or highlight your achievement.
**During a test:**
1. Open the test menu and select **Share**. The **Share Test with a Friend** dialog opens with tabs to share **this Test** or **this Study Set**, a preview card, and controls for who has access.
2. Select **Copy Link**, or share directly via the **WhatsApp**, **Telegram**, or **Text** icons at the bottom.
Share Test with a Friend dialog, Share this Test tab. Select Copy link, or one of the WhatsApp, Telegram, or message icons.
**From the Test Results page:**
1. Select **Challenge Them** within the **Proud of your progress?** prompt to open **Share Your Results**.
2. Choose how to share: **Help a Friend** shares the test without your score, **Challenge** shares it with your score so a friend can try to beat it, and **Celebrate** highlights your achievement. A live preview of the shareable card updates as you choose.
3. Select **Copy Link**, or share directly via **WhatsApp**, **Telegram**, or **Text**.
Share Your Results dialog, Celebrate selected. The PREVIEW panel shows the card that will be shared.
### Delete Your Test
1. Navigate to **Practice → Test**, select the **⋮** button on the desired test card, and choose **Delete**.
2. Confirm by selecting **Delete** in the dialog. This action is permanent.
Delete Test? dialog. Select the red Delete button to remove "Projectile Motion Practice Test" for good.
Warning
Be cautious as this cannot be undone!
Product knowledge
This page is for the StudyFetch app and is product knowledge for [StudyFetch.com](https://studyfetch.com).
## Take and Review a Practice Test
Source: https://studyfetch-academy.honen.com/docs/6a63c0556f4e994396e156e0
Product tutorial
StudyFetch app
This page is for the StudyFetch app and is product knowledge for [StudyFetch.com](https://studyfetch.com).
## Taking Your Test
### Step 1: Choose your layout
1. By default, questions are presented one at a time.
Test, question 1 / 12. Questions appear one at a time, with the progress bar at 0%.
1. To view all practice test questions at once, select the **...** (Settings) button and choose **View all questions**. Select it again to remove the checkmark and return to single-question view.
Test, all-questions layout. Questions 1 and 2 stack on a single scrolling page.
### Step 2: Answer questions
1. Choose your answer by selecting an option, or entering your response in the answer field when a typed response is indicated.
2. In single-question view, selecting an answer automatically advances you to the next question and updates the progress bar — there's no separate "next" click required. You can still return to any question and change your answer at any time before submitting.
Test, question 2 / 12. Answering question 1 moved the counter on and the progress reads 8%.
### Step 3: Navigation tools
1. A **progress bar** at the top of the practice test fills as you answer questions, with your **completion percentage** shown on the right.
2. Use the **\<** (Previous) and **>** (Next) buttons on the toolbar to move between questions in any order. Select the **grid icon** next to Settings to jump straight to any question — a numbered list opens showing which questions are **Answered** and which are **Unanswered**.
Test, question 1 / 12. The grid button beside the three-dot menu opens the question list.
1. If you want to restart your practice test, select the **...** (Settings) button on the toolbar and choose **Restart**. The same menu also lets you toggle **Enable animations** and re-open the onboarding walkthrough with **Show tutorial again**.
Test, three-dot menu open. Restart sits under ACTIONS, above the PREFERENCES entries.
### Step 4: Submit and view your score
1. Once you've answered all the questions, the **Submit Test** button becomes active. Click it to confirm you're ready for grading.
Submit Test? dialog. Select Submit to send the test for grading, or Cancel to keep working.
1. StudyFetch briefly shows a **Grading your test...** loading screen, then instantly displays your score percentage, the number of questions answered correctly, and a topic-by-topic performance breakdown.
Keep Learning!, SCORE: 50%. The screen reports 6 out of 12 correct and offers View Answers and Re-take Test.
If you'd like to try again before reviewing this attempt, select **Retake Test**. Otherwise, continue to the next step to review your practice test.
### Step 5: Review your results and learn with Sparky
1. Select **View Answers** to open the **Review Your Test** page. Scroll through to see each question with your answer and the correct answer highlighted — correct in green, incorrect in red. A **Retake** button in the top right lets you start a fresh attempt directly from this page.
Review Your Test, 6 / 12. Each question shows the correct answer outlined in green and a wrong answer outlined in red.
1. Select **Chat About This Question** next to any question to open the **Sparky** chat panel, already scoped to that question. Type your own message or choose a suggested prompt to get a personalized explanation.
Review Your Test with the Chat panel open. The panel reads Looking at question 1 and offers four suggested prompts.
Use your results to guide targeted study, then retake the practice test to reinforce mastery — either from the Review page's **Retake** button, or from the Test feature page by opening a completed test's **⋮** menu and choosing **Retake**.
Product knowledge
This page is for the StudyFetch app and is product knowledge for [StudyFetch.com](https://studyfetch.com).
## Test Features and Benefits
Source: https://studyfetch-academy.honen.com/docs/6a63c1093bb4714e6df0dfc6
Product tutorial
StudyFetch app
This page is for the StudyFetch app and is product knowledge for [StudyFetch.com](https://studyfetch.com).
## Test Features and Benefits
- **Customizable Question Types**: Choose from multiple choice, free response, fill-in-the-blank, and more
- **Targeted Testing**: Focus on specific topics or broader subject areas
- **Immediate Feedback**: Get instant grading and explanations for each question
- **AI-Powered Review**: Ask Sparky to explain concepts you didn't understand
- **Exam Preparation**: Practice with formats similar to standardized tests
- **Integration with Other Tools**: Your tests can be used to generate flashcards, quizzes, and other study materials. You can create new study resources directly from your test by selecting **Turn Into** at the top of the Test Results page
Turn Into menu on the results screen. Pick a tool such as Flashcards or QuizFetch to build from this test.
or from the top toolbar while taking a test, then choosing your desired study tool.
Turn Into menu during a test. The same list of tools is available from the top toolbar.
You can also generate study materials from within each feature's respective section.
## Related Features
After using the Test feature, you may want to:
- Try QuizFetch for a more game-like testing experience
- Create Flashcards to memorize concepts you struggled with
- Generate Notes for topics that need further review
Product knowledge
This page is for the StudyFetch app and is product knowledge for [StudyFetch.com](https://studyfetch.com).
## Add a Rubric and Submit
Source: https://studyfetch-academy.honen.com/docs/6a52f59624a5c54b90a40ce5
Product tutorial
StudyFetch app
This page is for the StudyFetch app and is product knowledge for [StudyFetch.com](https://studyfetch.com).
### Step 3: Provide a rubric
After adding your assignment, choose whether you have a rubric:
- **Yes, I have a rubric** — provide your own grading criteria.
- **No, skip this step** — let Sparky determine the grading automatically.
### Adding your rubric
If you have a rubric, choose how to add it:
- **Upload Rubric** — upload a PDF, DOC, DOCX, PPT, PPTX, PNG, or JPEG file.
- **Paste Rubric** — type or paste rubric text directly.
- **Take Photos** — scan a QR code and photograph a physical rubric from your phone.
Grade New Assignment, Step 3: Add your rubric. The Upload Rubric tab with a rubric file uploaded.
Once your rubric is added (or skipped), click **Next** to review your assignment details and submit for grading — see Submit an Assignment.
## Open Assignment Grader
Source: https://studyfetch-academy.honen.com/docs/6a52d82180aa1a08bac85085
Product tutorial
StudyFetch app
This page is for the StudyFetch app and is product knowledge for [StudyFetch.com](https://studyfetch.com).
## Introduction
Assignment Grader allows learners to upload assignments and rubrics and receive instant AI-powered grading with detailed feedback and suggestions for improvement. It helps learners understand their work more clearly, improve more effectively, and build confidence in their learning.
## Accessing Assignment Grader
1. On the left-hand side of your dashboard, click **Practice** and then select **Essay Grader**.
StudyFetch Home. Click Practice in the left sidebar, then Essay Grader.
1. All previous assignments associated with your study set can be found on this page.
Assignment Grader page. Previously graded assignments are listed as cards, each showing a letter grade and a score.
1. To open a previous assignment, simply click on the name of the assignment you would like to view.
2. To grade a new assignment, follow the steps outlined below.
Product knowledge
This page is for the StudyFetch app and is product knowledge for [StudyFetch.com](https://studyfetch.com).
## Review Results and Edit Rubric
Source: https://studyfetch-academy.honen.com/docs/6a52f5c424a5c54b90a40cf1
Product tutorial
StudyFetch app
This page is for the StudyFetch app and is product knowledge for [StudyFetch.com](https://studyfetch.com).
## Accessing your performance
After grading completes, you land on your results page: an overall score, a category-by-category breakdown, and your original document annotated with inline comments.
Assignment results page. Overall score and category breakdown on the left, your annotated document on the right.
### Viewing your grade breakdown
Click **Show Details** to expand full written feedback for every rubric category — what you did well and what to improve — alongside an overall summary.
Assignment results page, Show Details expanded. Written feedback and points for each rubric category.
## Viewing and editing your assignment rubric
Click **View Rubric** from the results page to see the exact criteria and point breakdown used to grade your work.
Assignment Rubric modal. Point levels and descriptions for each category.
Click **Edit** on any category to adjust its description, point breakdowns, or add new criteria, then **Save Changes**.
Assignment Rubric modal, category in edit mode. Change the description and point rows, then click Save Changes.
## Submit an Assignment
Source: https://studyfetch-academy.honen.com/docs/6a52f58124a5c54b90a40cdf
Product tutorial
StudyFetch app
This page is for the StudyFetch app and is product knowledge for [StudyFetch.com](https://studyfetch.com).
## Grade a New Assignment
### Step 1: Add your assignment
Click **+ Grade New Assignment**, then choose how you'll add your work: **Upload Files**, **Use Text Editor**, or **Phone Camera**.
Grade New Assignment, Step 1: Submit the assignment. Pick Upload Files, Use Text Editor, or Phone Camera.
### Upload Files
Select **Upload Files** to submit a PDF, DOC, DOCX, PPT, PPTX, PNG, or JPEG from your computer. Click **Browse Files** or drag and drop the document into the box.
Grade New Assignment, Step 1: Submit the assignment. The drop area shows the uploaded file, with a Remove File button below it.
### Use Text Editor
Select **Use Text Editor** to type or paste your assignment directly into StudyFetch after completing setup. The editor supports formatting, tables, images, and LaTeX via the Insert menu.
### Phone Camera
Select **Phone Camera** to scan a QR code with your phone and photograph a physical assignment. Allow camera access, take a photo of each page, then select **Finish and Upload to Set** to send the pages back to your desktop session.
## Step 3: Add a rubric (optional)
Choose whether to provide your own grading rubric or let Sparky generate one automatically. See Add a Rubric and Submit for details.
## Step 4: Submit for grading
Review your assignment and rubric summary, then click **Submit**. Sparky uploads your files, processes them, builds or applies the rubric, compares your work against it, and calculates a final grade.
Grading Assignment screen. Progress runs through the uploading and processing stages.
When grading finishes, you'll land on your results page with a full grade breakdown and feedback — see Review Results and Edit Rubric.
## Submit New Attempts and Manage Assignments
Source: https://studyfetch-academy.honen.com/docs/6a52f5ac24a5c54b90a40ceb
Product tutorial
StudyFetch app
This page is for the StudyFetch app and is product knowledge for [StudyFetch.com](https://studyfetch.com).
## Submit a new attempt
After reviewing feedback from Sparky, revise your work and click **New Attempt** to submit another round for grading. Each attempt is tracked separately, and your best attempt is highlighted at the top.
Assignment results page. Click New Attempt in the top right to submit another round.
New attempts follow the same submission flow as your first — upload a file, use the text editor, or use your phone camera — and are graded against the same rubric so you can track improvement across attempts.
## Manage assignments
From the Assignment Grader list, click the **⋮** menu on any assignment card to view or delete it.
Assignment Grader page, card menu open. Choose View or Delete.
Deleting an assignment is permanent and removes all of its attempts.
Delete Assignment dialog. Click Delete to confirm or Cancel to back out.
## Choose and Customize an Explainer Video
Source: https://studyfetch-academy.honen.com/docs/6a5639aff5c9d6009d358912
Product tutorial
StudyFetch app
This page is for the StudyFetch app and is product knowledge for [StudyFetch.com](https://studyfetch.com).
### Step 3: Choose an Explainer Video Type
Select the style of explainer video you'd like to generate:
- **Classic Explainer** — best for advanced or technical topics that involve detailed explanations, complex concepts, or equations.
- **Animated Explainer** _(Experimental)_ — a simple, animated, single-speaker breakdown, best for easier concepts.
- **Animated Conversation** _(Experimental)_ — presents the topic as a dialogue between two animated characters.
Which type of Explainer Video would you like to create?, Step 3 of 4. Pick a video type, then click Next.
Click **Next** to continue to customization.
### Step 4: Customize Your Explainer Video
The customization step now lives on a single screen rather than a multi-page flow. From here you can set:
- **Presentation style** — Professional, Teacher, Quick Guide, Storyteller, Comedy, Deep Dive, or Other (custom).
- **Video length** — Short (~3 min), Medium (~3-8 min), Long (~8-12 min), or Extended (18-20 min).
- **Visual theme** — Clean, Dark Pro, Blackboard, Minimal, Warm, or Custom (with your own colors).
- **Content enhancement** — toggles to include relevant web content and web images, plus a language selector for the narration.
A live summary card on the right shows your selected style, length, and theme as you configure them.
Customize your Explainer Video, Step 4 of 4. Set how the material is presented, the Video Length, and the Visual Theme, then click Create.
1. Once you're done, click **Create**.
### Generating Your Video
Your Explainer Video begins generating, with a live countdown and an option to try another study feature while you wait.
Explainer video page, generating. A countdown runs while the video is built, with study features to try while you wait.
1. Proceed to [Watch an Explainer Video](https://www.studyfetch.com/docs/tutorial-doc-format/explainers#navigating-your-explainer-video) for next steps.
Product knowledge
This page is for the StudyFetch app and is product knowledge for [StudyFetch.com](https://studyfetch.com).
## Create an Explainer
Source: https://studyfetch-academy.honen.com/docs/6a563998f5c9d6009d35890c
Product tutorial
StudyFetch app
This page is for the StudyFetch app and is product knowledge for [StudyFetch.com](https://studyfetch.com).
## **Creating Explainers**
### Step 1: Start a New Explainer
1. From the Explainers List, click **+ Create Video** in the top right.
### Step 2: Choose Your Source
Choose how you'd like to generate your explainer video: **Create from Materials** or **Create from Topic**.
Create Explainer Video, How would you like to create your Explainer Video? Choose Create from Materials or Create from Topic.
#### Method 1: Create from Materials
1. Select **Create from Materials**, then choose from your previously uploaded materials or click **+ Upload New Material** to add something new. Selected materials appear in the right-side preview panel. When you're ready, click **Next**.
Select your materials, Step 2 of 4. Pick the materials to generate the video from, then click Next.
#### Method 2: Create from Topic
1. Select **Create from Topic**, then fill in the **Topic to learn** field (or pick one of the suggested prompts like Psychology, Economics, or Marketing), describe **what about this topic** you want covered, and choose a **skill level** — High School, AP Course, College, or Professional. A live preview on the right updates as you type. Click **Next** when you're done.
What should this Explainer Video cover?, Step 2 of 4. Fill in Topic to learn, say what you want covered, and pick a skill level.
1. Proceed to [Choose and Customize an Explainer Video](https://www.studyfetch.com/docs/tutorial-doc-format/explainers#step-3-choose-an-explainer-video-type).
Product knowledge
This page is for the StudyFetch app and is product knowledge for [StudyFetch.com](https://studyfetch.com).
## Explainers Overview
Source: https://studyfetch-academy.honen.com/docs/6a5637e0f5c9d6009d3588f4
Product tutorial
StudyFetch app
This page is for the StudyFetch app and is product knowledge for [StudyFetch.com](https://studyfetch.com).
## Introduction
Explainer Videos turn your study materials — or any topic you want to learn — into narrated video lessons. If you learn best by watching and listening rather than reading, Explainers break down complex concepts with visuals, animation, and structured narration so you can absorb material at your own pace.
## Accessing Explainers
### Step 1: Open Explainers
1. On the left-hand side of your Dashboard, click **Audio & Video** and then select **Explainers**.
Study set page, left sidebar. Click Explainers under Practice & Activities.
### Step 2: Browse the Explainers List
1. The Explainers page opens to **Explore**, a gallery of video explainers you can browse for inspiration. Use the **All**, **Classic**, and **Animated** tabs to filter by video type, or use **Search videos...** to find a specific topic. Click **My Videos** to see explainers you've created yourself.
Explainers List, Explore tab with the Animated filter selected. Browse the gallery of explainer videos or search them with Search videos...
1. Selecting a filter tab, like **Classic**, narrows the gallery down to that video type, and each thumbnail shows its runtime so you can gauge length before watching.
Explainers List, Explore tab with the Classic filter selected. The gallery narrows to that video type, and each card shows its runtime.
1. Click **+ Create Video** in the top right at any time to start building your own Explainer.
Product knowledge
This page is for the StudyFetch app and is product knowledge for [StudyFetch.com](https://studyfetch.com).
## Imagine Explainers Tutorial
Source: https://studyfetch-academy.honen.com/docs/6a066a5393786f5846f9b2d8
Product tutorial
StudyFetch app
This page is for the StudyFetch app and is product knowledge for [StudyFetch.com](https://studyfetch.com).
Create an animated video explainer in just a few minutes.
#### How to create a video explainer
To get started with Imagine Explainers:
1. Visit [imagineexplainers.com](https://imagineexplainers.com)
2. Create a free account or log in to your existing account
3. Once logged in, you'll be taken to the main dashboard where you can start creating video explainers
1. On your homepage, you will immediately see a text prompt where you can type in what you want to learn about. You can also tick the Real Time Web Search button to allow the AI to use real time data and get the latest information about your topic from the internet
Imagine an Explainer Video, topic entered. The prompt field reads All about tsunamis and Real Time Web Search is turned on.
1. Click on **Create Video** > Choose the video length you want to generate. Note that longer videos will include more detail and take more time to create > Click on **Generate**
2. After 5 minutes, your Explainer video will be generated.
How Do Tsunamis Form and Move? (5 min Animation), video generated. The Spark.E AI panel opens at the right with its greeting.
1. While watching, feel free to ask Sparky, your AI assistant, any questions to deepen your understanding of the topic you're learning. Sparky is here to help clarify concepts and provide additional insights!
How Do Tsunamis Form and Move? (5 min Animation), question answered. Spark.E AI replies to What was the worst tsunami recorded?
1. Scrolling down, you will see a comment section. On the right side, a list of recommended videos
How Do Tsunamis Form and Move? (5 min Animation), comments. The reader types in the Write your comment... box and clicks Post, with Recommended Videos listed at the right.
1. The comment section is there as your videos can be viewed publicly by simply clicking the more options icon and clicking **Make Public**. You may also use this option to erase your video by clicking **Delete Video**
How Do Tsunamis Form and Move? (5 min Animation), more options menu. The menu lists Make Public and Delete Video.
1. If you are not satisfied with the video that has been generated, you may click on the **Regenerate** button so it can create a new one. The icons next to that is the **Like** button, the **Share** button, and the **Download** button
How Do Tsunamis Form and Move? (5 min Animation), Regenerate tooltip. Hovering the first control in the row shows the Regenerate label.
#### Exploring Imagine Explainers
1. On the upper side of your screen, you will see different pages you can explore
Imagine an Explainer Video, top navigation. A red box marks the My Videos, For You and Following links.
1. The **My Videos** page stores all of the videos you have created using Imagine Explainers
My Explainer Videos. The page lists the 2 videos this account has created.
1. The **For You** Page will show you recommended videos based on your watch history
For You. The page lists recommended videos based on your watch history.
1. The **Following** page will show you videos created from the people you follow
Following Feed. Recent Videos lists posts from the accounts you follow.
#### How to Follow someone on Imagine Explainers
1. If you're watching a great video and you'd like to see more from this user, simply click on their name to view their profile
Today's Top News Stories Explained in 5 Minutes (Animated), creator link. A red circle marks the Imagine Explainers name under the title.
1. On their profile page, click on the **Follow** button on the right side
Imagine Explainers profile, Video tab. The reader clicks Follow at the top right, circled in red.
Product knowledge
This page is for the StudyFetch app and is product knowledge for [StudyFetch.com](https://studyfetch.com).
## Manage Explainer Videos
Source: https://studyfetch-academy.honen.com/docs/6a563b7ef5c9d6009d358936
Product tutorial
StudyFetch app
This page is for the StudyFetch app and is product knowledge for [StudyFetch.com](https://studyfetch.com).
## Managing Your Explainer Video
Open any explainer video you've created to manage it. Below the video, next to your name, you'll find **Like**/**Dislike** buttons, a **Share** button, and a **⋮** menu with **Update Title**, **Make Private**, and **Delete**.
Explainer video page, three dot menu open. The menu lists Update Title, Make Private, and Delete.
### Renaming Your Video
1. Click the **⋮** menu and select **Update Title**, then edit the **Video Title** field and click **Update**.
Update Video Title modal. Edit the Video Title field, then click Update.
### Sharing Your Video
1. Click the **Share** button below the video to open the share dialog. From here you can toggle between sharing **this Explainer** or **this Study Set**, copy a link, or share directly.
Share Explainer with a Friend, Share this Explainer tab. Click Copy link or use one of the share icons.
### Rating Your Video
Use the **thumbs up**/**thumbs down** icons next to your name to tell StudyFetch whether the video was helpful.
### Privacy and Deleting
- From the **⋮** menu, click **Make Private** to remove the video from the public Explore gallery, or **Make Public** to add it back.
- Click **Delete** to permanently remove the video. You'll be asked to confirm — this action can't be undone.
## Related Features
After creating a Video Explainer, you might want to:
- Check out [**Notes**](https://www.studyfetch.com/docs/tutorial-doc-format/notes) for a text-based version of your materials
- Use [**Flashcards**](https://www.studyfetch.com/docs/tutorial-doc-format/flashcards) to test your recall of key concepts
- Try [**QuizFetch**](https://www.studyfetch.com/docs/tutorial-doc-format/quizfetch) to test your understanding of the material
Product knowledge
This page is for the StudyFetch app and is product knowledge for [StudyFetch.com](https://studyfetch.com).
## Watch an Explainer Video
Source: https://studyfetch-academy.honen.com/docs/6a563b9df5c9d6009d358952
Product tutorial
StudyFetch app
This page is for the StudyFetch app and is product knowledge for [StudyFetch.com](https://studyfetch.com).
## Navigating Your Explainer Video
Once a video is ready, opening it brings you to its watch page: the player is front and center, with the title, creator, view count, and description below it. On the right, a **Master This Topic** panel suggests related study tools (a Tutor session, Flashcards, or a Quiz) built directly from the video's subject matter, and a **Keep Watching** list surfaces similar explainers.
Explainer video watch page. The player sits above the title, creator, and view count, with Master This Topic and Keep Watching panels on the right.
### Playback Controls
Standard video controls are available along the bottom of the player when you move your mouse over it:
- Click the video, or the **Play/Pause** icon, to start or pause playback.
- Click and drag the **progress bar** to jump to any point in the video.
- Use the **Sound** icon to mute, unmute, or drag its slider to adjust volume.
- Open the **Settings** (gear) icon to change playback **Speed** or video **Quality**.
- Click the **Full Screen** icon to expand the player, and press **Esc** or the Minimize icon to return to the standard view.
### Video Outline
Click **...more** below the video to expand a structured outline of everything the video covers; click **Show less** to collapse it again.
Product knowledge
This page is for the StudyFetch app and is product knowledge for [StudyFetch.com](https://studyfetch.com).
## Audio Recap: Access and Create
Source: https://studyfetch-academy.honen.com/docs/6a5309782cf59c73ff1b1555
Product tutorial
StudyFetch app
This page is for the StudyFetch app and is product knowledge for [StudyFetch.com](https://studyfetch.com).
Audio Recap turns study materials or a topic into an audio summary you can listen to while reviewing on the go. Use this page to open Audio Recap, start a new recap, and choose the source.
### Open Audio Recap
Go to Audio & Video, then select Audio Recap.
### Choose a source
Create from existing materials or generate from a topic.
### Add focus
Use a focus topic to shape the output.
## Open Audio Recap
1. On the left-hand side of your dashboard, click **Audio & Video**, then select **Audio Recap**.
 Study set page, left sidebar. Click Audio Recap under Practice & Activities.
2. The Audio Recaps page lists existing recaps for the current study set and lets you start a new one.
 Audio Recaps, empty state. Click + Generate Audio Recap to start a recap.
3. To open a specific Audio Recap, click its name in the list.
## Start a new Audio Recap
Select **+ Generate Audio Recap** from the top right of the Audio Recaps page to begin the three-step creation flow.
## Choose your source
1. Choose **Create from Materials** to use study materials you've already uploaded, or **Create from Topic** to generate a recap from a prompt.
 Create an Audio Recap, Step 1 of 3. Choose Create from Materials or Create from Topic.
2. After selecting **Create from Materials**, choose the uploaded materials to include (documents, folders, or linked videos), then click **Next**.
 Create an Audio Recap, Step 2 of 3: Select your materials. Choose the materials to include, then click Next.
3. **Create from Topic** works the same way, but prompts you for a topic, an optional web-search toggle, and an optional theme instead of a materials list.
Takeaway
### Pick the source that matches your _goal_.
Use materials when you want the recap grounded in uploaded content. Use a topic when you want to learn something new from a prompt.
Product knowledge
This page is for the StudyFetch app and is product knowledge for [StudyFetch.com](https://studyfetch.com).
## Audio Recap: Customize and Generate
Source: https://studyfetch-academy.honen.com/docs/6a5425c2deb2f78c2a5f9b4a
Product tutorial
StudyFetch app
This page is for the StudyFetch app and is product knowledge for [StudyFetch.com](https://studyfetch.com).
After you choose a source, customize the title, length, recap type, voice, and language before generating the final Audio Recap.
### Name and length
Add a title and choose how long the recap should be.
### Recap type
Choose Summary, Lecture, Podcast, Audio Book, or Music.
### Voice and language
Select the speaker setup and output language where available.
## Customize your Audio Recap
1. Name your Audio Recap in the **Title your Audio Recap** field, and optionally add a **Focus Topic** to steer what the recap emphasizes. If you leave the title blank, StudyFetch names the recap for you.
 Create an Audio Recap, Step 3 of 3: Customize your Audio Recap. Enter a title, add an optional Focus Topic, then pick a Recap Length.
2. Choose a recap length from **Short**, **Medium**, **Long**, **Extended**, **Complete**, or **Ultra**.
## Choose the recap type
1. Scroll down to **Recap Type** and select one format: **Summary**, **Lecture**, **Podcast**, **Audio Book**, or **Music**. A **Voice Configuration** section appears below the list once you've picked a type.
 Create an Audio Recap, Step 3 of 3: Customize your Audio Recap. Pick one Recap Type from Summary, Lecture, Podcast, Audio Book, or Music.
### Summary
A concise audio overview for reviewing key concepts quickly.
### Lecture
A structured lecture-style explanation for deeper understanding.
### Podcast
A conversational format for learning while on the go.
### Audio Book
A narration-driven format for comprehensive review.
### Music
A custom song with vocals based on your study content.
## Configure the voice
### Summary, Lecture, or Audio Book
These recap types use a single speaker. Open the **Voice** dropdown shown above to change the narrator.
### Podcast
1. Choose **Single Voice** for one narrator, or **Multi Voice** for two speakers who trade off during the conversation. Selecting Multi Voice adds a second voice picker.
 Create an Audio Recap, Step 3 of 3 with Podcast selected. Choose Multi Voice, then set Voice 1 and Voice 2.
### Music
Music recaps don't offer voice customization, but they do use their own length options instead of the standard Short–Ultra scale.
 Create an Audio Recap, Step 3 of 3 with Music selected. Recap Length offers 15 seconds, 30 seconds, 1 minute, and 2 minutes.
## Finalize and generate
1. Open **Advanced Settings** to set the output language if you need something other than the default. The preview card on the right always shows the language, length, type, and speaker(s) currently selected.
2. Click **Generate Audio Recap**. StudyFetch analyzes the source materials and builds the recap.
 Create Audio Recap, generating. A progress bar reads Generating audio recap while the recap builds.
Takeaway
### Match the format to how you want to _review_.
Choose Summary for quick review, Lecture for structured explanation, Podcast for conversational learning, Audio Book for narration, or Music for rhythm and repetition.
Product knowledge
This page is for the StudyFetch app and is product knowledge for [StudyFetch.com](https://studyfetch.com).
## Audio Recap: Listen and Ask Questions
Source: https://studyfetch-academy.honen.com/docs/6a5429228cd4ff1a19b6e136
Product tutorial
StudyFetch app
This page is for the StudyFetch app and is product knowledge for [StudyFetch.com](https://studyfetch.com).
Once your Audio Recap is ready, use the player controls, transcript, source view, and question tools to review without leaving the recap.
### Play the recap
Start, pause, rewind, fast forward, or jump to a specific time.
### Follow the transcript
Show or hide the transcript while the audio plays.
### Ask questions
Type or speak a question and get an answer during playback.
## Play your audio
1. When the Audio Recap is ready, click **Play** to start listening.
 Audio Recap player, stopped at the start. Click Play to start the recap.
2. While playing, the Play button becomes Pause. Rewind (15s) and fast forward (30s) sit on either side of it, and you can drag the progress bar to jump to any point. Use the slider next to the speaker icon to adjust volume, or click the icon to mute and unmute.
 Audio Recap player, playing. The centre button now shows Pause, with rewind 15 seconds and forward 30 seconds on either side.
## View the transcript and source
1. Select **Show Transcript** below the player controls to follow along with the text. It updates in real time as the recap plays; select **Hide Transcript** to close it. **View References** next to it shows which of your source materials the current section came from.
 Audio Recap player, transcript open. Click Hide Transcript to close the panel.
## Ask questions while listening
While listening, you can ask questions and receive answers in real time to clarify concepts without leaving the recap.
1. Type your question into the **Ask anything about this topic...** field below the transcript, or click the microphone icon to ask by voice instead. Press **Enter** or click the send arrow to submit.
 Audio Recap player, transcript open with a question typed. Enter your question in the ask field below the transcript, then press Enter or click the send arrow.
2. The recap pauses, and the question and answer appear directly above the ask field. Playback resumes from where it left off once you're ready to continue.
 Audio Recap player, playing. The panel below the player shows Your Question and the answer.
Takeaway
### Use questions to keep the recap _active_.
The player can pause, answer, and resume so you can clarify a concept without breaking your study flow.
Product knowledge
This page is for the StudyFetch app and is product knowledge for [StudyFetch.com](https://studyfetch.com).
## Audio Recap: Manage and Extend
Source: https://studyfetch-academy.honen.com/docs/6a542aa7620fb121cbf4520c
Product tutorial
StudyFetch app
This page is for the StudyFetch app and is product knowledge for [StudyFetch.com](https://studyfetch.com).
Use the Audio Recap menu to rename, share, delete, and turn a recap into other study tools.
### Rename
Edit the recap name from the dropdown next to the title.
### Share
Copy a link or share through supported apps.
### Delete
Remove an Audio Recap from the Audio Recaps page.
## Change the name or share from inside a recap
1. While viewing a recap, click the dropdown arrow next to its name in the breadcrumb to open **Rename**, **Share**, and **Create Audio Recap**.
 Audio Recap player, breadcrumb menu open. The menu lists Rename, Share, and Create Audio Recap.
2. Selecting **Rename** opens a dialog where you can edit the name and click **Save**.
 Rename Audio Recap. Edit the Name field, then click Save.
3. Selecting **Share** (also available from the top-right Share button) opens a dialog to copy a link, share to WhatsApp/Telegram/Text, and control who has access.
 Share Audio Recap with a Friend, Share this Audio Recap tab. Click Copy link, or use one of the messaging icons.
## Manage recaps from the Audio Recaps list
1. From the left-hand sidebar, click **Audio & Video**, then **Audio Recap**, to see every recap for the current study set. Click the **three-dot menu** on a card for **Play**, **Rename**, **Share**, or **Delete**.
 Audio Recaps, card menu open. The three-dot menu on a recap card offers Play, Rename, Share, and Delete.
2. Choosing **Delete** asks you to confirm — this action is permanent.
 Delete Audio Recap?, confirmation. Click Delete to remove the recap, or Cancel to keep it.
Warning
### Deleting a recap cannot be _undone_.
Confirm deletion only after you are sure you no longer need the Audio Recap.
## Turn an Audio Recap into other study tools
The **Turn Into** button next to the recap title (visible in the dropdown screenshot above) converts a recap's content into other StudyFetch formats — flashcards, quizzes, and more — without starting over from your source materials.
## Benefits of Audio Recap
- **Mobile learning:** Study while commuting, exercising, or doing other activities.
- **Auditory learning:** Review in a format that works well for students who learn by listening.
- **Customization:** Choose voice, language, format, and length to match your preferences.
- **Transcript included:** Reinforce learning with both audio and text.
- **Variable playback:** Use playback controls to move through the recap at your own pace.
- **Integration with other tools:** Turn an Audio Recap into practice tests, quizzes, and other study materials.
## When to use Audio Recap
- You are preparing for exams and want to review on the go.
- You want to reinforce learning through a different format.
- You are an auditory learner who prefers hearing information.
- You want to make use of time spent commuting or exercising.
- You want to create a podcast-like experience from study materials.
## Related StudyFetch features
After creating an Audio Recap, you can also use Notes for text-based study materials, Flashcards to test recall, and QuizFetch to check understanding.
Takeaway
### Audio Recap works best when review needs to be _portable_.
Use it when listening fits your study time better than reading or clicking through a study set.
Product knowledge
This page is for the StudyFetch app and is product knowledge for [StudyFetch.com](https://studyfetch.com).
## Arcade Tutorial
Source: https://studyfetch-academy.honen.com/docs/6a5451b3b47a1f7e9e4bb168
Product tutorial
StudyFetch app
This page is for the StudyFetch app and is product knowledge for [StudyFetch.com](https://studyfetch.com).
Love games? Ready to make learning fun?
Introducing **Arcade** - the ultimate way to turn your study materials into exciting, interactive games!
#### How to use the Arcade feature
1. In the lefthand sidebar, open **Practice** and choose **Arcade**.
1. You'll land on the Arcade list: your own games under **My Games**, or community games under **Explore** (sort by Similar, Latest, or Popular). Each card shows the game type, creator, and play count.
Arcade List, Explore tab with Similar sort selected. Each game card lists its game type and play count.
### Creating a Game
1. Click **+ Create Game**. Choose how to build it: **Create from Materials**, **Create from Topic**, or **Create from Flashcards**.
Create a Game, Step 1 of 4. The reader picks Create from Materials, Create from Topic, or Create from Flashcards.
1. If creating from a topic, type in what you want to learn about. If creating from materials or flashcards, pick from what's already in the Study Set.
2. Next, select a game type. There are now 8 to choose from: **Match Game, City Run, Rocket Defender, Platform Jump, Track Race, Jetpack Quiz, Cloud Bridge,** and **Quiz With Friends** (multiplayer).
Create a Game, Step 3 of 4: Select a Game. The reader picks a game type card, then clicks Next.
1. Optionally give your game a name and a style (for example "Retro 80s," "Neon Cyberpunk," "Space Adventure" — anything you can think of). A live preview card updates as you type.
2. Click **Create a Game**.
Create a Game, Step 4 of 4: Game Details. The reader enters a Game Name and Game Style, then clicks Create a Game.
1. Once your game finishes generating, click **Play Game**. You'll see brief instructions for the selected game type — click **Start Game** when ready.
WWII Quiz Aces, instructions before play. The reader reads the controls and rules, then clicks Start Game.
1. Enjoy the game while you learn!
WWII Quiz Aces, Wave 1 in play. The reader shoots the answer planes that are wrong for the question When did WWII begin?
Product knowledge
This page is for the StudyFetch app and is product knowledge for [StudyFetch.com](https://studyfetch.com).
## Account Login and Management
Source: https://studyfetch-academy.honen.com/docs/6a6152bb81be4e67d4588e52
Support docs
StudyFetch app
This page is for the StudyFetch app and is product knowledge for [StudyFetch.com](https://studyfetch.com).
## Login Methods
- Our platform currently only supports logging in with the method used during sign-up. If you signed up using Google or Apple, you must continue to use your Google or Apple account to log in.
## Troubleshooting Login Issues
If you are unable to log in with your Google account, here are some options:
1. **Reset your Google Account Password:** If you have forgotten your Google account password, you can reset it through your Google profile. This will allow you to regain access to your account and log into our platform.
2. **Cancel Subscription, Delete Account, and Create a New Account (Data Loss):** If you wish to use a different email address for your account, you can cancel your current subscription, delete your account, and create a new one with the desired email address. Please note that this will result in the loss of all your existing data and materials.
## Refunds for Cancelled Subscriptions
- If you cancel a yearly subscription or a recently charged monthly subscription that you have barely used, you may be eligible for a refund for the unused portion of the service.
- Contact our support team to request a refund if you decide to cancel your subscription.
## Key Points to Remember
- Login method is determined at sign-up and cannot be changed.
- Reset your Google account password if you are having trouble logging in.
- Creating a new account with a different email address will result in data loss.
- Refunds may be available for cancelled subscriptions under certain conditions.
 Welcome back to StudyFetch login page. Sign in with Google or Apple, or enter your email and password and select Login.
Product knowledge
This page is for the StudyFetch app and is product knowledge for [StudyFetch.com](https://studyfetch.com).
## Account Recovery and Password Reset
Source: https://studyfetch-academy.honen.com/docs/6a61530f81be4e67d4588e63
Support docs
StudyFetch app
This page is for the StudyFetch app and is product knowledge for [StudyFetch.com](https://studyfetch.com).
## Account Recovery Options
Please begin by visiting the login page and exploring the available account recovery options:
- **"Forgot Password" link:** This will initiate the password reset process
## Password Reset
If you choose to reset your password, follow these steps:
1. Click on the "Forgot Password" link on the login page.
2. Enter your email address or username associated with your StudyFetch account.
3. Check your email inbox for a "Reset Password" email.
4. Click on the link provided in the email to create a new password.
## Troubleshooting
- **Check Your Spam Folder:** If you do not receive the "Reset Password" email within a few minutes, please check your spam or junk folder. Sometimes, automated emails can be mistakenly filtered into these folders.
- **Email Delivery Delays:** In rare cases, email delivery may be delayed due to network congestion or other technical issues. If you still have not received the email after a reasonable amount of time, please try the password reset process again.
## Further Assistance
If you continue to experience difficulties accessing your account after following these steps, please contact our support team for further assistance. We are here to help you resolve this issue as quickly as possible.
 Reset your password screen. Enter the email address on your account, then select Send Reset Link.
Product knowledge
This page is for the StudyFetch app and is product knowledge for [StudyFetch.com](https://studyfetch.com).
## Common Questions
Source: https://studyfetch-academy.honen.com/docs/6a067a05f983a7215b738de1
Support docs
StudyFetch app
This page is for the StudyFetch app and is product knowledge for [StudyFetch.com](https://studyfetch.com).
### What is StudyFetch?
StudyFetch is a revolutionary new platform that allows you to upload your course materials and create interactive study sets. You can study with an AI tutor, create flashcards, generate notes, take practice tests, and more.
### What types of course material can I upload?
You can upload a variety of formats including PDF, DOC, DOCX, PPT, PPTX, TXT, PNG, JPEG, MP3, MP4, YouTube videos, and Google Docs. Check out our page on [Uploading Materials](https://www.studyfetch.com/docs/tutorial-doc-format/creatingstudysets) for further clarifications!
### Who is Sparky?
Sparky is your friendly dog AI tutor. Sparky is a virtual assistant that helps you study your course material. Sparky is powered by advanced machine learning algorithms that allow it to understand your course material and help you study better.
### Does my course material automatically convert into other features?
Yes you can! Ask Sparky, our AI tutor, to generate practice features based off of your study materials. You can ask [questions](https://www.studyfetch.com/docs/tutorial-doc-format/creatingstudysets), [create flashcards](https://www.studyfetch.com/docs/tutorial-doc-format/flashcards), take [practice tests](https://www.studyfetch.com/docs/tutorial-doc-format/test), play [games](https://www.studyfetch.com/docs/tutorial-doc-format/arcade), watch [explainers](https://www.studyfetch.com/docs/tutorial-doc-format/explainers) and even get taught by your [personal AI tutor](https://www.studyfetch.com/docs/tutorial-doc-format/tutorme)!
### How does the AI work?
StudyFetch's AI, Sparky, utilizes advanced machine learning algorithms to offer a tailored, interactive tutoring experience. Once you upload your study materials, Sparky scans and indexes them, making the content searchable and accessible for real-time queries.
### Can I upload my whole class lecture to StudyFetch?
Yes, you can upload lectures that last for multiple hours. You can even have Sparky listen along using our [Live Lecture](https://www.studyfetch.com/docs/tutorial-doc-format/livelecture) feature!
## What are the minimum system requirements?
To ensure the best experience on StudyFetch, please make sure your system meets the following minimum requirements.
### Windows
| Requirement | Minimum Version |
| --- | --- |
| Operating System | Windows 10+ |
| Google Chrome | 125+ |
| Microsoft Edge | 125+ |
| Mozilla Firefox | 125+ |
### macOS
| Requirement | Minimum Version |
| --- | --- |
| Apple Safari | 17.4+ |
| Google Chrome | 125+ |
| Microsoft Edge | 125+ |
| Mozilla Firefox | 125+ |
Using an unsupported browser or operating system may result in degraded performance or missing features. We recommend keeping your browser up to date for the best experience.
Product knowledge
This page is for the StudyFetch app and is product knowledge for [StudyFetch.com](https://studyfetch.com).
## Contact Support
Source: https://studyfetch-academy.honen.com/docs/6a0679df1289ddc3f190389c
Support docs
StudyFetch app
This page is for the StudyFetch app and is product knowledge for [StudyFetch.com](https://studyfetch.com).
Depending on your needs, StudyFetch offers different support channels:
## Website Support
For questions related to the StudyFetch website or documentation:
- Email: support@studyfetch.com
## IOS and Android App Support
For assistance with the StudyFetch application on IOS and Android:
- Email: appsupport@studyfetch.com
## Institutional and Enterprise Support
For educational institutions and enterprise customers:
- Email: enterprise@studyfetch.com
- Or contact your dedicated account representative
Product knowledge
This page is for the StudyFetch app and is product knowledge for [StudyFetch.com](https://studyfetch.com).
## How to Cancel Your Subscription
Source: https://studyfetch-academy.honen.com/docs/6a067a051289ddc3f19038b1
Support docs
StudyFetch app
This page is for the StudyFetch app and is product knowledge for [StudyFetch.com](https://studyfetch.com).
If you wish to cancel your StudyFetch subscription, please follow these steps:
1. **Access Your Account Settings:**
- Log in to your StudyFetch account.
- Click on your account icon in the top right corner of the screen.
- Select "Settings" from the dropdown menu.
2. **Navigate to the Billing Portal:**
- Within the Settings page, locate and click on the "Billing Portal" section.
3. **Cancel Subscription:**
- In the Billing Portal, you will find the option to cancel your subscription. Follow the prompts to complete the cancellation process.
Note
### Contact support if cancellation _fails_.
If you encounter any difficulties or have further questions, please contact our support team for assistance.
Product knowledge
This page is for the StudyFetch app and is product knowledge for [StudyFetch.com](https://studyfetch.com).
## How to Change Your Study Hub Language
Source: https://studyfetch-academy.honen.com/docs/6a615032e0c97dc1977fff11
Support docs
StudyFetch app
This page is for the StudyFetch app and is product knowledge for [StudyFetch.com](https://studyfetch.com).
If you need to change the language displayed in your Study Hub account, follow these simple steps:
1. **Access Your Account Settings:**
- Click on your account icon located in the top right corner of your Study Hub screen.
- A dropdown menu will appear. Select "Settings" from the list.
2. **Locate the Language Setting:**
- On the Settings tab, the "Language" field sits near the top of the page, next to Your Username.
3. **Choose Your Preferred Language:**
- Click on the Language dropdown menu.
- Select your desired language from the available options.
4. **Save Your Changes:**
- Your Study Hub language will automatically update once you've selected your new language. There is no need to manually save your changes.
## Additional Notes
- The Language setting is on the main Settings tab, alongside your name, username, and email.
- If you encounter any issues while changing your language, please contact our Support Team for assistance.
 Settings, with the Settings tab selected. The Language dropdown sits on the right, below Your Username, and currently reads English USGB.
Product knowledge
This page is for the StudyFetch app and is product knowledge for [StudyFetch.com](https://studyfetch.com).
## How to Delete Your StudyFetch Account
Source: https://studyfetch-academy.honen.com/docs/6a614fe0e0c97dc1977fff05
Support docs
StudyFetch app
This page is for the StudyFetch app and is product knowledge for [StudyFetch.com](https://studyfetch.com).
If you wish to delete your StudyFetch account, please follow these steps:
1. **Access Settings:**
- Log in to your StudyFetch account.
- Click on your account icon in the top right corner of the screen.
- Select "Settings" from the dropdown menu.
2. **Navigate to Privacy & Data:**
- On the Settings page, click the "Privacy & Data" tab.
3. **Delete Account:**
- Scroll down to the "Delete Your Data and Account" section.
- Click the "Delete Account" button.
4. **Confirmation:**
- You may be asked to confirm your decision to delete your account.
- Follow any additional prompts to complete the deletion process.
Note
### Deleting your account is _permanent_.
Deleting your account will permanently remove all your data and content from StudyFetch. This action cannot be undone. Please ensure that you have backed up any important information before deleting your account.
If you encounter any issues or have further questions, please contact our support team.
 Settings → Privacy & Data now also lists Recently Deleted items above the Delete Account section.
Product knowledge
This page is for the StudyFetch app and is product knowledge for [StudyFetch.com](https://studyfetch.com).
## How to disable Marketing Emails?
Source: https://studyfetch-academy.honen.com/docs/6a067a064e9f7692c6853963
Support docs
StudyFetch app
This page is for the StudyFetch app and is product knowledge for [StudyFetch.com](https://studyfetch.com).
## Steps
1. **Navigate to your Account:**
- Locate your account settings in the top right corner of the screen.
- Click on your account icon or name to reveal a drop-down menu.
2. **Access Settings:**
- From the drop-down menu, select the "Settings" option.
- This will take you to your account's Settings page.
3. **Manage Email Preferences:**
- On the Settings page, find the section related to email preferences or notifications.
- Look for an option specifically labeled "Marketing Emails" or something similar.
4. **Disable Marketing Emails:**
- Toggle the switch or checkbox next to "Marketing Emails" to the "Off" or "Disabled" position.
- This will prevent you from receiving further marketing emails from us.
## Note
- Depending on the platform or service, the exact location and wording of these options may vary slightly.
- If you have trouble finding the settings, you can use the search function on the Settings page or refer to the platform's help documentation.
If you have any further questions or concerns, please don't hesitate to contact our support team.
Product knowledge
This page is for the StudyFetch app and is product knowledge for [StudyFetch.com](https://studyfetch.com).
## How to print or download notes?
Source: https://studyfetch-academy.honen.com/docs/6a615568d2ff34814d58a1fc
Support docs
StudyFetch app
This page is for the StudyFetch app and is product knowledge for [StudyFetch.com](https://studyfetch.com).
If you need to keep a physical or digital copy of your notes, follow these steps:
1. **Locate your notes:** Open the Notes view for the material containing the notes you want to save or print.
2. **Find the Print option:** In the toolbar above the notes, look for the print icon.
 Notes can be viewed alongside the Sparky chat panel — the print icon lives in the notes toolbar above the document.
1. **Open the Print Preview:** Click on the print icon. This will open a new tab or window displaying your notes in a print-ready format.
2. **Save as PDF or Print:**
- **Save as PDF:**
- Right-click anywhere on the print preview page.
- Select the "Print" option from the context menu.
- In the Print dialog box, choose "Save as PDF" as the destination.
- Select a location on your device to save the PDF file.
- Click "Save".
- **Print a Physical Copy:**
- Right-click anywhere on the print preview page.
- Select the "Print" option from the context menu.
- In the Print dialog box, choose your printer and adjust any print settings as needed.
- Click "Print".
## Additional Tips
- **Check Page Setup:** Before printing, you may want to adjust page orientation, margins, or scaling in the Print dialog box.
- **Troubleshooting:** If you encounter any issues, try refreshing the page, using a different browser, or contacting technical support.
- **Alternative Methods:** Some platforms may offer additional ways to save or export notes, such as downloading as a text file or sharing via email.
**Remember:** The exact steps and options may vary slightly depending on your device, operating system, and the application you are using to view your notes.
Product knowledge
This page is for the StudyFetch app and is product knowledge for [StudyFetch.com](https://studyfetch.com).
## How to request a refund
Source: https://studyfetch-academy.honen.com/docs/6a067a064e9f7692c6853965
Support docs
StudyFetch app
This page is for the StudyFetch app and is product knowledge for [StudyFetch.com](https://studyfetch.com).
## Ineligibility for Refunds
Refunds will not be granted in the following situations:
- **Change of Mind:** If the customer simply changes their mind about the service.
- **Service Already Rendered:** If the service has already been fully or partially rendered.
- **Forgetting to Cancel:** The customer is responsible for their own subscription, if they forget to cancel it they won’t be eligible for a refund.
- **Not Providing Evidence:** If the customer has an issue with the service, and they don’t have any evidence to support the claim.
All refunds remain subject to the company’s subjection.
## Refund Process
To request a refund, customers must follow these steps:
1. **Contact Customer Support:** Contact our customer support team using the email below to initiate the refund process.
2. **Provide Proof of Purchase:** Customers must provide proof of purchase, such as an invoice number or receipt.
3. **Provide Evidence of Service not Functioning as Advertized:** Customers must provide evidence of the faulty service via screenshots or recordings with explanation of how to recreate the issue.
4. **Refund Approval:** The company will review the refund request and determine whether it is approved. The customer will be notified via email if the refund is approved.
5. **Refund Issuance:** If approved, the refund will be issued to the original payment method within 10 business days.
## Refund Timeframe
Refunds will typically be processed within 10 business days following approval. The timeframe may vary depending on the payment method and other factors.
## Contact Information
For any questions or concerns regarding this article, please contact our customer support team at:
- **Email:** support@studyfetch.com
Product knowledge
This page is for the StudyFetch app and is product knowledge for [StudyFetch.com](https://studyfetch.com).
## Logging Out of Your StudyFetch Account
Source: https://studyfetch-academy.honen.com/docs/6a61505481be4e67d4588e28
Support docs
StudyFetch app
This page is for the StudyFetch app and is product knowledge for [StudyFetch.com](https://studyfetch.com).
## Step-by-Step Guide
1. **Locate the Profile Icon:** In the upper right-hand corner of your StudyFetch dashboard, you'll find a small circular icon representing your profile — usually your initial. Click on this icon.
2. **Access the Settings Menu:** A drop-down menu will appear when you click the profile icon. From this menu, select the "Settings" option. This will take you to your account settings page.
3. **Find the Sign Out Button:** On the Settings page, look for the "Sign Out" button in the top-right corner, next to the Settings/Subscription/Usage/Personalization/Privacy & Data/Support tabs.
4. **Confirm Log Out:** Click the "Sign Out" button. You may be asked to confirm that you want to log out of your account.
Important Note
### Logging out ends your current _session_.
You'll need to enter your login credentials, username and password, to access your account again.
 Settings page, step 3. Sign Out sits at the right end of the tab row, past the Support tab.
## Troubleshooting
If you encounter any issues logging out, please try the following:
- **Clear Your Browser Cache:** Sometimes, stored data in your browser can cause problems. Clearing your cache and cookies might resolve the issue.
- **Try a Different Browser:** If the problem persists, try logging out using a different web browser, e.g., Chrome, Firefox, Safari.
- **Contact Support:** If you're still unable to log out, please contact our StudyFetch Support team for assistance.
## Additional Information
- **Remember to Log Out on Shared Devices:** If you're using a public or shared computer, always remember to log out of your StudyFetch account to protect your personal information.
- **Stay Logged In on Your Personal Devices:** For convenience, you can usually stay logged in on your personal devices, e.g., your laptop or phone.
## We're Here to Help!
If you have any questions or need further assistance, please don't hesitate to reach out to the StudyFetch Support team.
Product knowledge
This page is for the StudyFetch app and is product knowledge for [StudyFetch.com](https://studyfetch.com).
## Tutor Me Vs. Spark E Chat
Source: https://studyfetch-academy.honen.com/docs/6a3db8794acdb607f5b4a725
Internal Support
These two features are commonly confused by customers. Before troubleshooting, always confirm which one the customer is actually using.
---
### Sparky Chat
Also known as the **chat feature**, this allows users to ask questions related to their uploaded material. The chat provides detailed responses and can create quizzes, tests, audio recaps, and live lectures when asked. Think of it as having a teacher in the room while you study your material.
Available on: **Website & Mobile App**
### Tutor Me
Sometimes called the **AI tutor**, Tutor Me provides 1:1 instruction led by Sparky. Sparky speaks to the user, goes over material in great detail, checks for understanding after each section, and provides live feedback on follow-up questions. Tutor Me has its own built-in chat, but it is not the same as the Sparky chat feature above.
Available on: **Website only**
### Key Differences at a Glance
| Feature | Sparky Chat | Tutor Me |
| --- | --- | --- |
| Also known as | Chat, Sparky chat | AI Tutor, Tutor Me |
| How it works | User asks questions; chat provides detailed answers | Sparky leads a 1:1 instructional session with the user |
| Can create quizzes, tests, audio recaps, live lectures | Yes (when asked) | No (separate session format) |
| Live feedback from Sparky | No | Yes |
| Has a built-in chat | It is the chat feature | Yes, but separate from the main chat |
| Available on mobile | Yes | No |
| Available on website | Yes | Yes |
Important Note for Support
### Always clarify which feature the customer _actually_ means.
Customers frequently refer to the chat feature as the "AI Tutor." Before giving next steps, confirm whether they are using Sparky Chat or the Tutor Me feature. Additionally, remember that Tutor Me is not available on the mobile app and is only accessible on the website.
## StudyFetch Canvas Integration
Source: https://studyfetch-academy.honen.com/docs/6a067a051289ddc3f19038b2
Enterprise support
StudyFetch app
This page is for the StudyFetch app and is product knowledge for [StudyFetch.com](https://studyfetch.com).
The integration has 2 parts to it: LTI integration for login to StudyFetch directly from your canvas instance and API integration to allow students to upload docs from their canvas course into StudyFetch.
## LTI Instructions
### Gives users access to sign in with their Canvas credentials to StudyFetch
1. Go Admin -> (Your account name) -> Developer Keys -> Add Developer Key -> LTI registration
2. Paste the following Dynamic Registration URL [https://www.studyfetch.com/lti/registration](https://www.studyfetch.com/lti/registration)
3. When prompted, enter the following one-time registration key then Enable and Close.
To receive this code, reach out to enterprise@studyfetch.com **_with subject line \[Canvas Code Request\]._**
Administrator required
### Keep in mind that this step needs to be done by a _Canvas Administrator_.
### Adding StudyFetch to any context
1. Copy the Client ID from the added app in your developer Keys, as shown below
 Canvas Developer Keys page, Account tab. The StudyFetch row's Details value is outlined, and that is the Client ID you copy.
1. In any course, navigate to Settings -> Apps -> View App Configurations -> Add App
2. Select the “By Client ID” configuration type, and paste in the Client ID of the app, Submit and Install
_After a refresh, a StudyFetch link should be accessible from the left navigation of the course, and clicking will launch and login to StudyFetch_
### API Instructions
For this step we need a Developer API Key from you to allow users from your LMS to use the “Upload from StudyFetch” feature
**_This also requires Administrator privileges in your Canvas:_**
1. Go to the admin section of your Canvas Instance
2. Select Developer Keys on the sidebar
3. Add a new Developer API Key
4. Name key as you wish
5. Redirect URIs box should have [https://www.studyfetch.com/api/auth/lti/oauth2response](https://www.studyfetch.com/api/auth/lti/oauth2response)
6. Check the enforce scopes box
7. Tick “Allow Include Parameters”
8. Add the following scopes:
1. url:GET|/api/v1/courses
2. url:GET|/api/v1/courses/:course\_id/pages/:url\_or\_id
3. url:GET|/api/v1/courses/:course\_id/modules
4. url:GET|/api/v1/courses/:course\_id/modules/:module\_id/items
5. url:GET|/api/v1/users/:id
9. Save the key
Next steps are to input your developer key & ID into studyfetch. For this step you must be first logged into StudyFetch thru your canvas link (LTI integration, added above)
1. Go to [https://www.studyfetch.com/platform/lms/setupApi](https://www.studyfetch.com/platform/lms/setupApi)
2. Input the Developer Key ID and Secret accordingly, from the previously created API key
3. Save credentials, and then close the StudyFetch tab and relog in thru canvas
After that is done, you should be fully set up and be able to access the “Import from LMS” button on the Add Material page of a study set
If any issues or questions arise, don’t hesitate to reach out through enterprise@studyfetch.com!
Product knowledge
This page is for the StudyFetch app and is product knowledge for [StudyFetch.com](https://studyfetch.com).
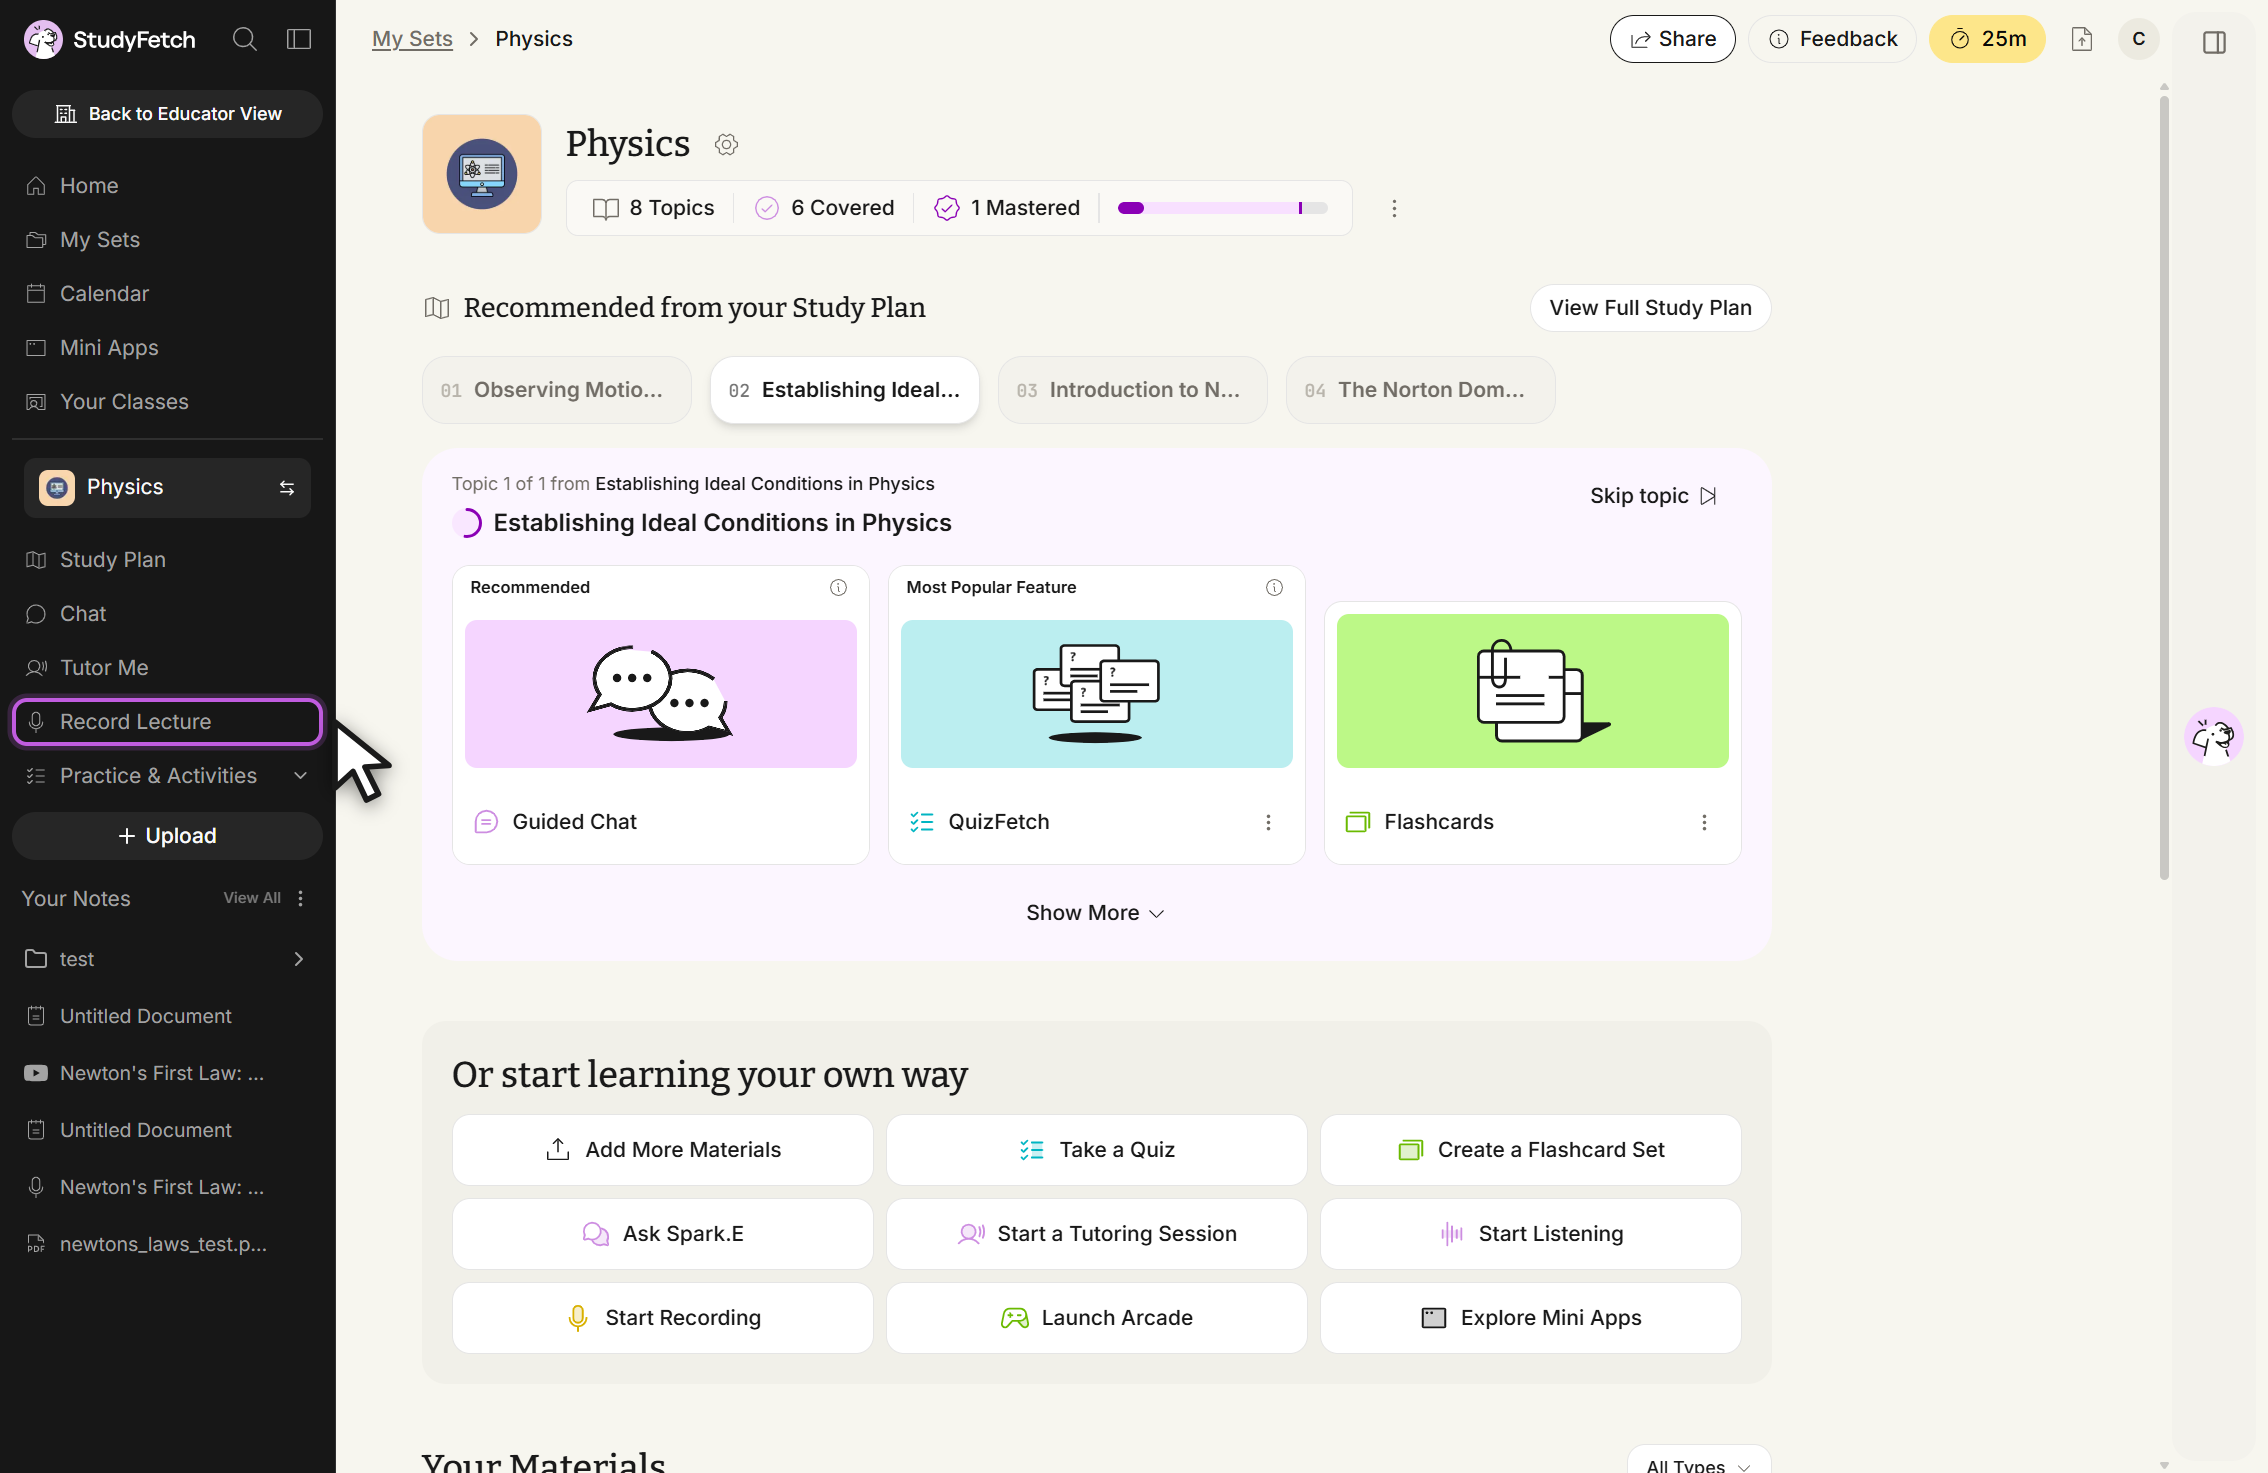 \
\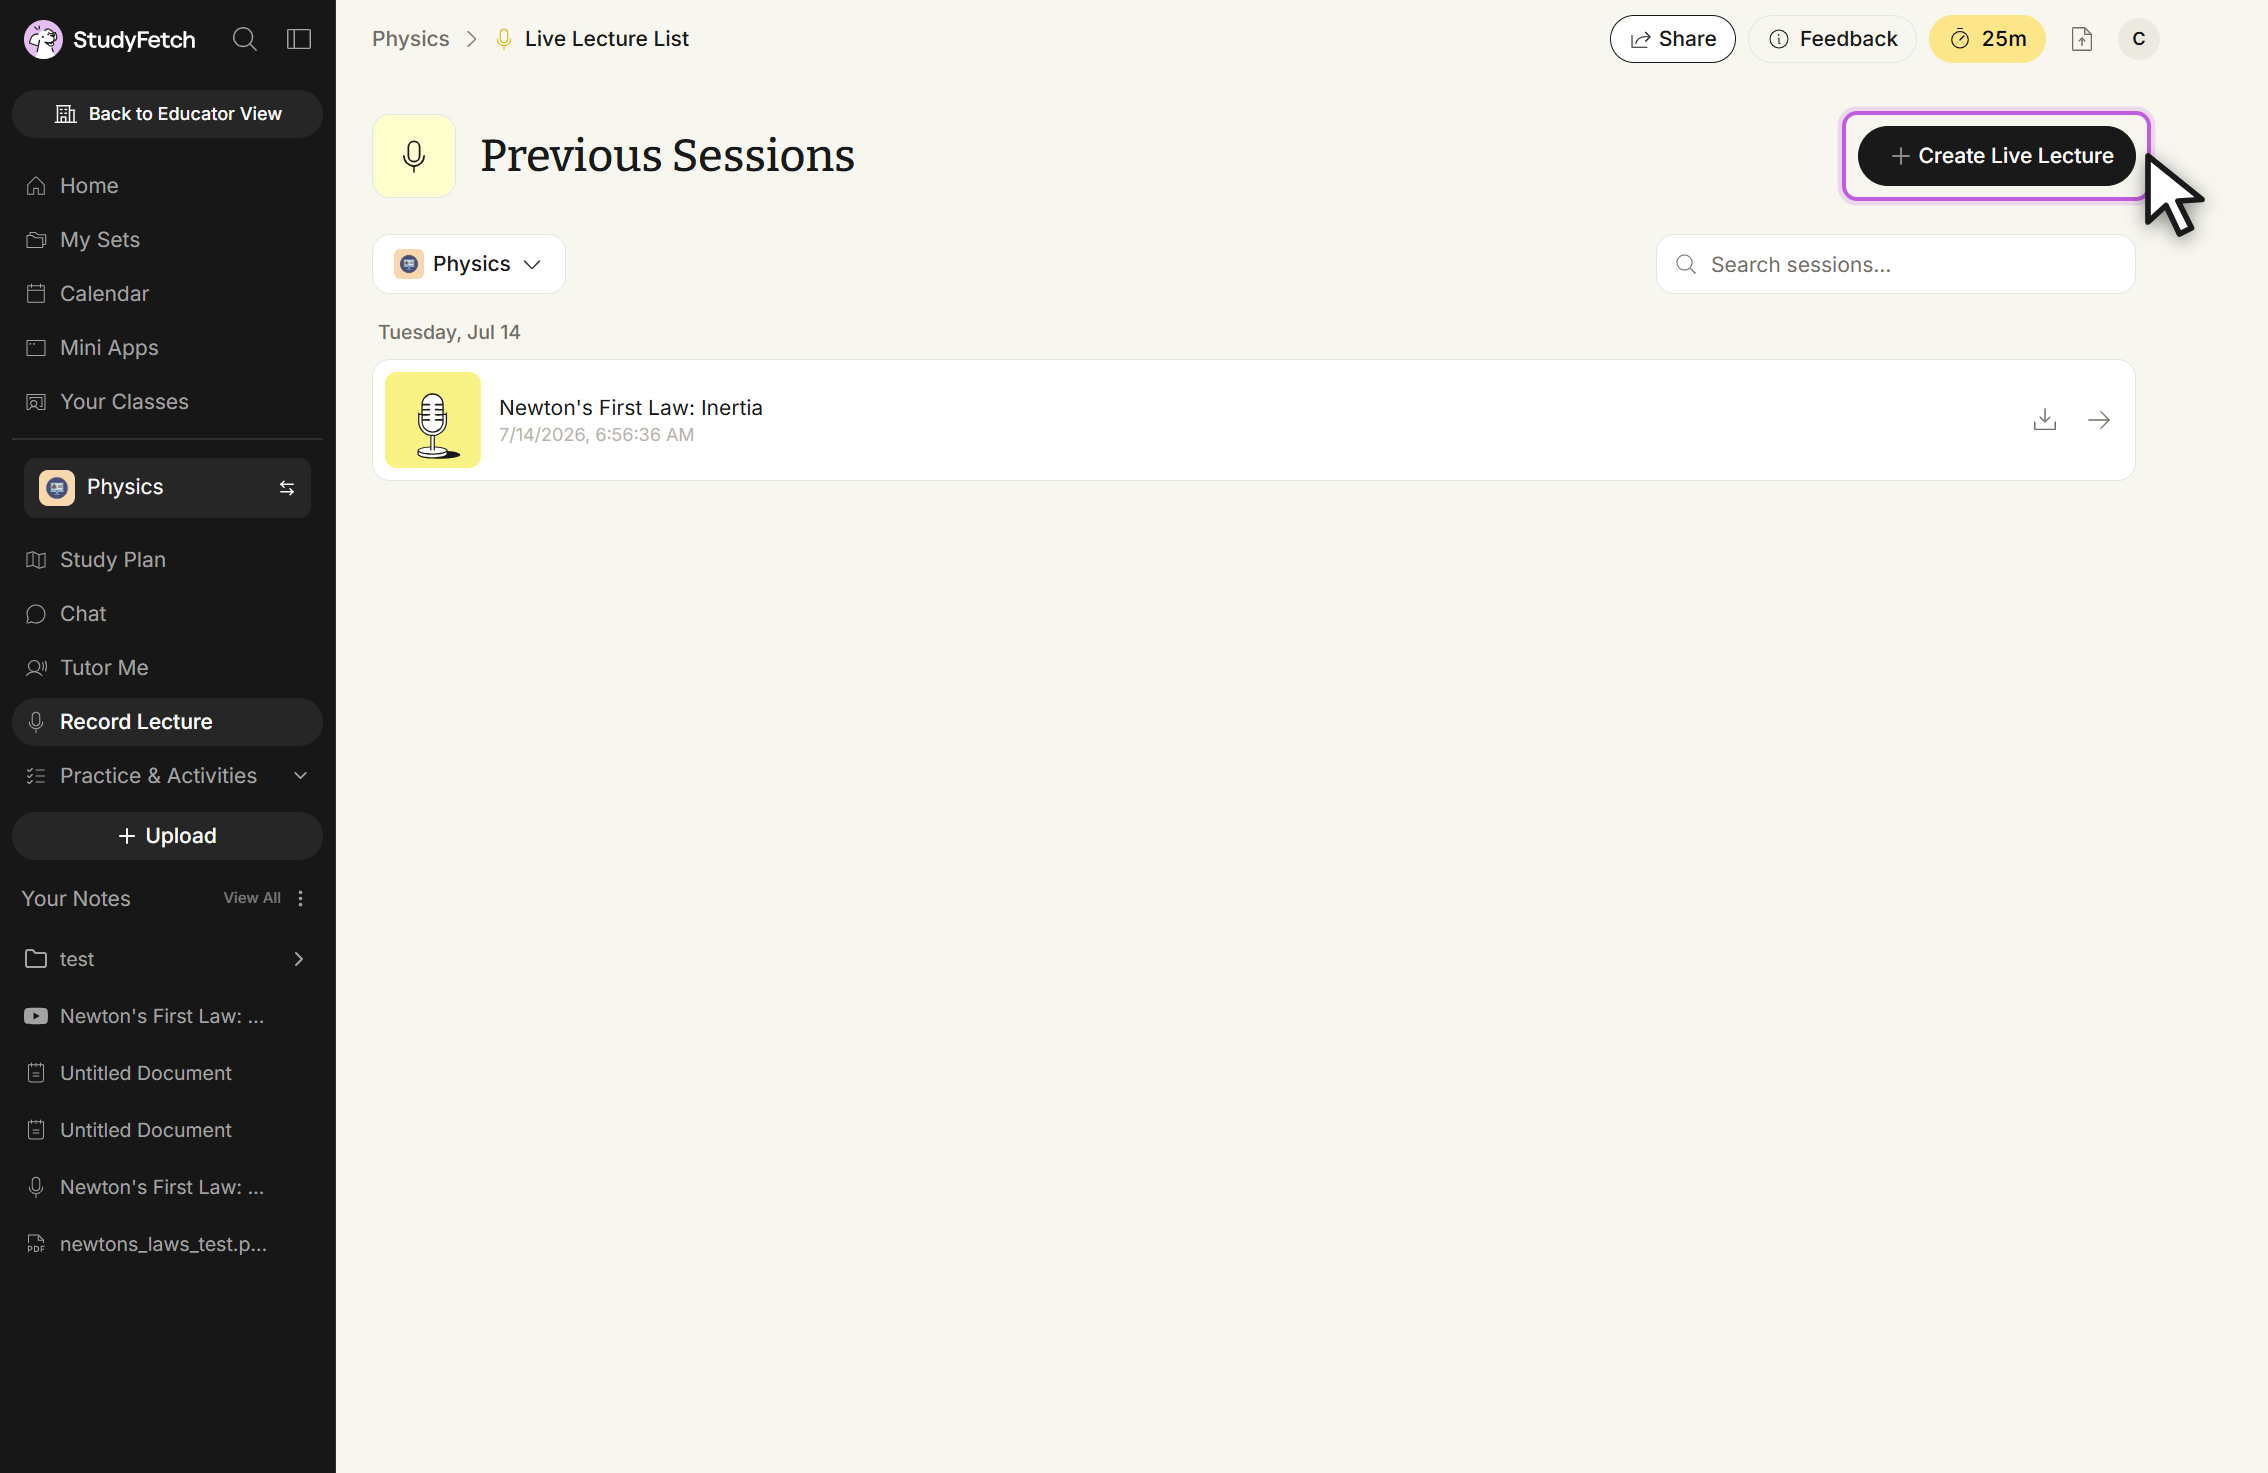 \
\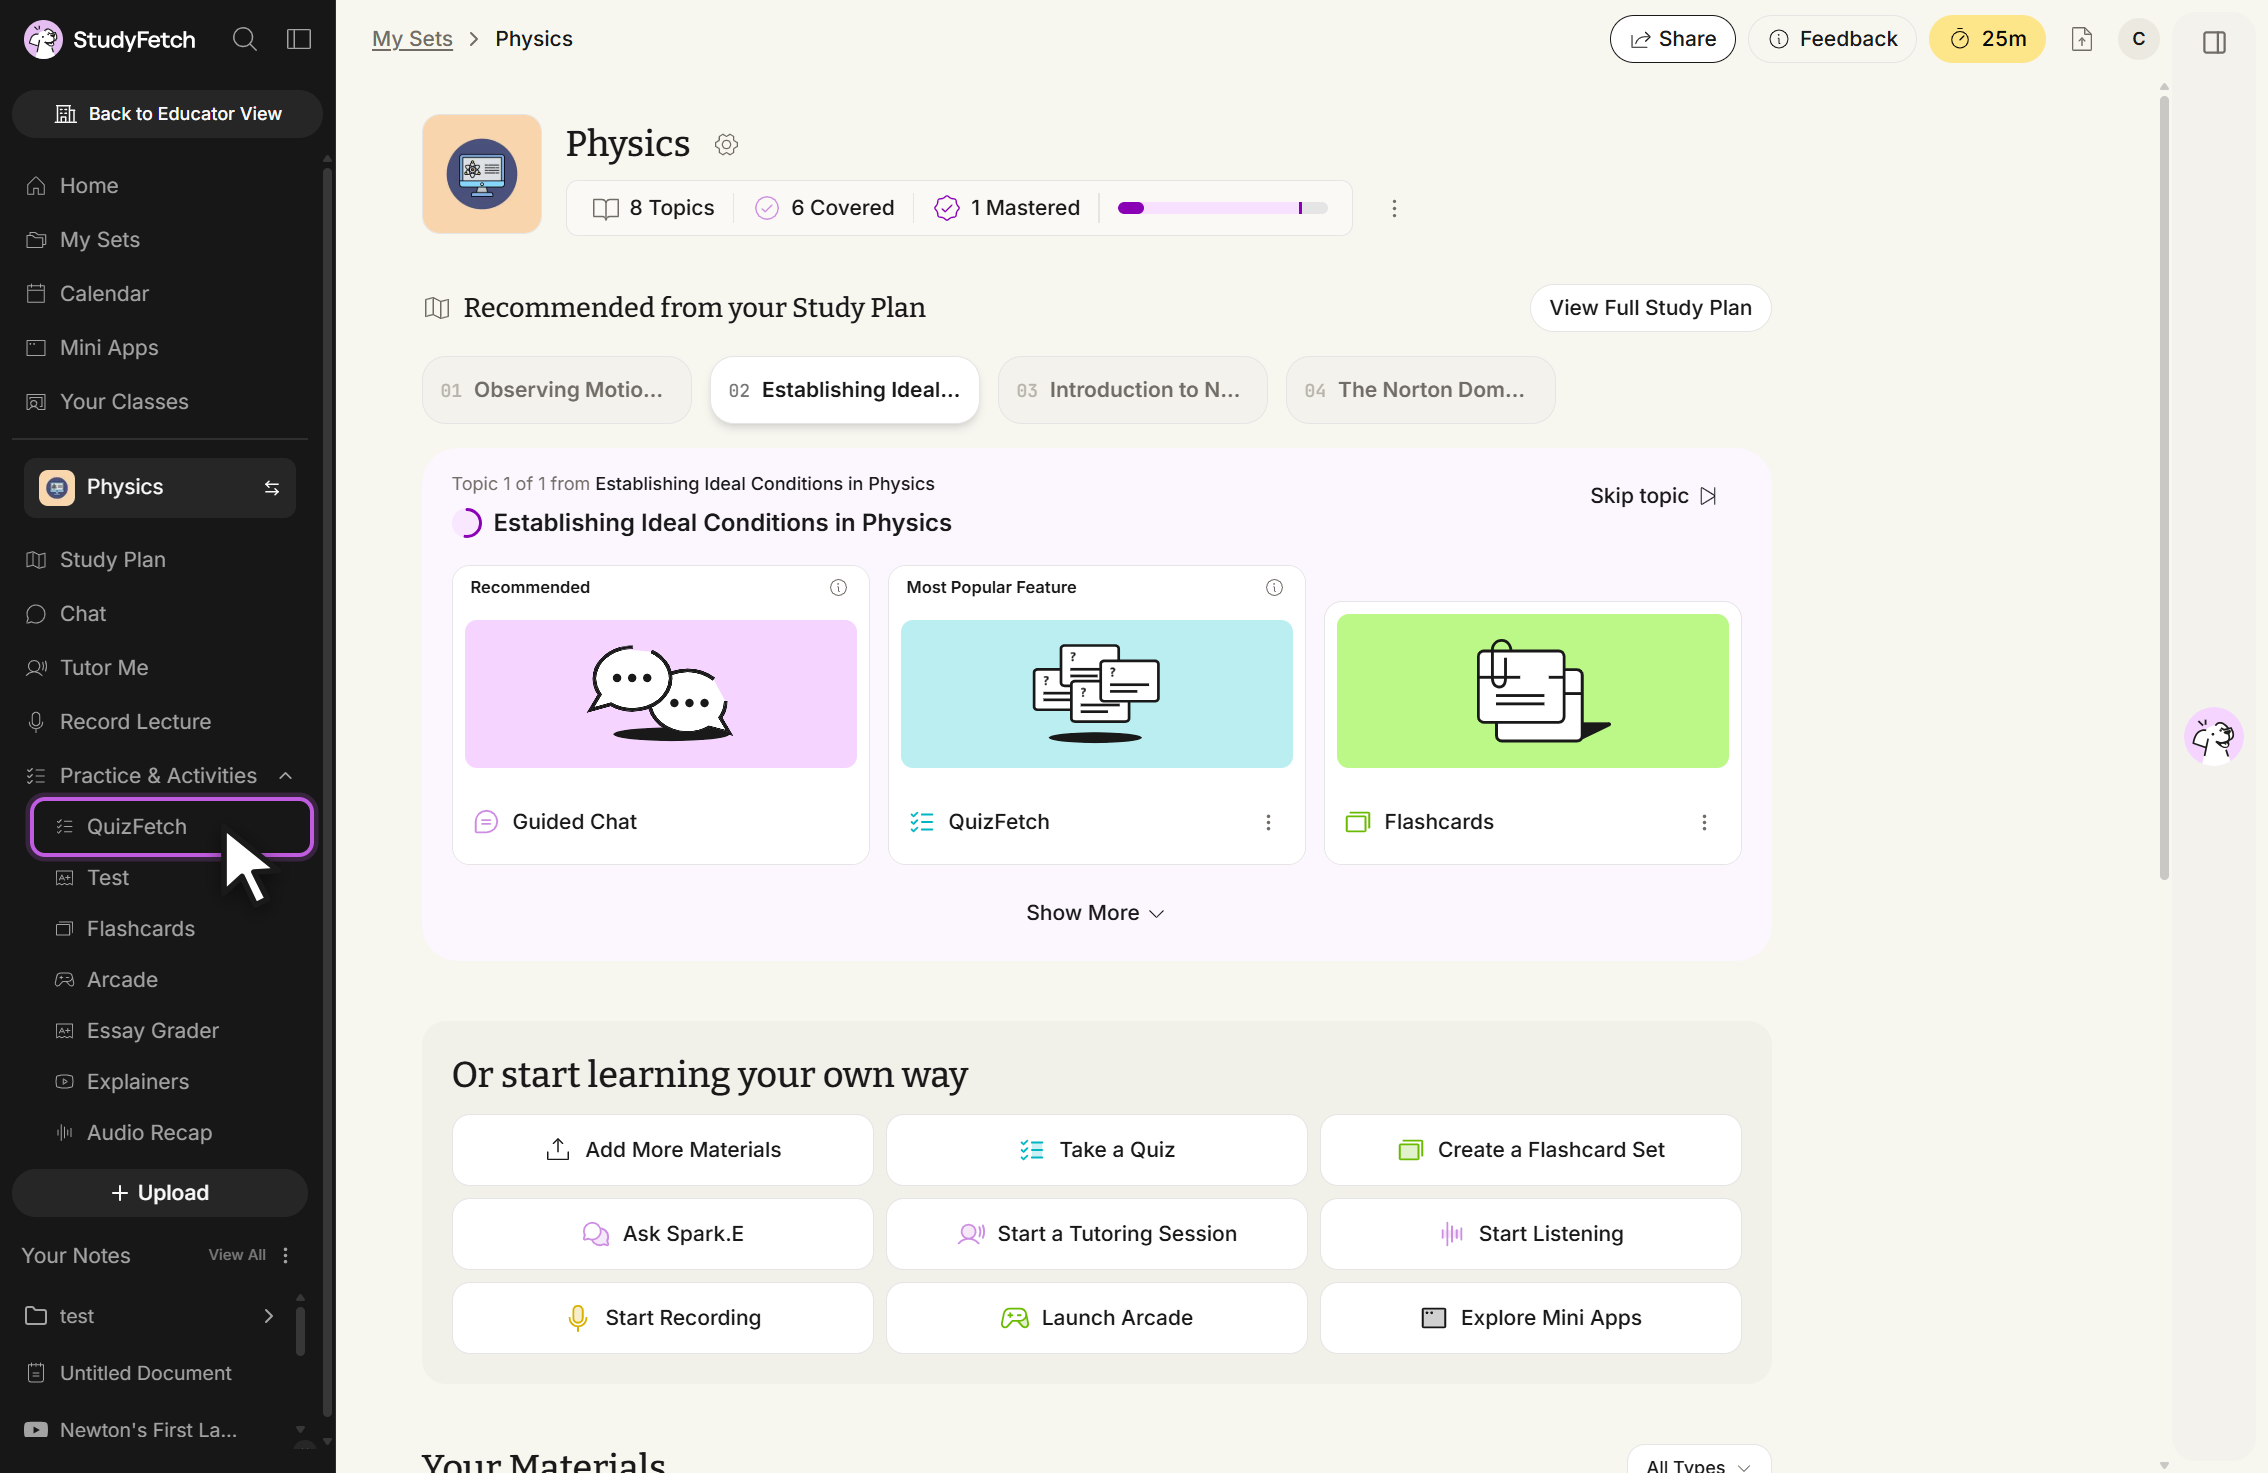 \
\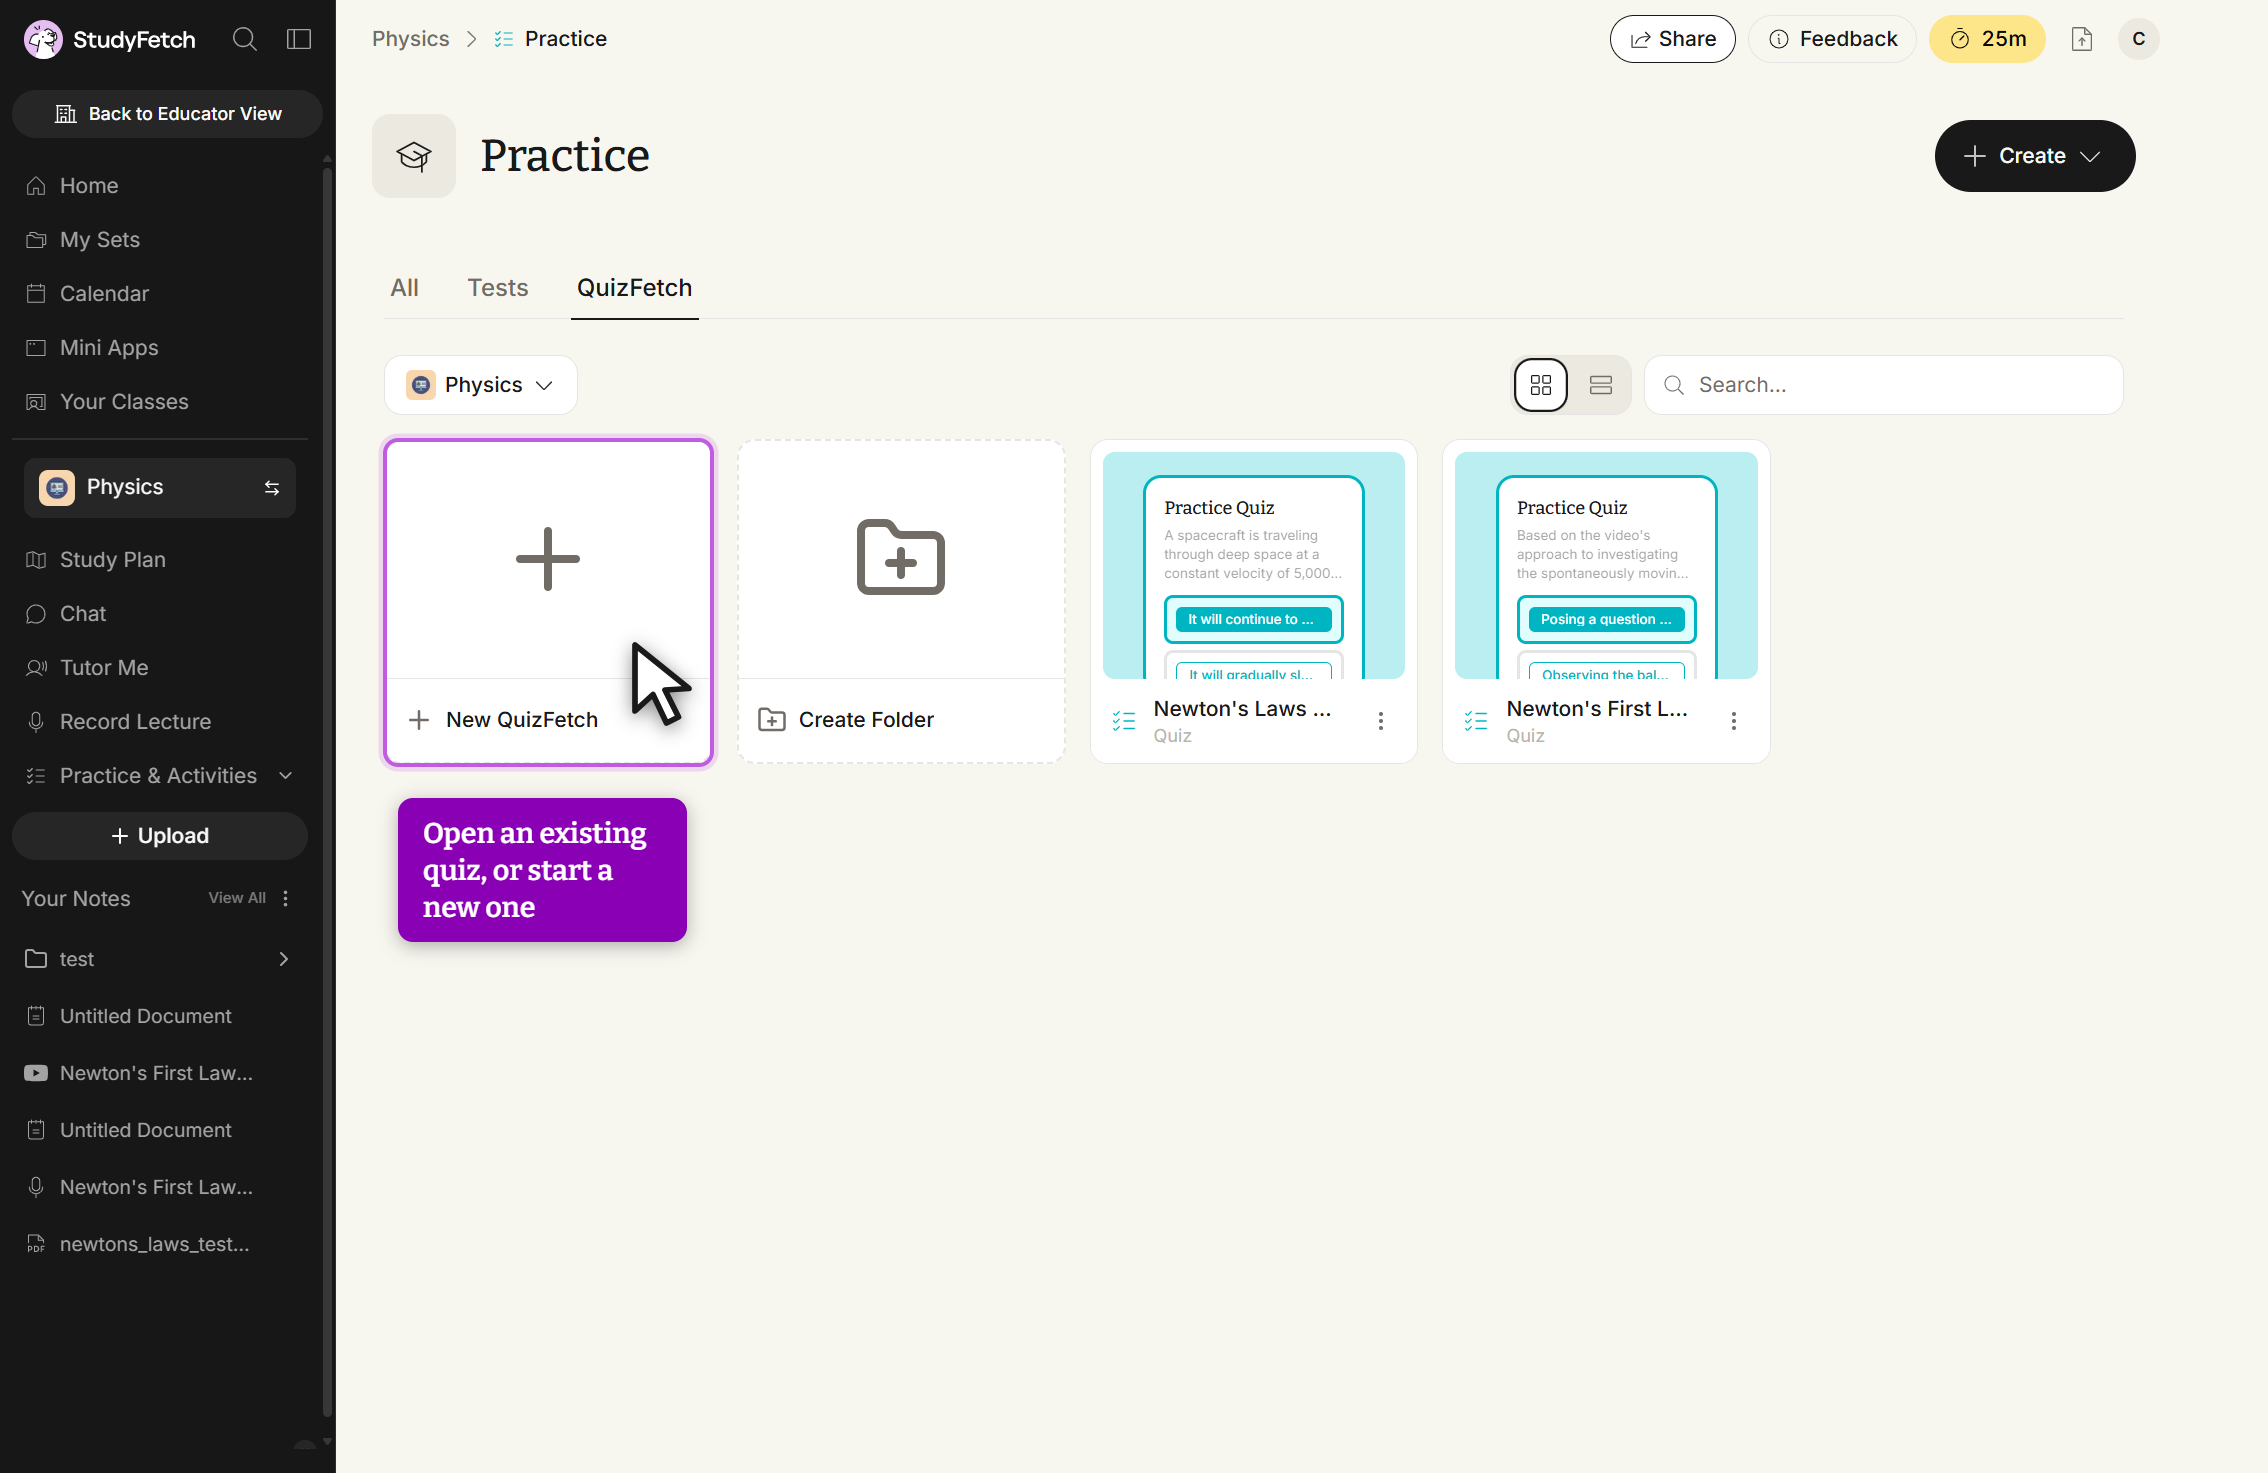 \
\