
Product Tutorials
Customizing Spark.E Chat
Customize Your Chat Experience
Customize how you chat with Sparky, your AI tutor, using powerful tools like plugins, dynamic personalities, and tailored scenarios.
Personalities and Skillsets
Within the chat feature, click Personalities & Skillsets to choose from a variety of AI Tutor Persona Presets, each designed with a distinct teaching style to match your learning preferences.
Selecting Plugins for Chat
Customize how you interact in chat based on your personality preferences and learning goals with Chat Plugins.
Browse available plugins on the Explore page, where you'll find both StudyFetch Originals and community-created plugins. Use the category tabs, search field, or Sort By dropdown to narrow down your options.
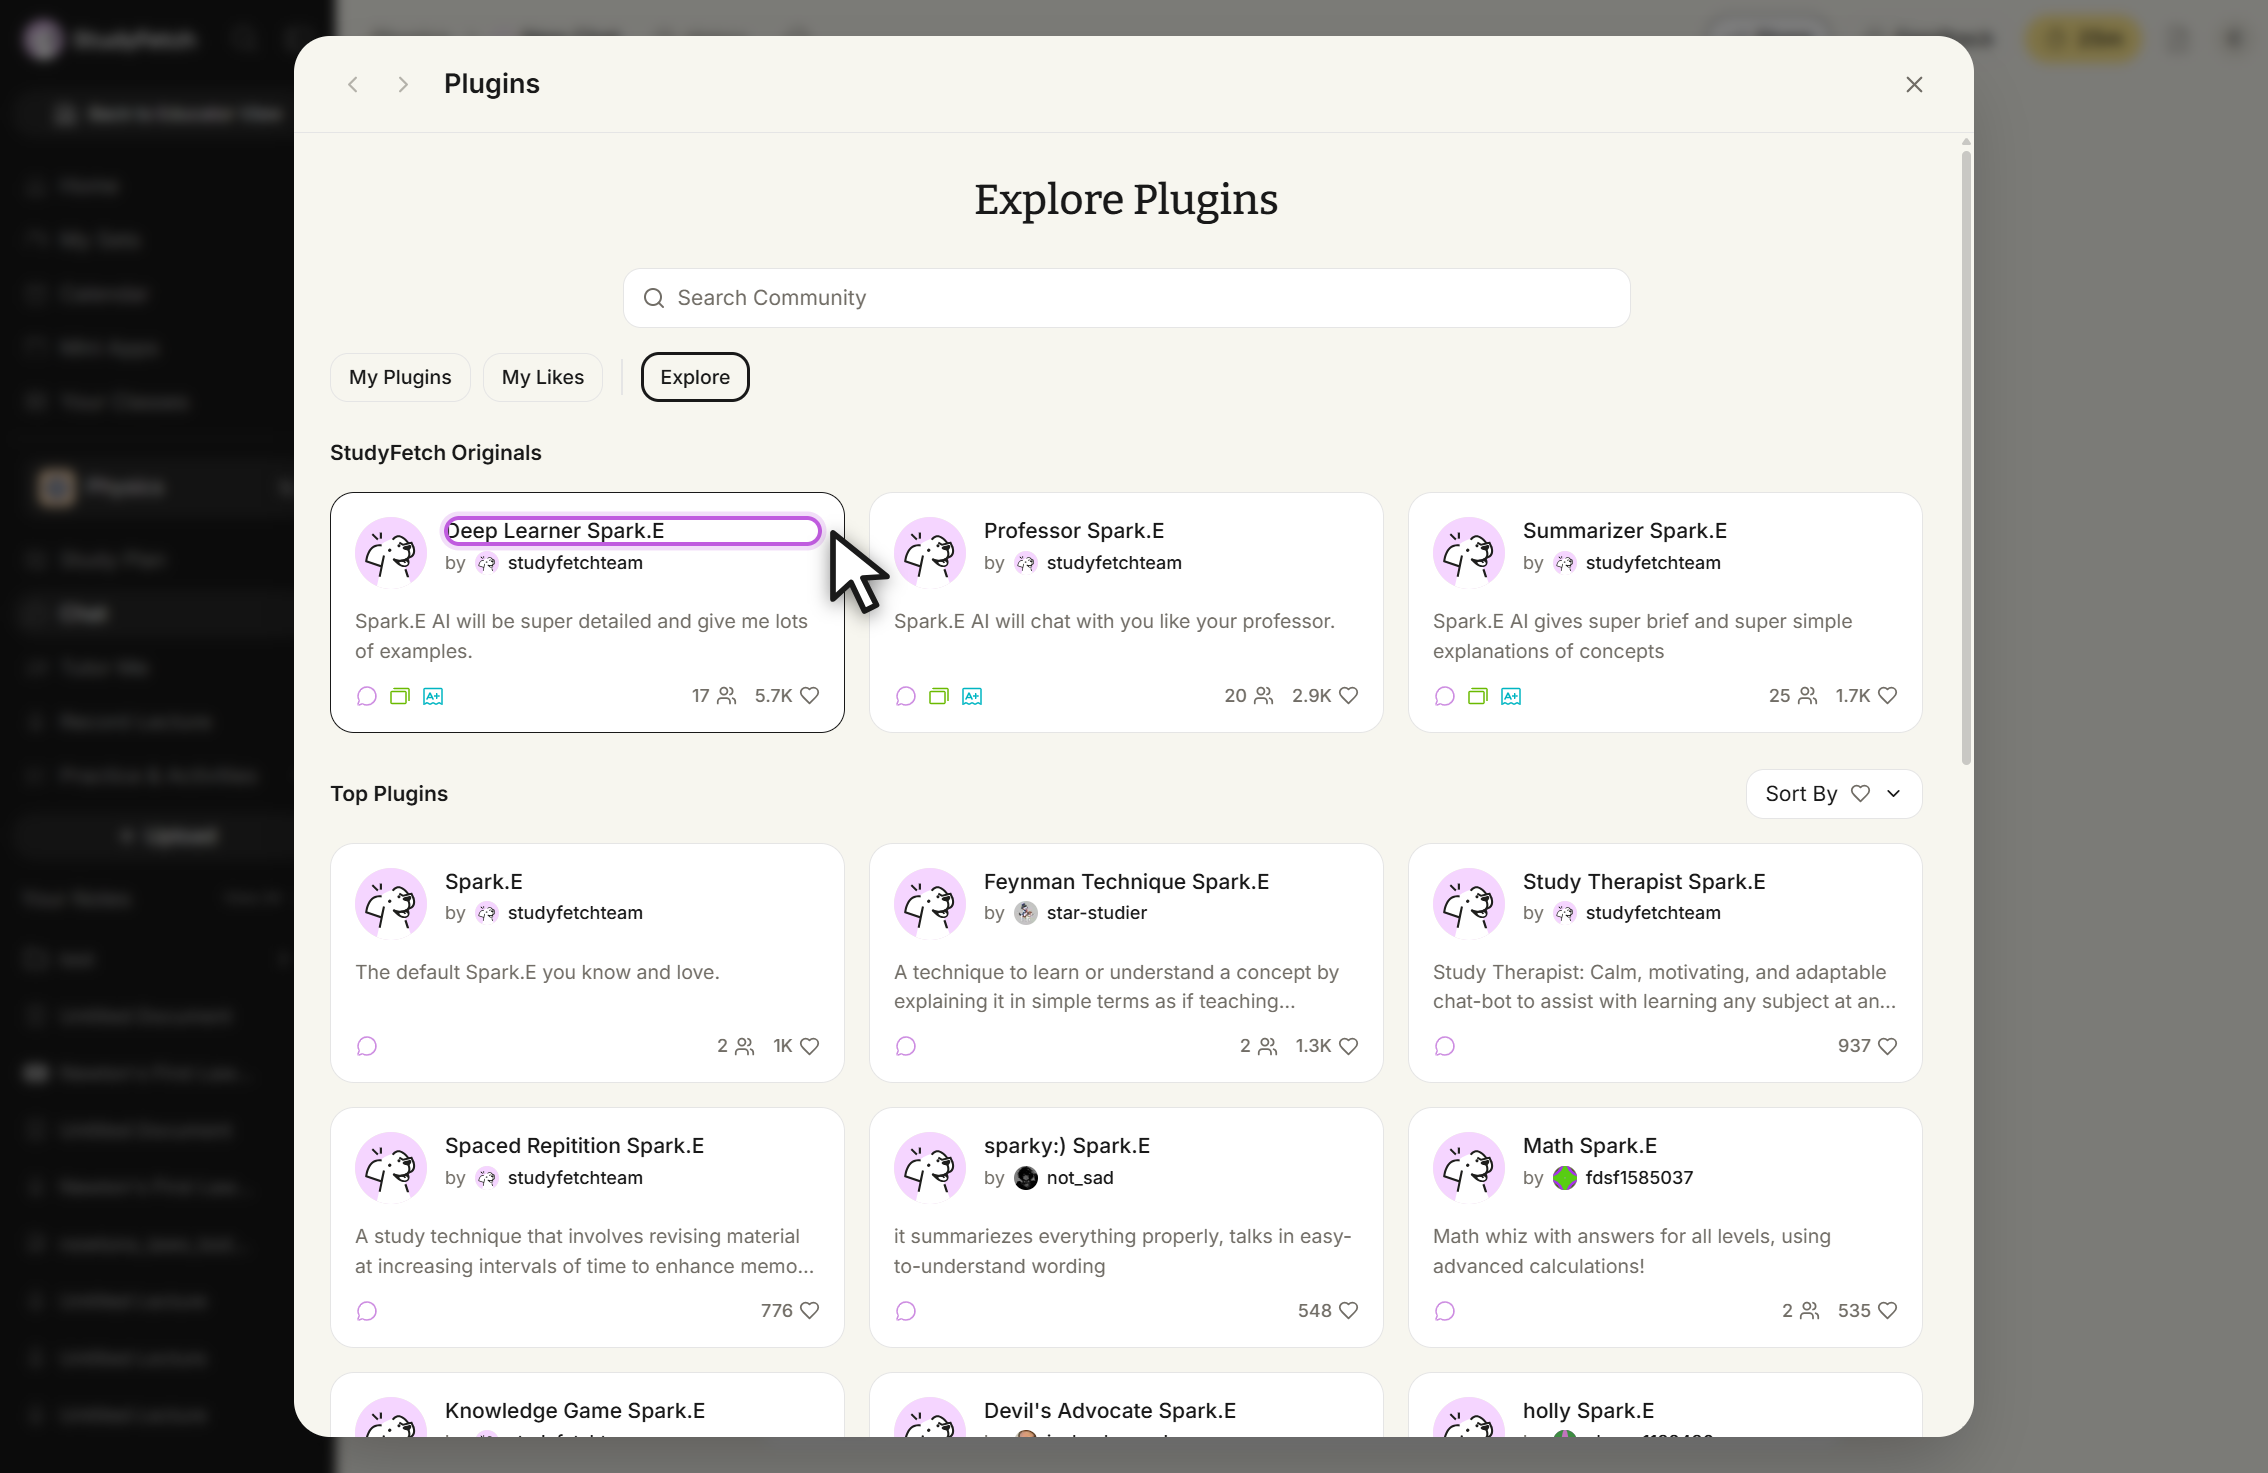
Explore Plugins, Explore tab. StudyFetch Originals lists Deep Learner Spark.E, Professor Spark.E, and Summarizer Spark.E above the Top Plugins grid. Click a plugin to open its About page, which shows a full description and the prompts it uses for each feature (Chat, Flashcards, Tests, Quizzes). Select + Use Plugin, then once it shows ✓ Using Plugin, close the panel.
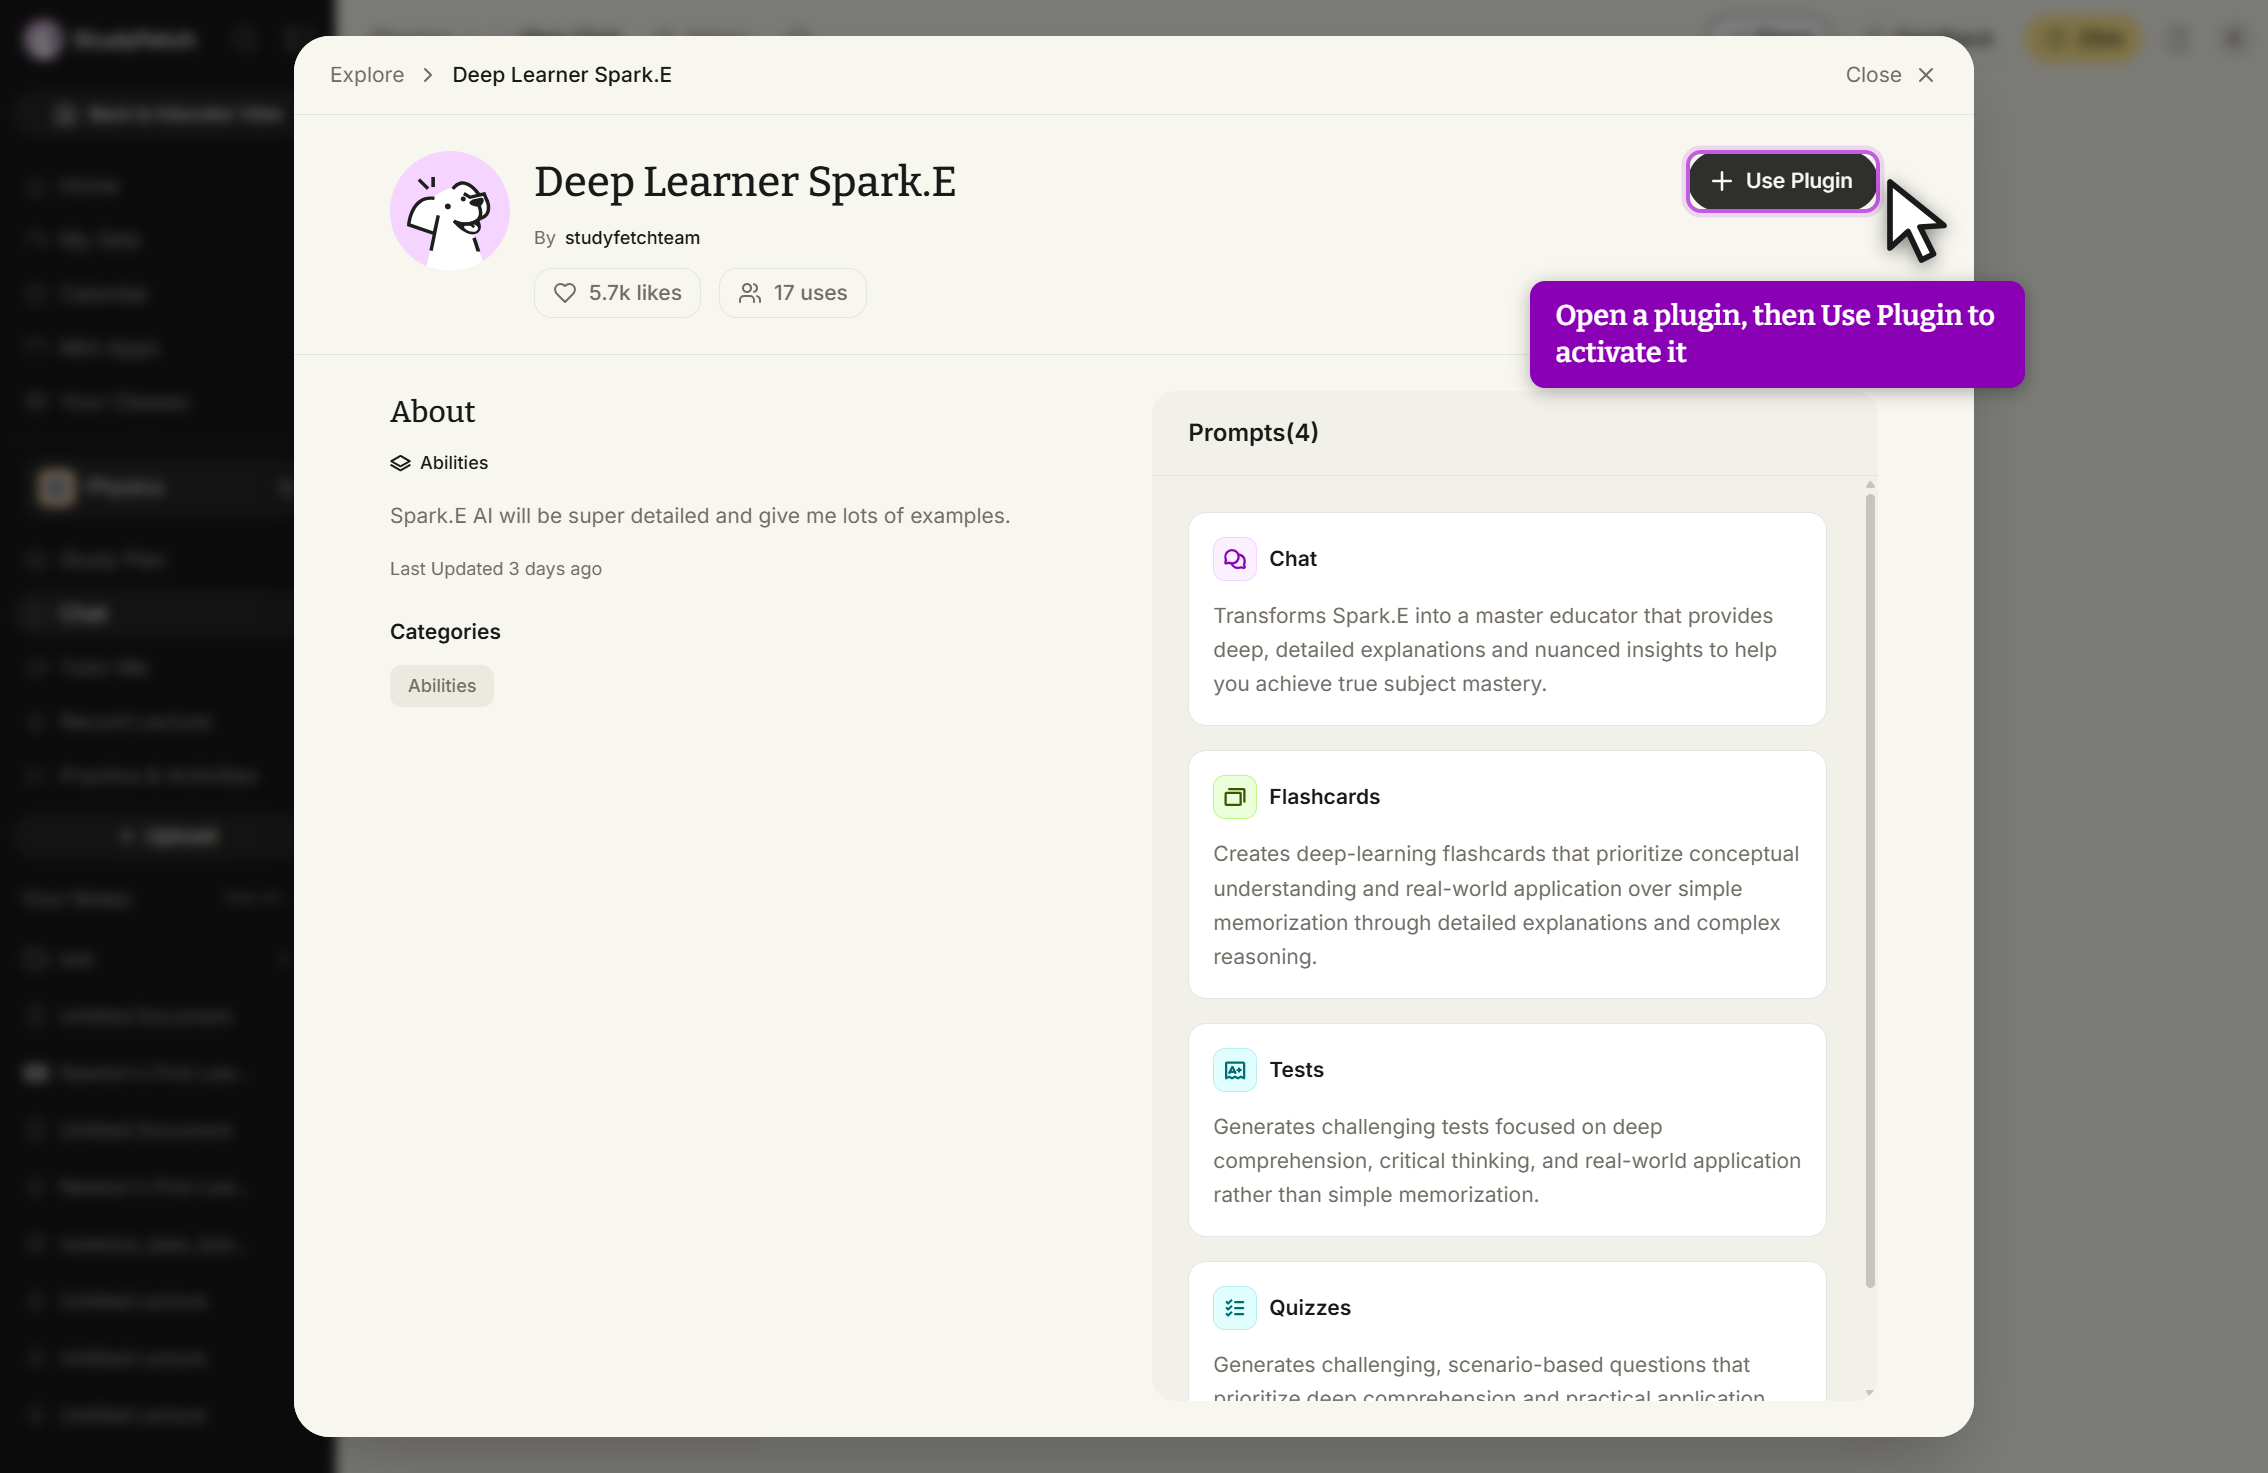
Deep Learner Spark.E, plugin page. Select + Use Plugin at the top right to activate it. Your AI tutor will immediately adjust how it responds based on the active plugin — here, Deep Learner Sparky gives a noticeably more thorough, structured explanation than the default tutor would.
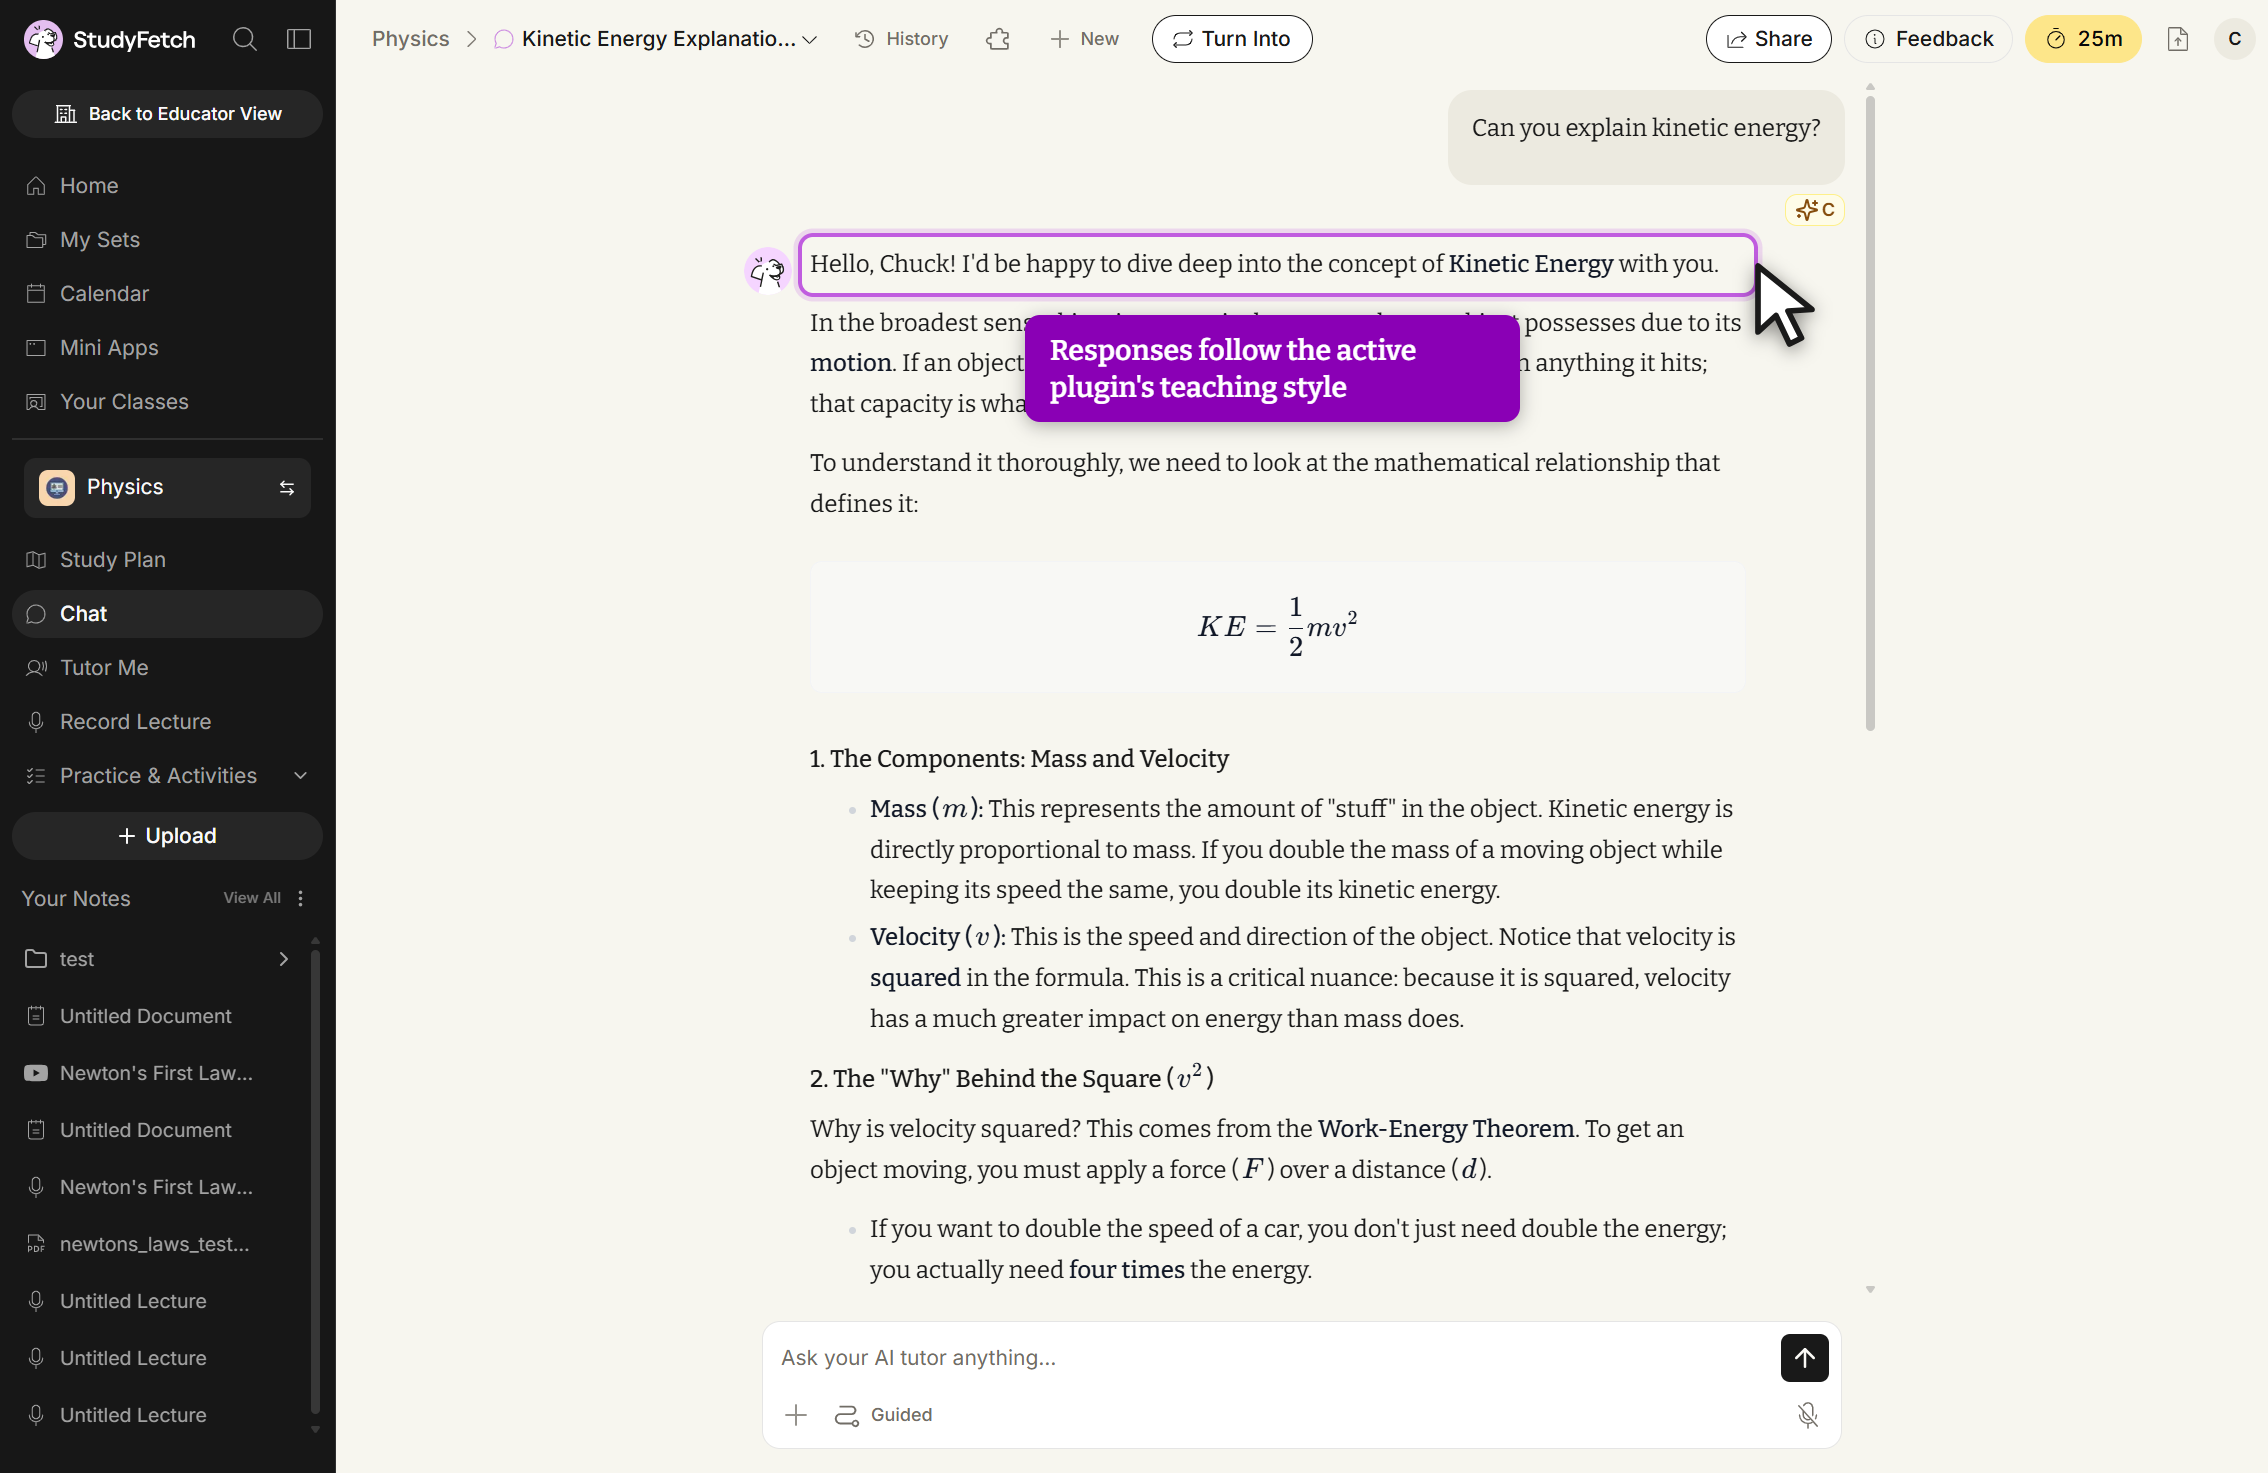
Kinetic Energy Explanatio... chat. The reply to Can you explain kinetic energy? sets out the formula and numbered sections.
Customize Your Own Chat Plugin
Don't see a plugin that fits your needs? Create your own to transform how you study with custom instructions, personalized learning preferences, and specialized techniques. Any plugins you build appear under the My Plugins tab alongside plugins you've previously created.
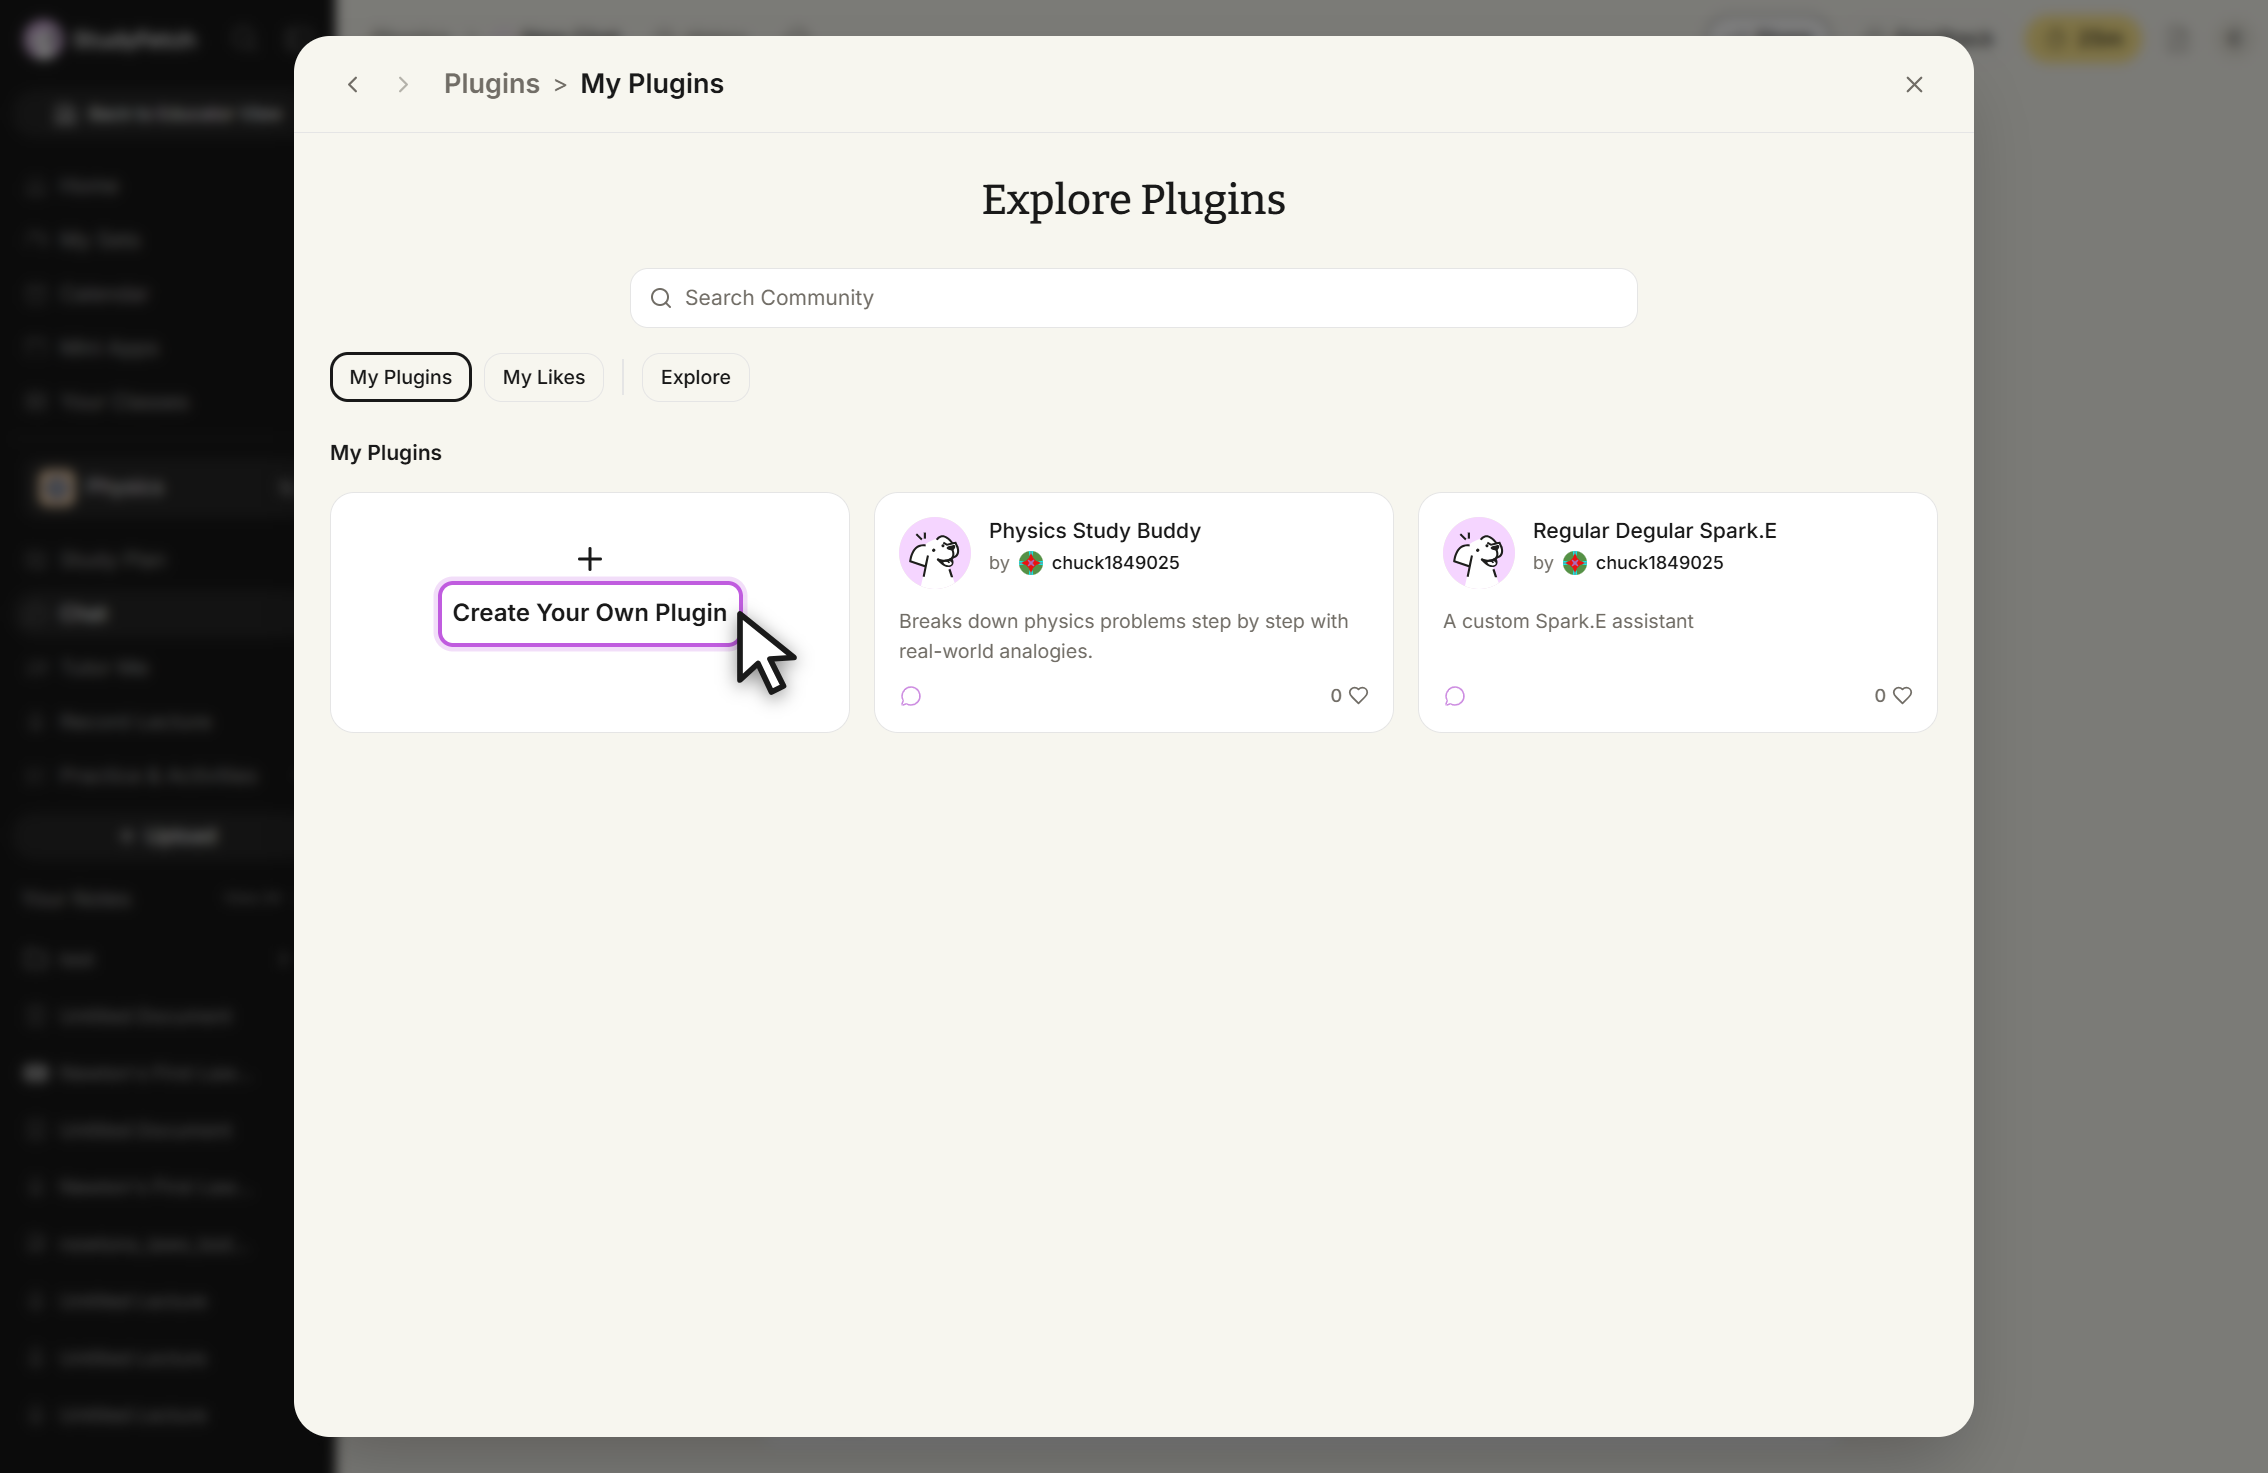
Select + Create Your Own Plugin, then fill out the Basic Information step: give it a Plugin Name and optional Description, choose a Skill Level (High School, AP, College, or Professional), and set its Visibility to Private or Public. A live preview card updates on the right as you type.
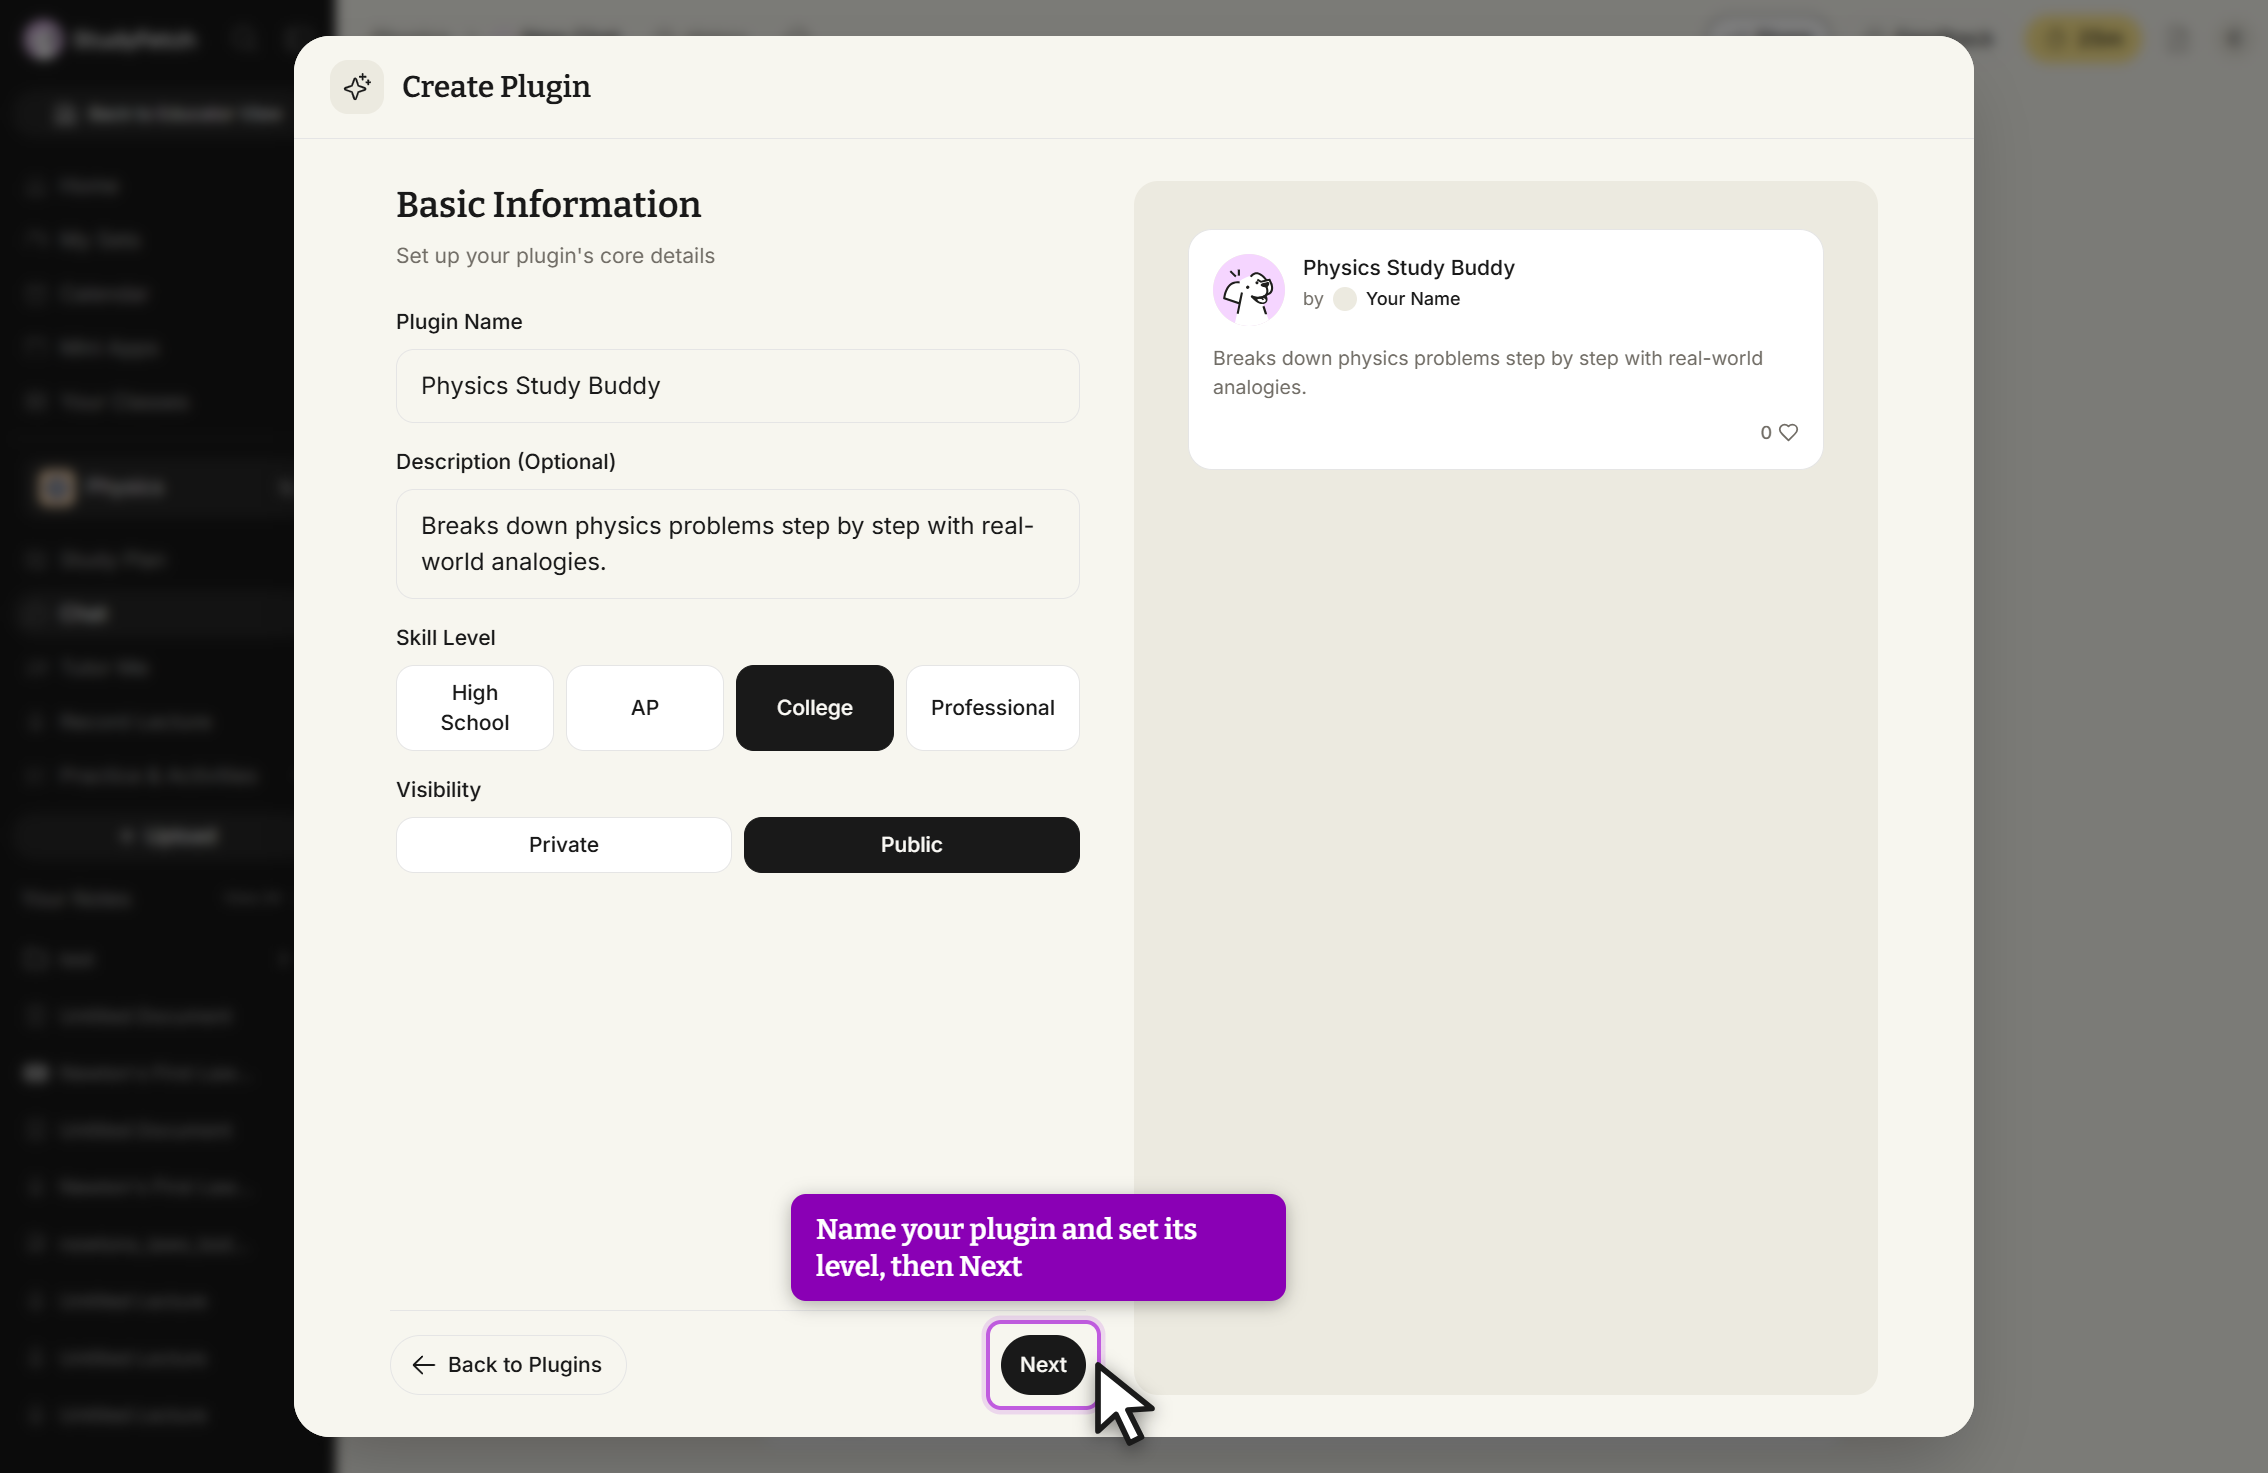
Create Plugin, Basic Information step. Fill in the plugin details, then select Next. Click Next to reach the AI Behavior step. Describe the tutor's tone in Base Personality, then enter a Custom Prompt for Chat describing how you want it to behave. Optional tabs let you add separate prompts for Flashcards, Tests, and Quizzes. When you're finished, click Create Plugin.
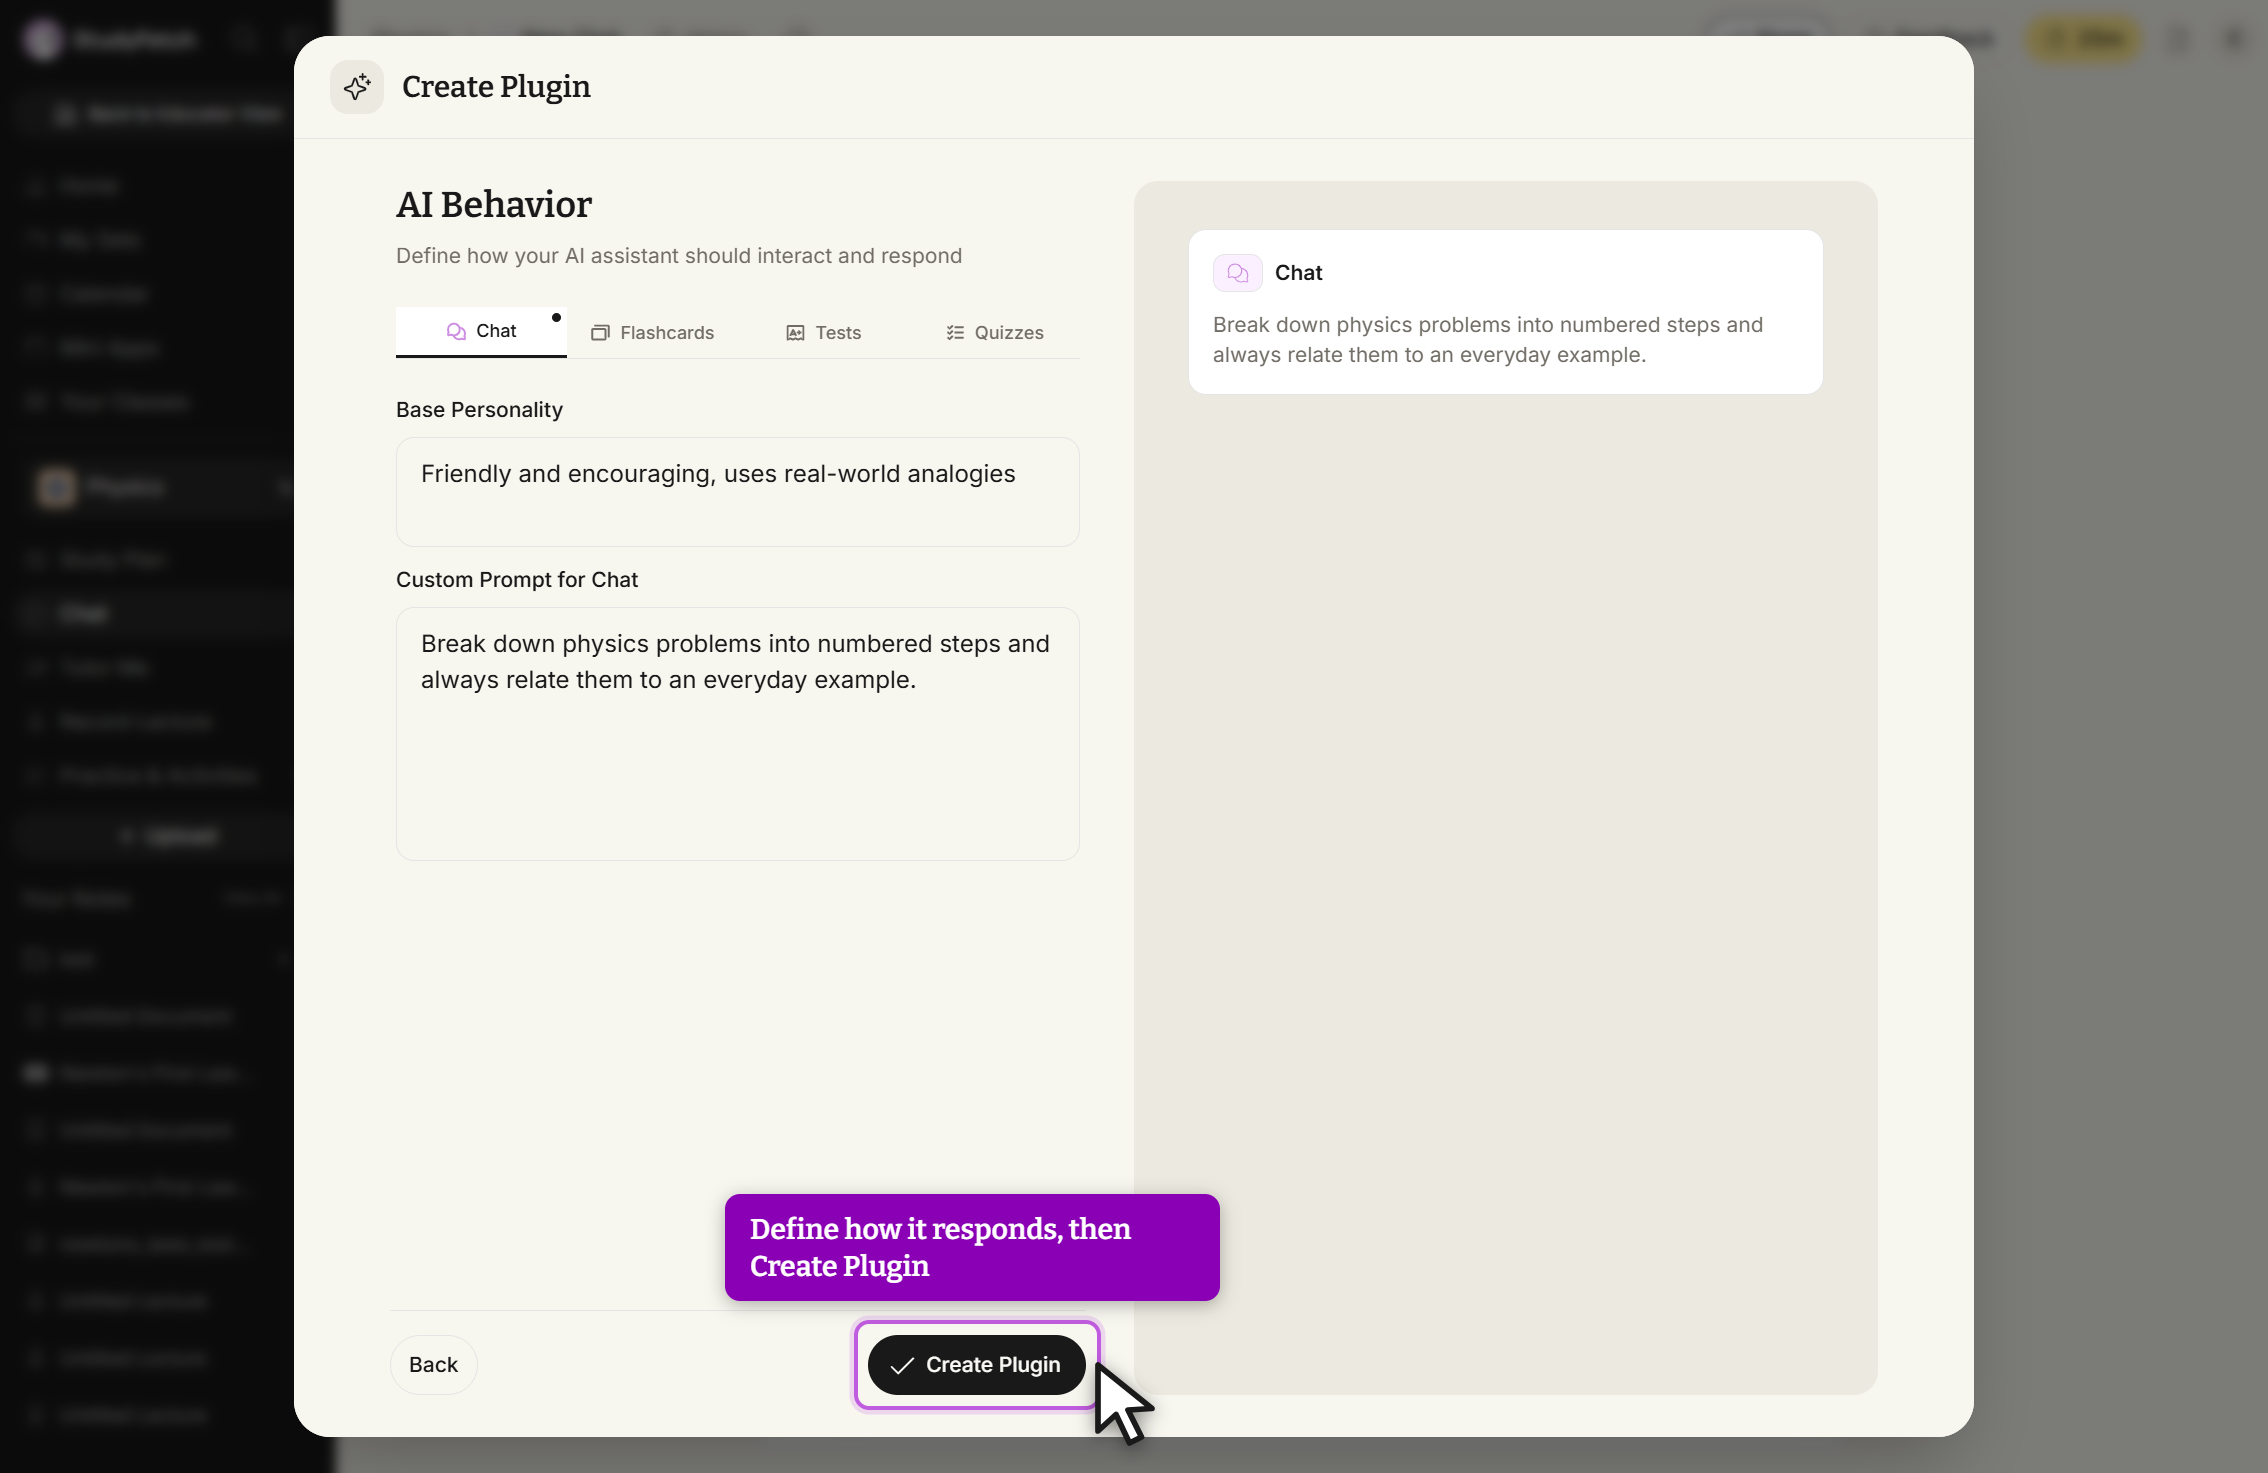
Create Plugin, AI Behavior step. Fill in Base Personality and Custom Prompt for Chat, then select Create Plugin.
Scenarios
The Scenario chat feature transforms studying into an interactive, real-world experience by placing you in customizable simulations tailored to any field. You can engage with dynamic scenarios, apply your knowledge in real time, and receive detailed feedback to strengthen your understanding and decision-making skills.
Accessing Scenarios
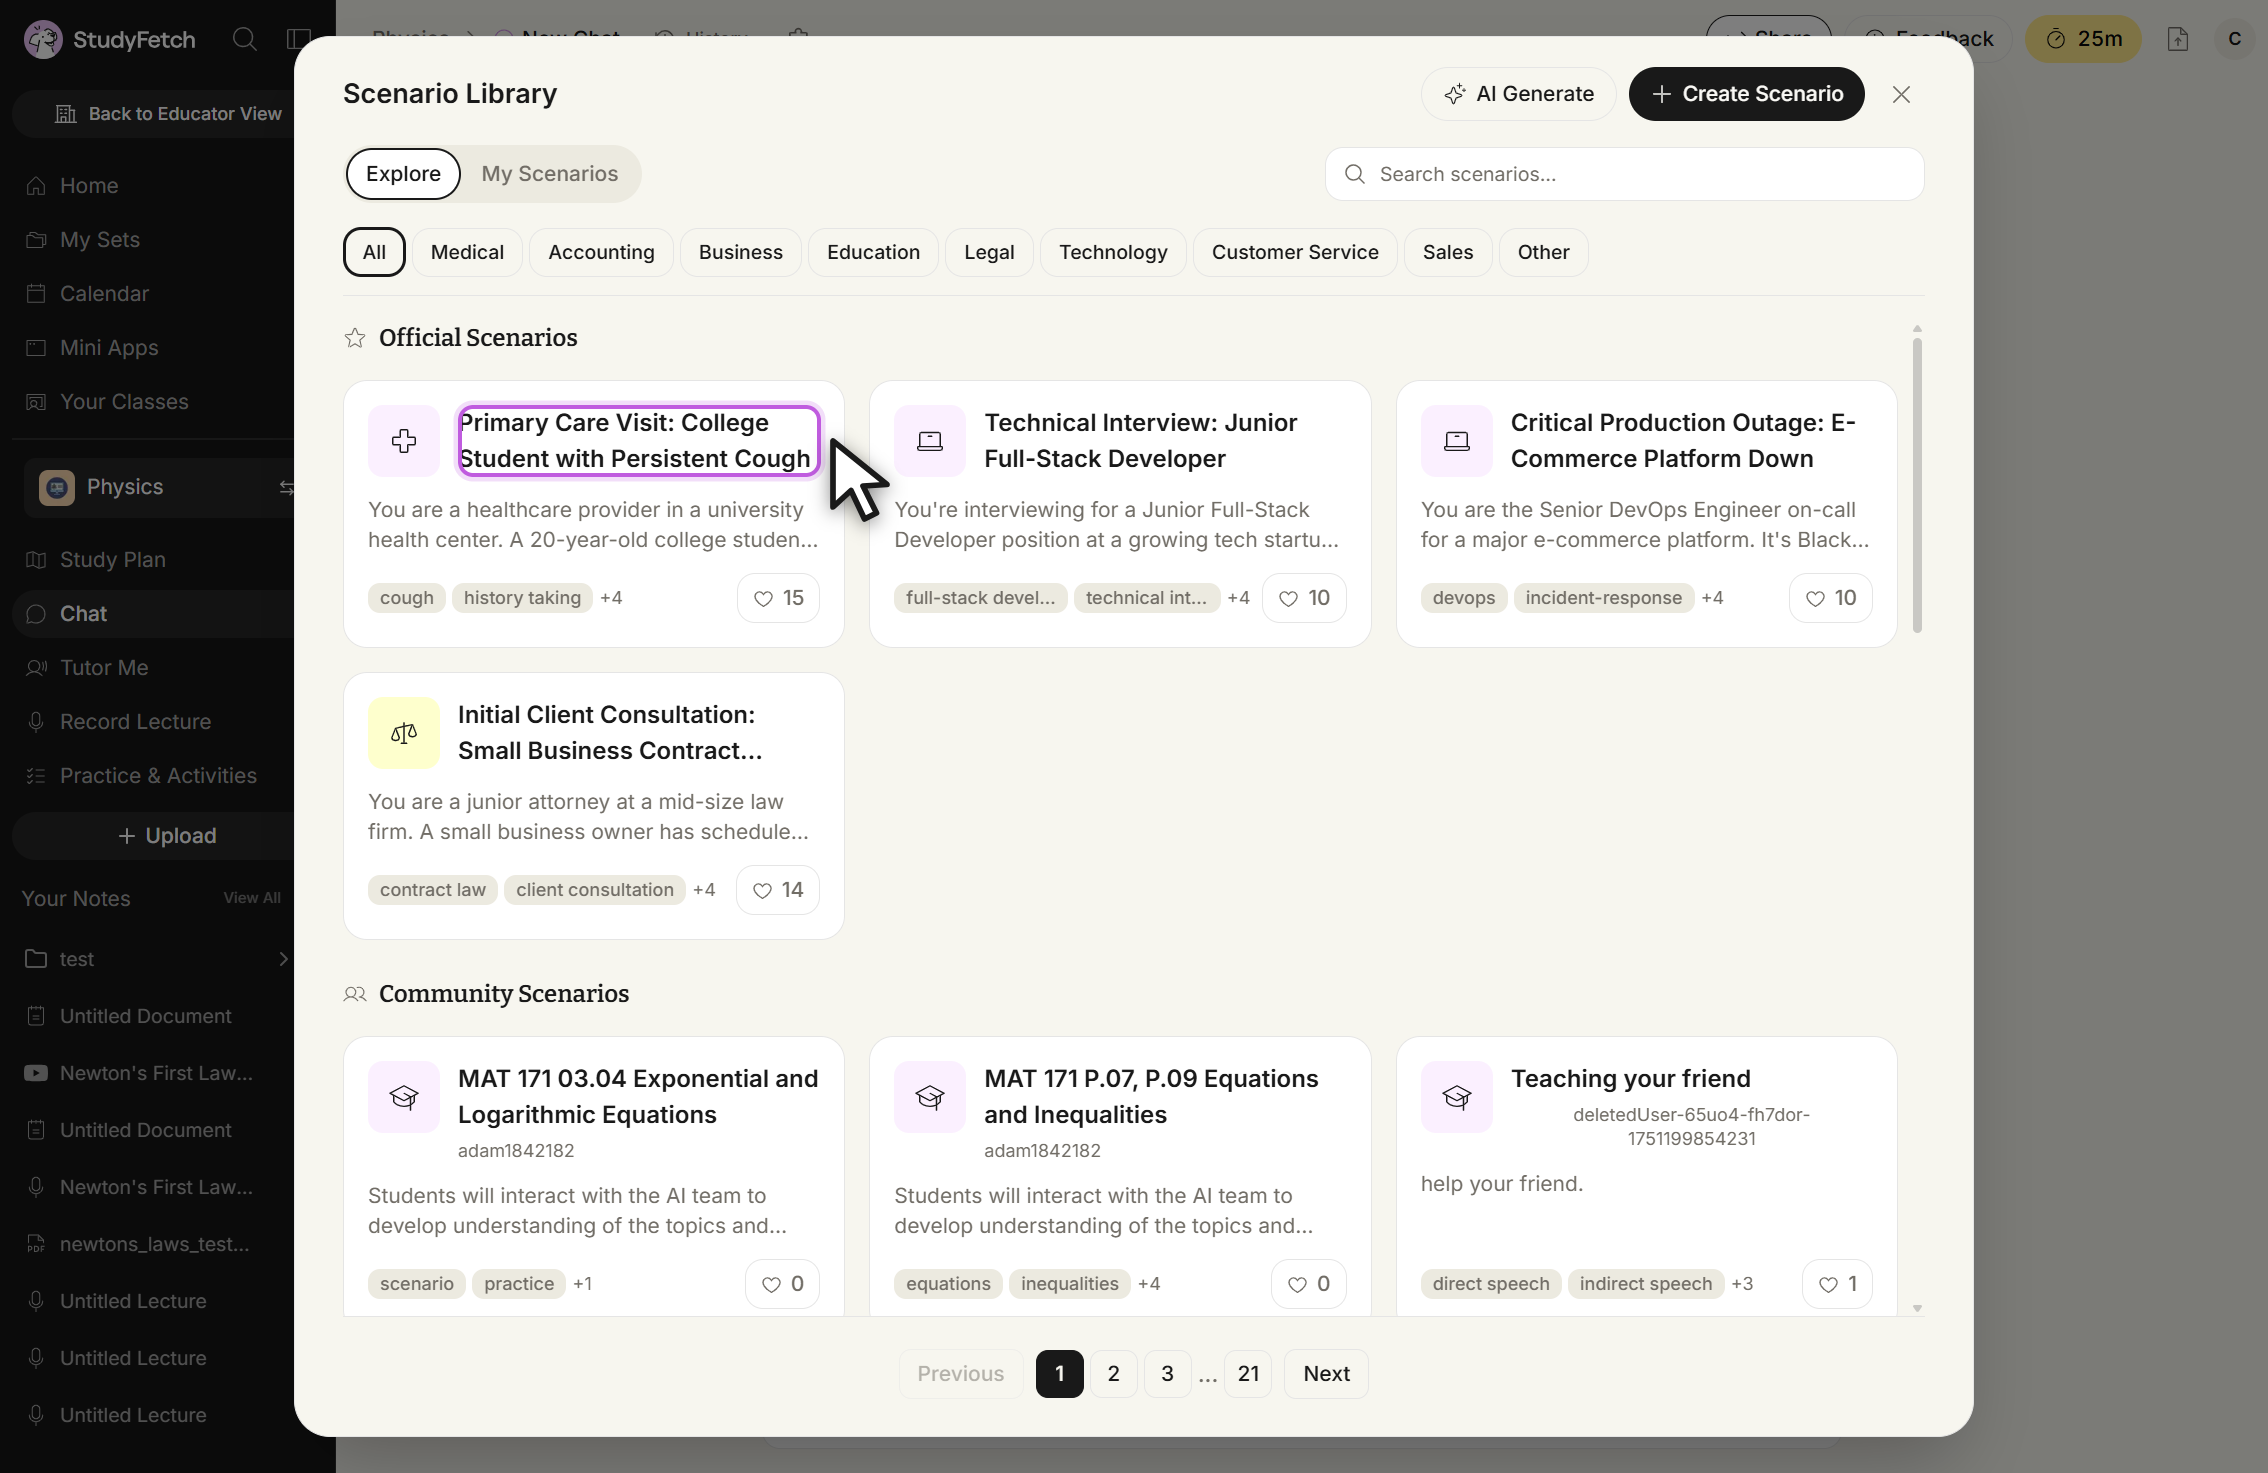
After opening a new chat, select the Scenarios button. The Scenario Library will load, showing StudyFetch Official Scenarios and Community Scenarios, organized by category (Medical, Business, Legal, Technology, and more) with a search field to find something specific.
Selecting and Starting a Scenario
Click a scenario card to open its detail page, which lists the Scenario Description, your Goal, and the Characters involved. When you're ready, click Start Scenario.
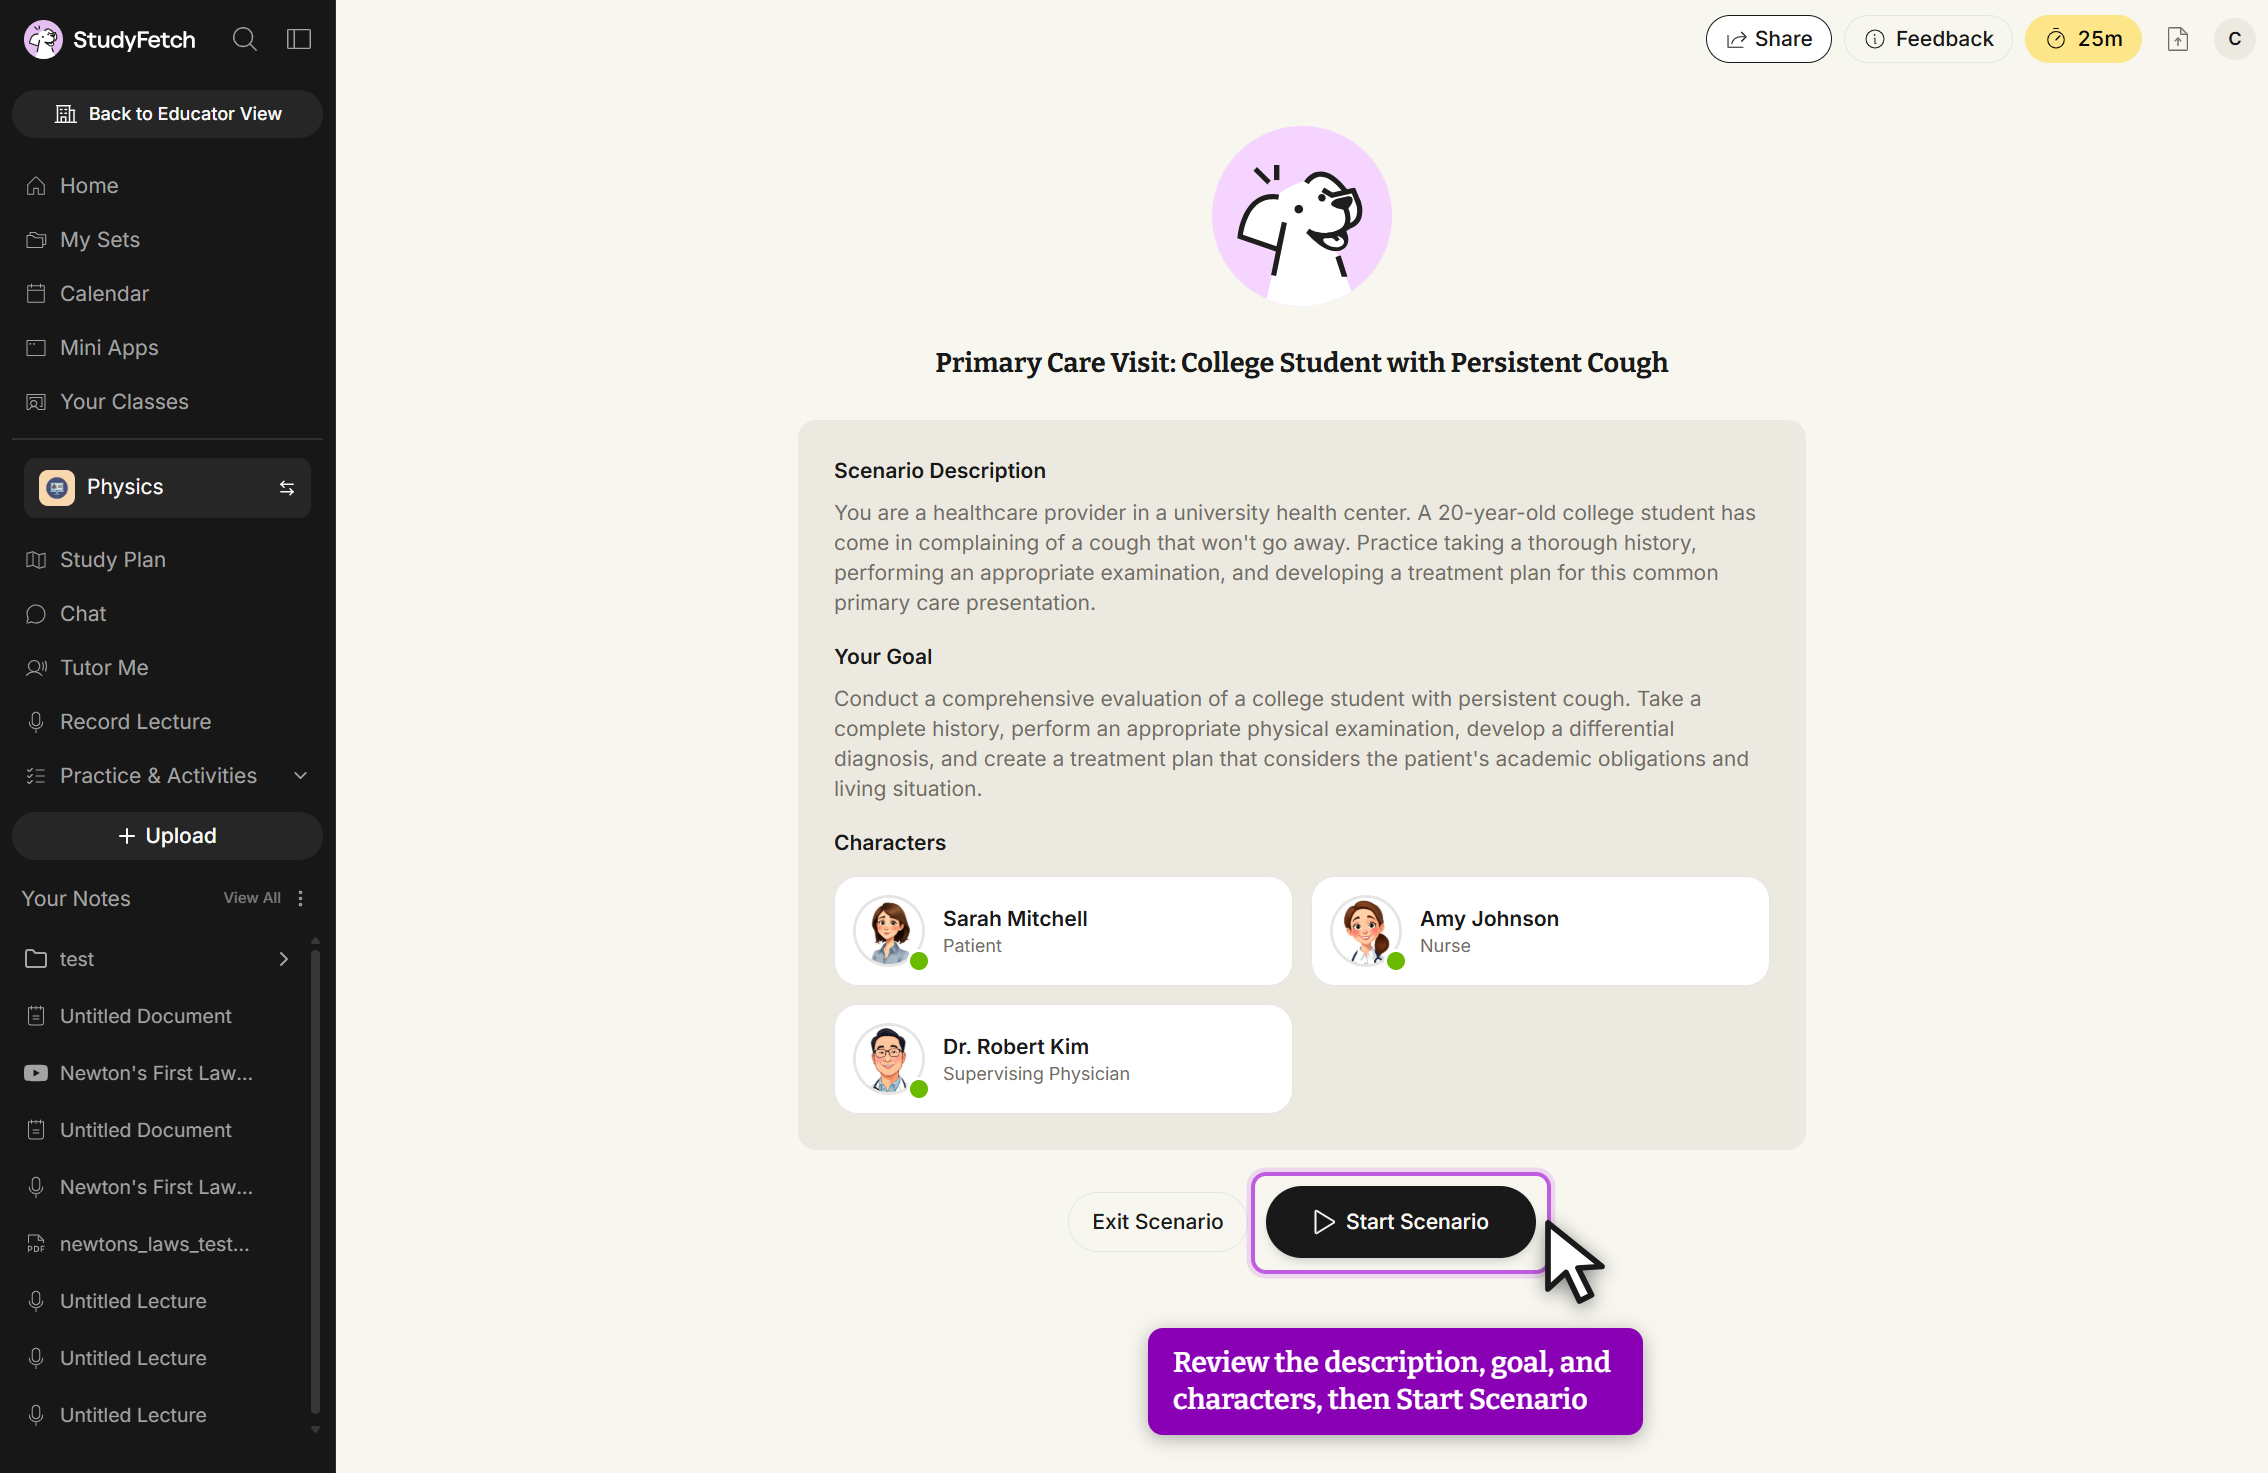
Primary Care Visit: College Student with Persistent Cough. Read the description, goal, and characters, then select Start Scenario. A greeting message starts the interaction, and a panel on the right lists the scenario's characters (and tools, if any) for reference. Type your response in the chat box, or use the microphone icon to dictate, then press Enter to send. As the scenario progresses, the AI automatically has the right character respond to what you say.
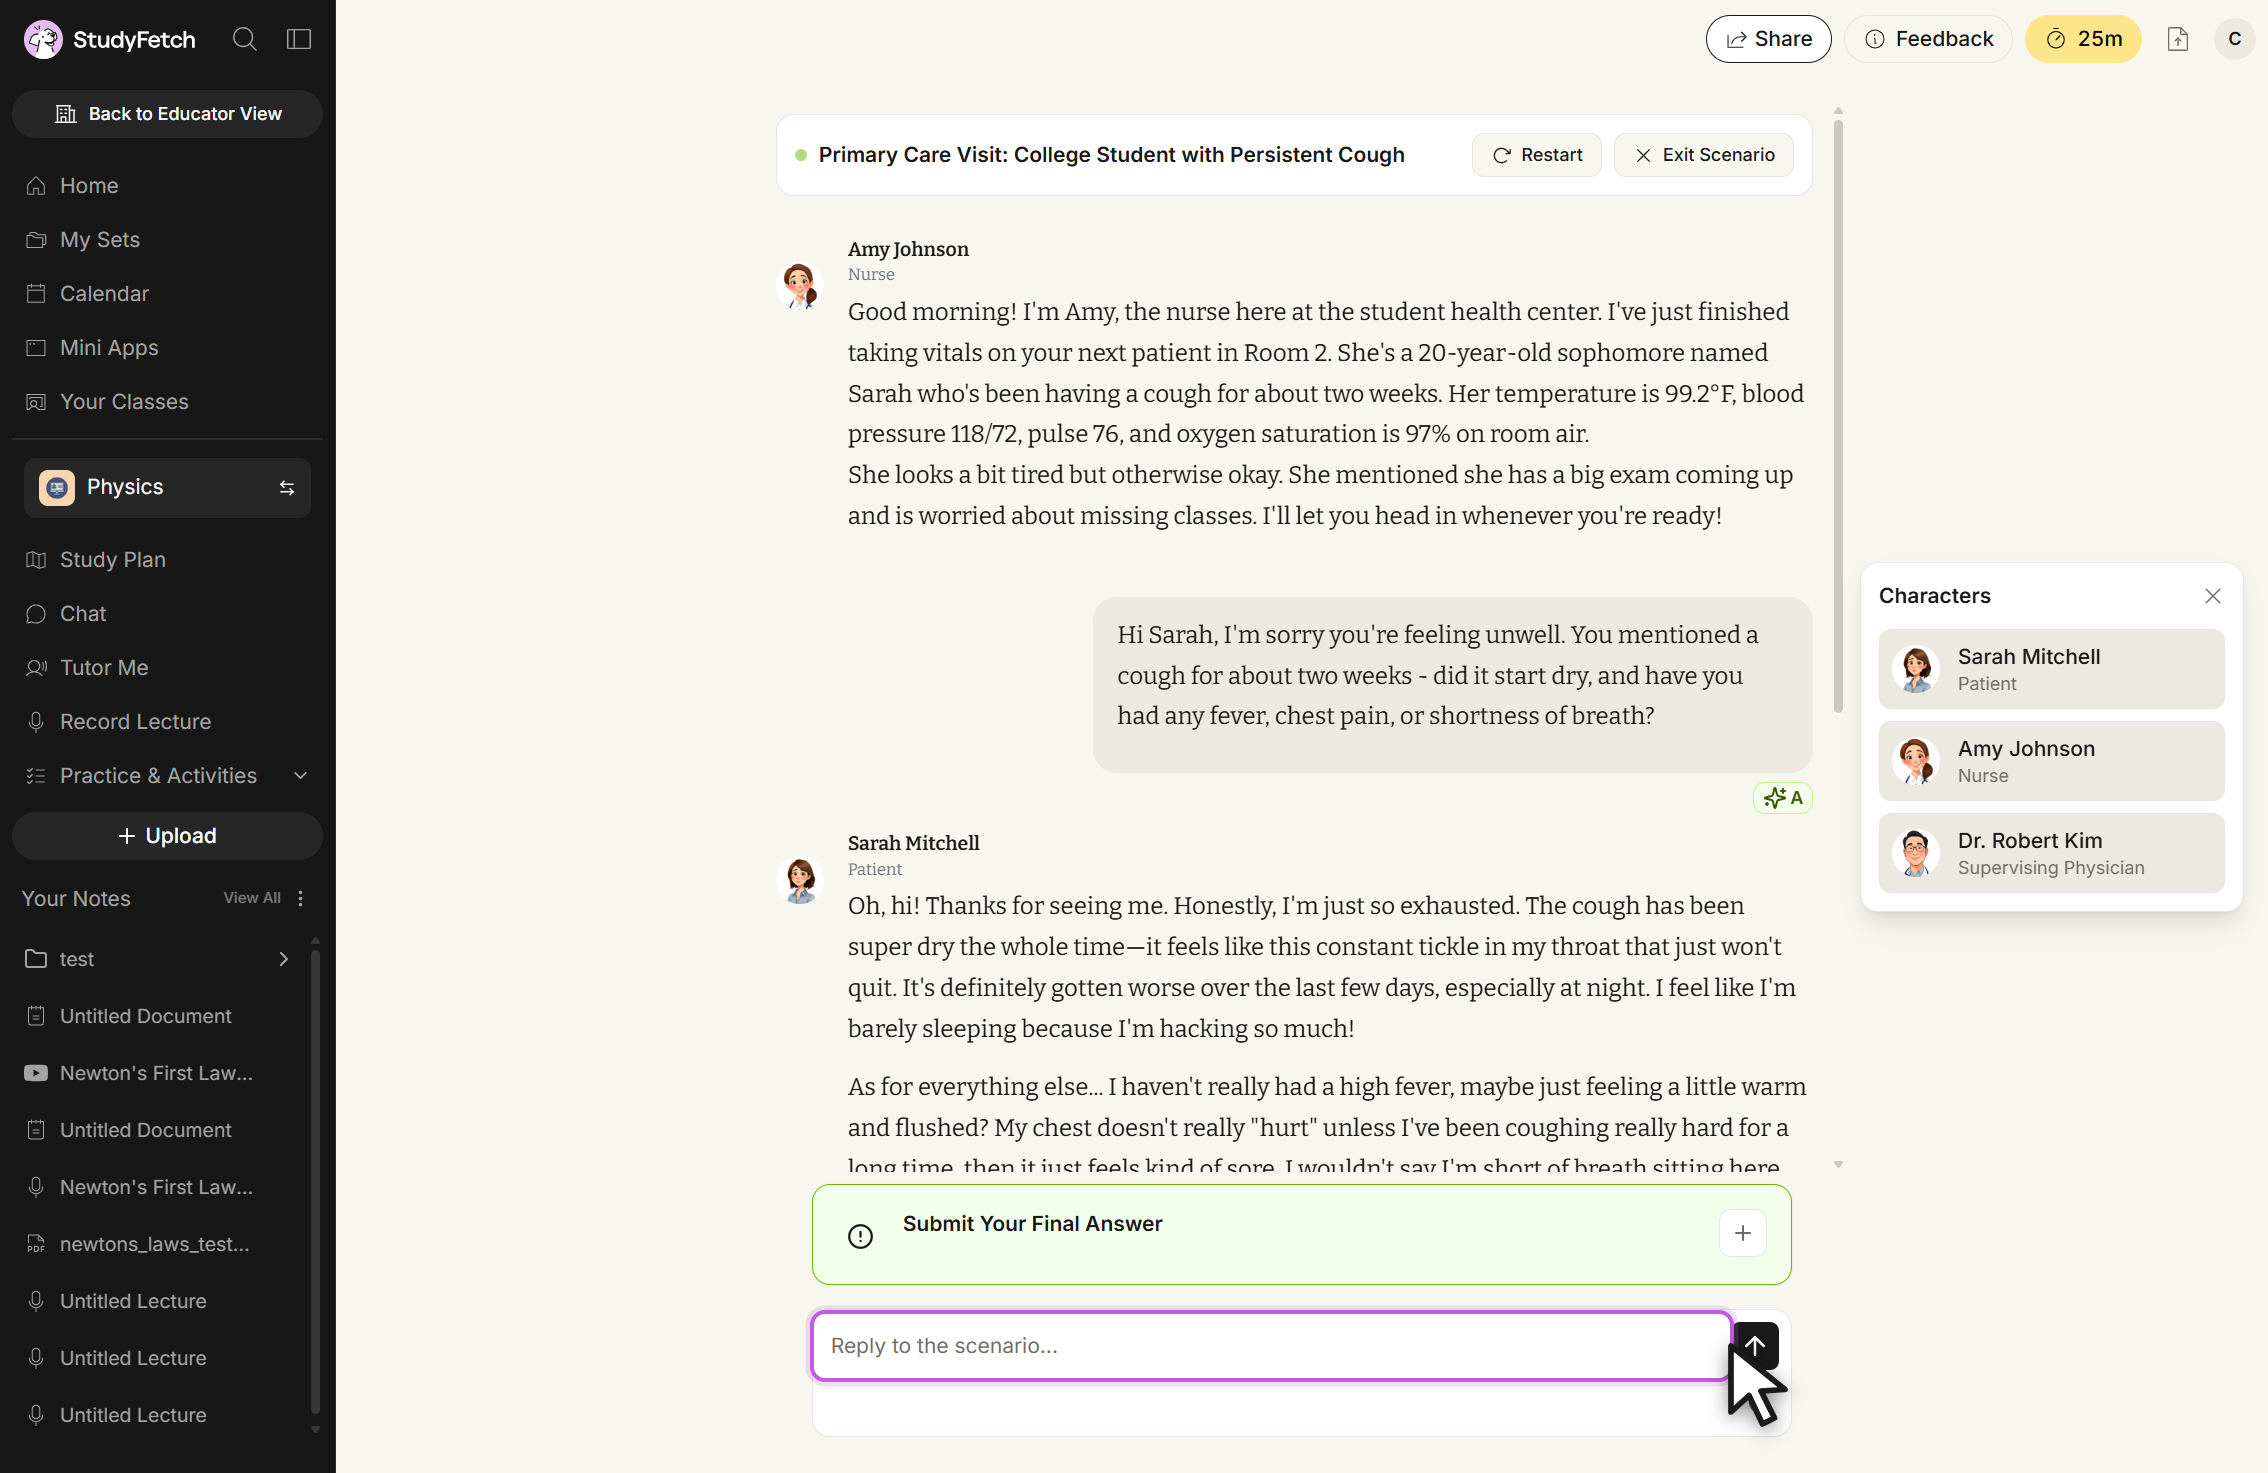
Primary Care Visit: College Student with Persistent Cough, two replies in. Type in the Reply to the scenario box to answer the characters. When you're finished, either select Submit Scenario, or, if the scenario requires a final answer, expand the Submit Your Final Answer prompt, enter your response, and click Submit Answer.
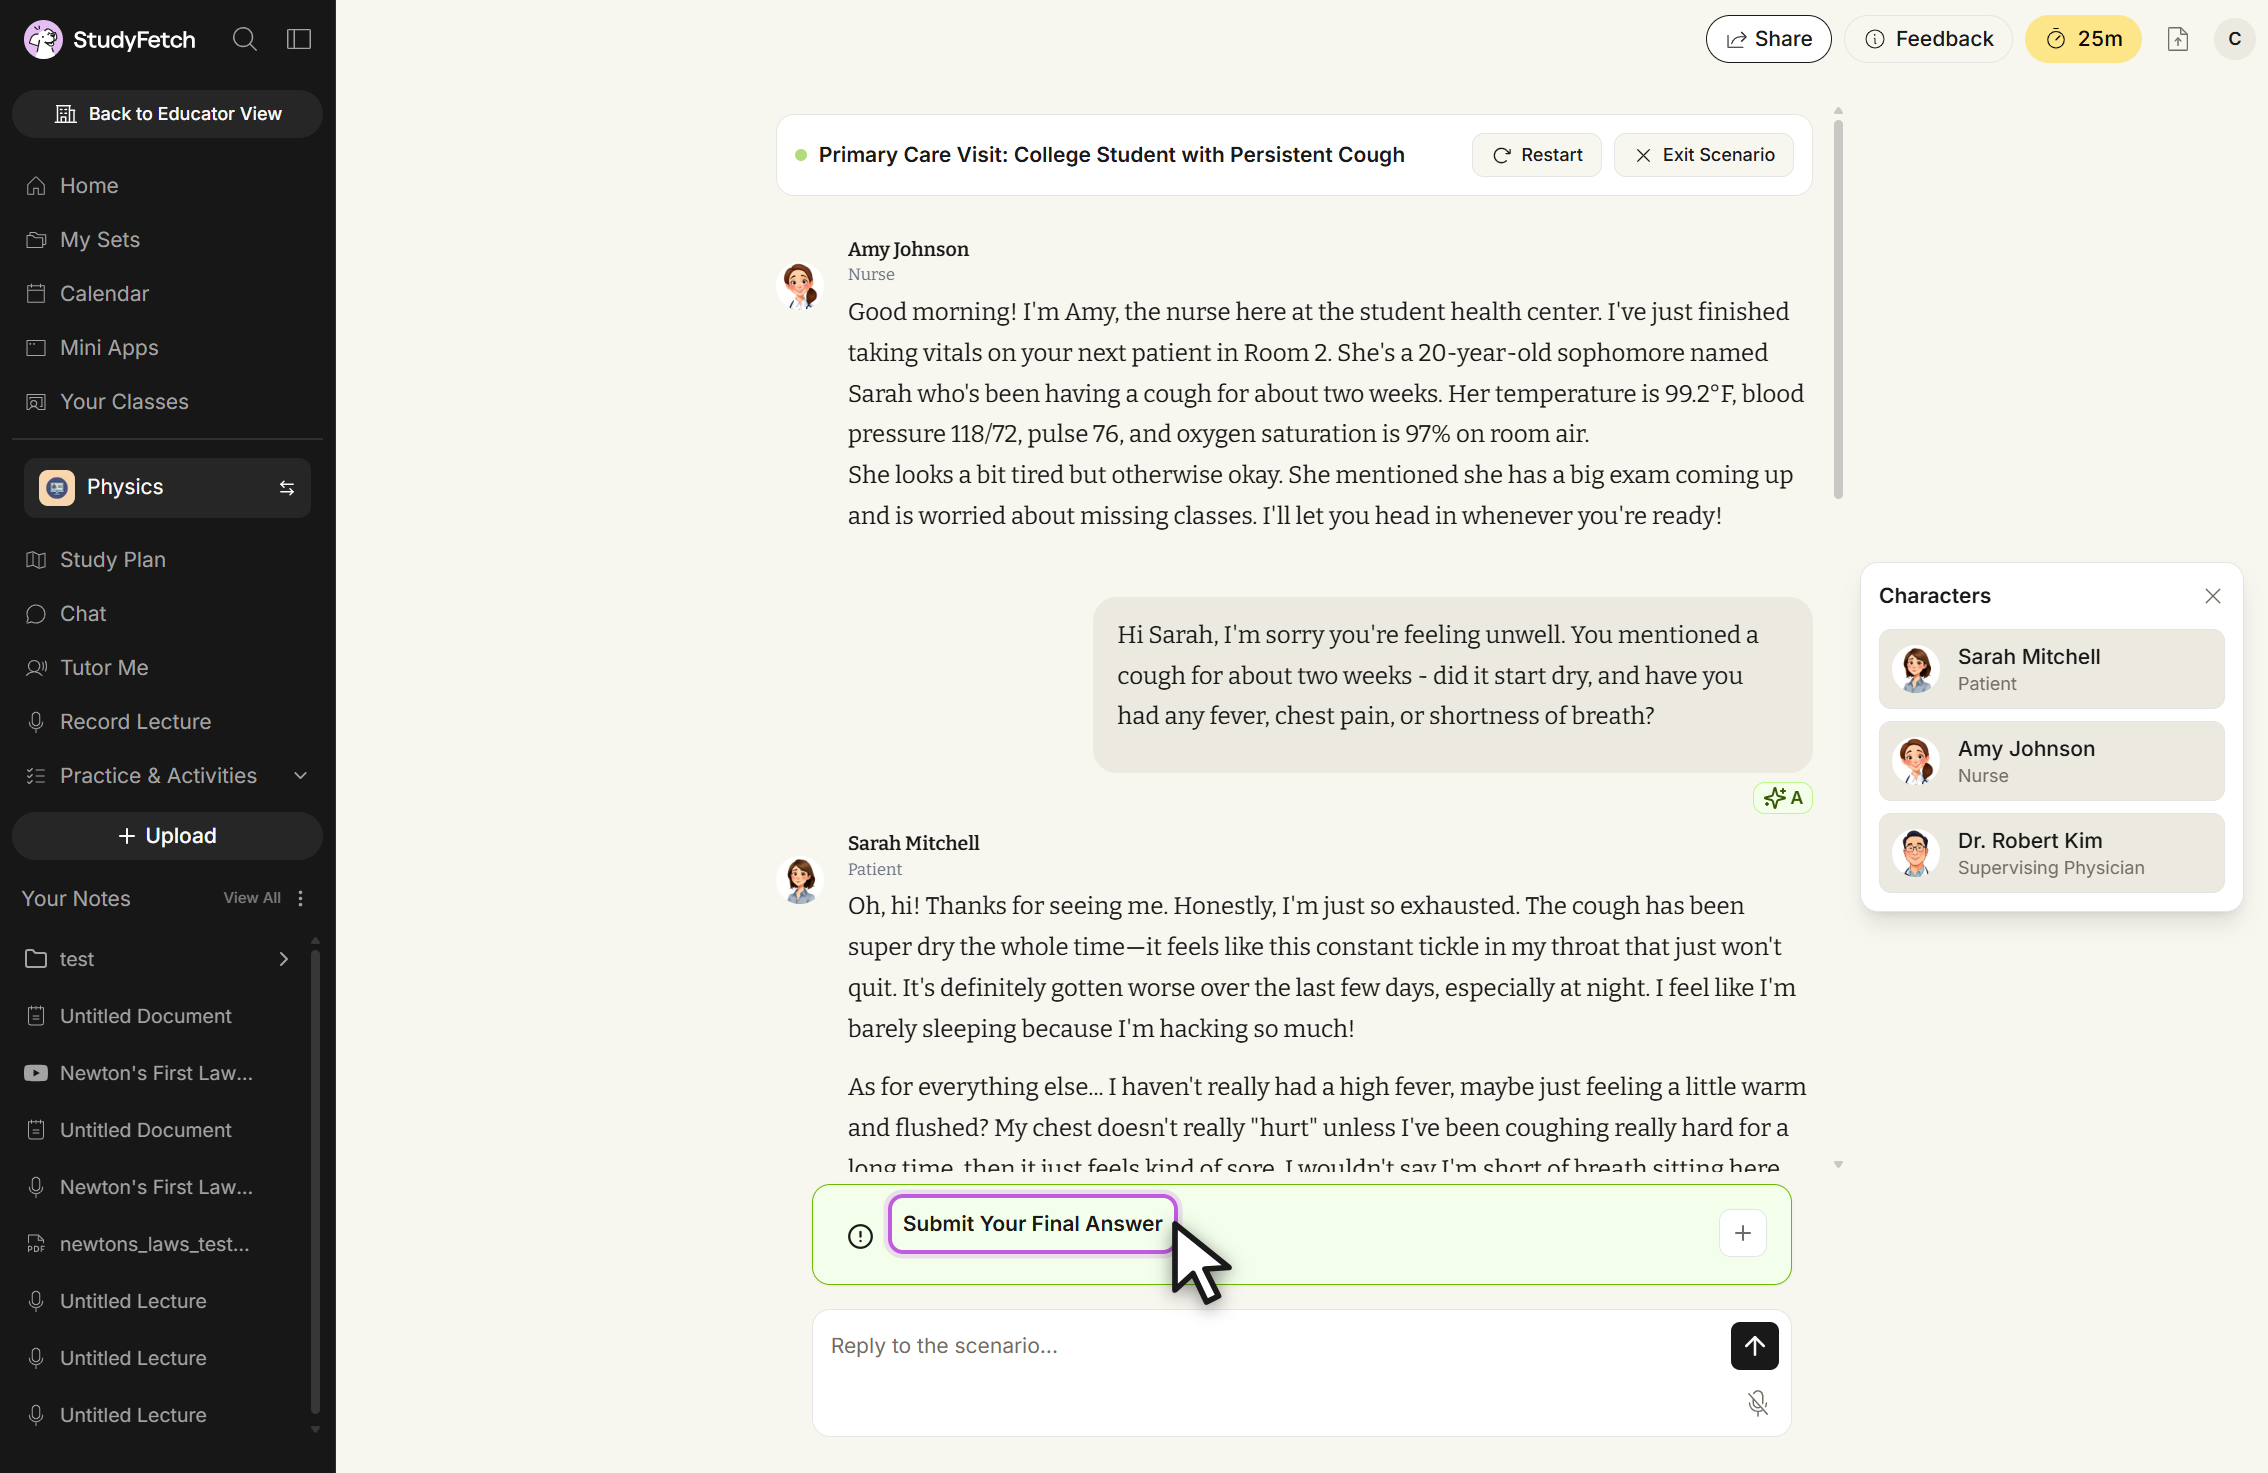
Primary Care Visit: College Student with Persistent Cough, in progress. Select Submit Your Final Answer to expand the final answer box.
Interpreting Scenario Feedback and Trying Again
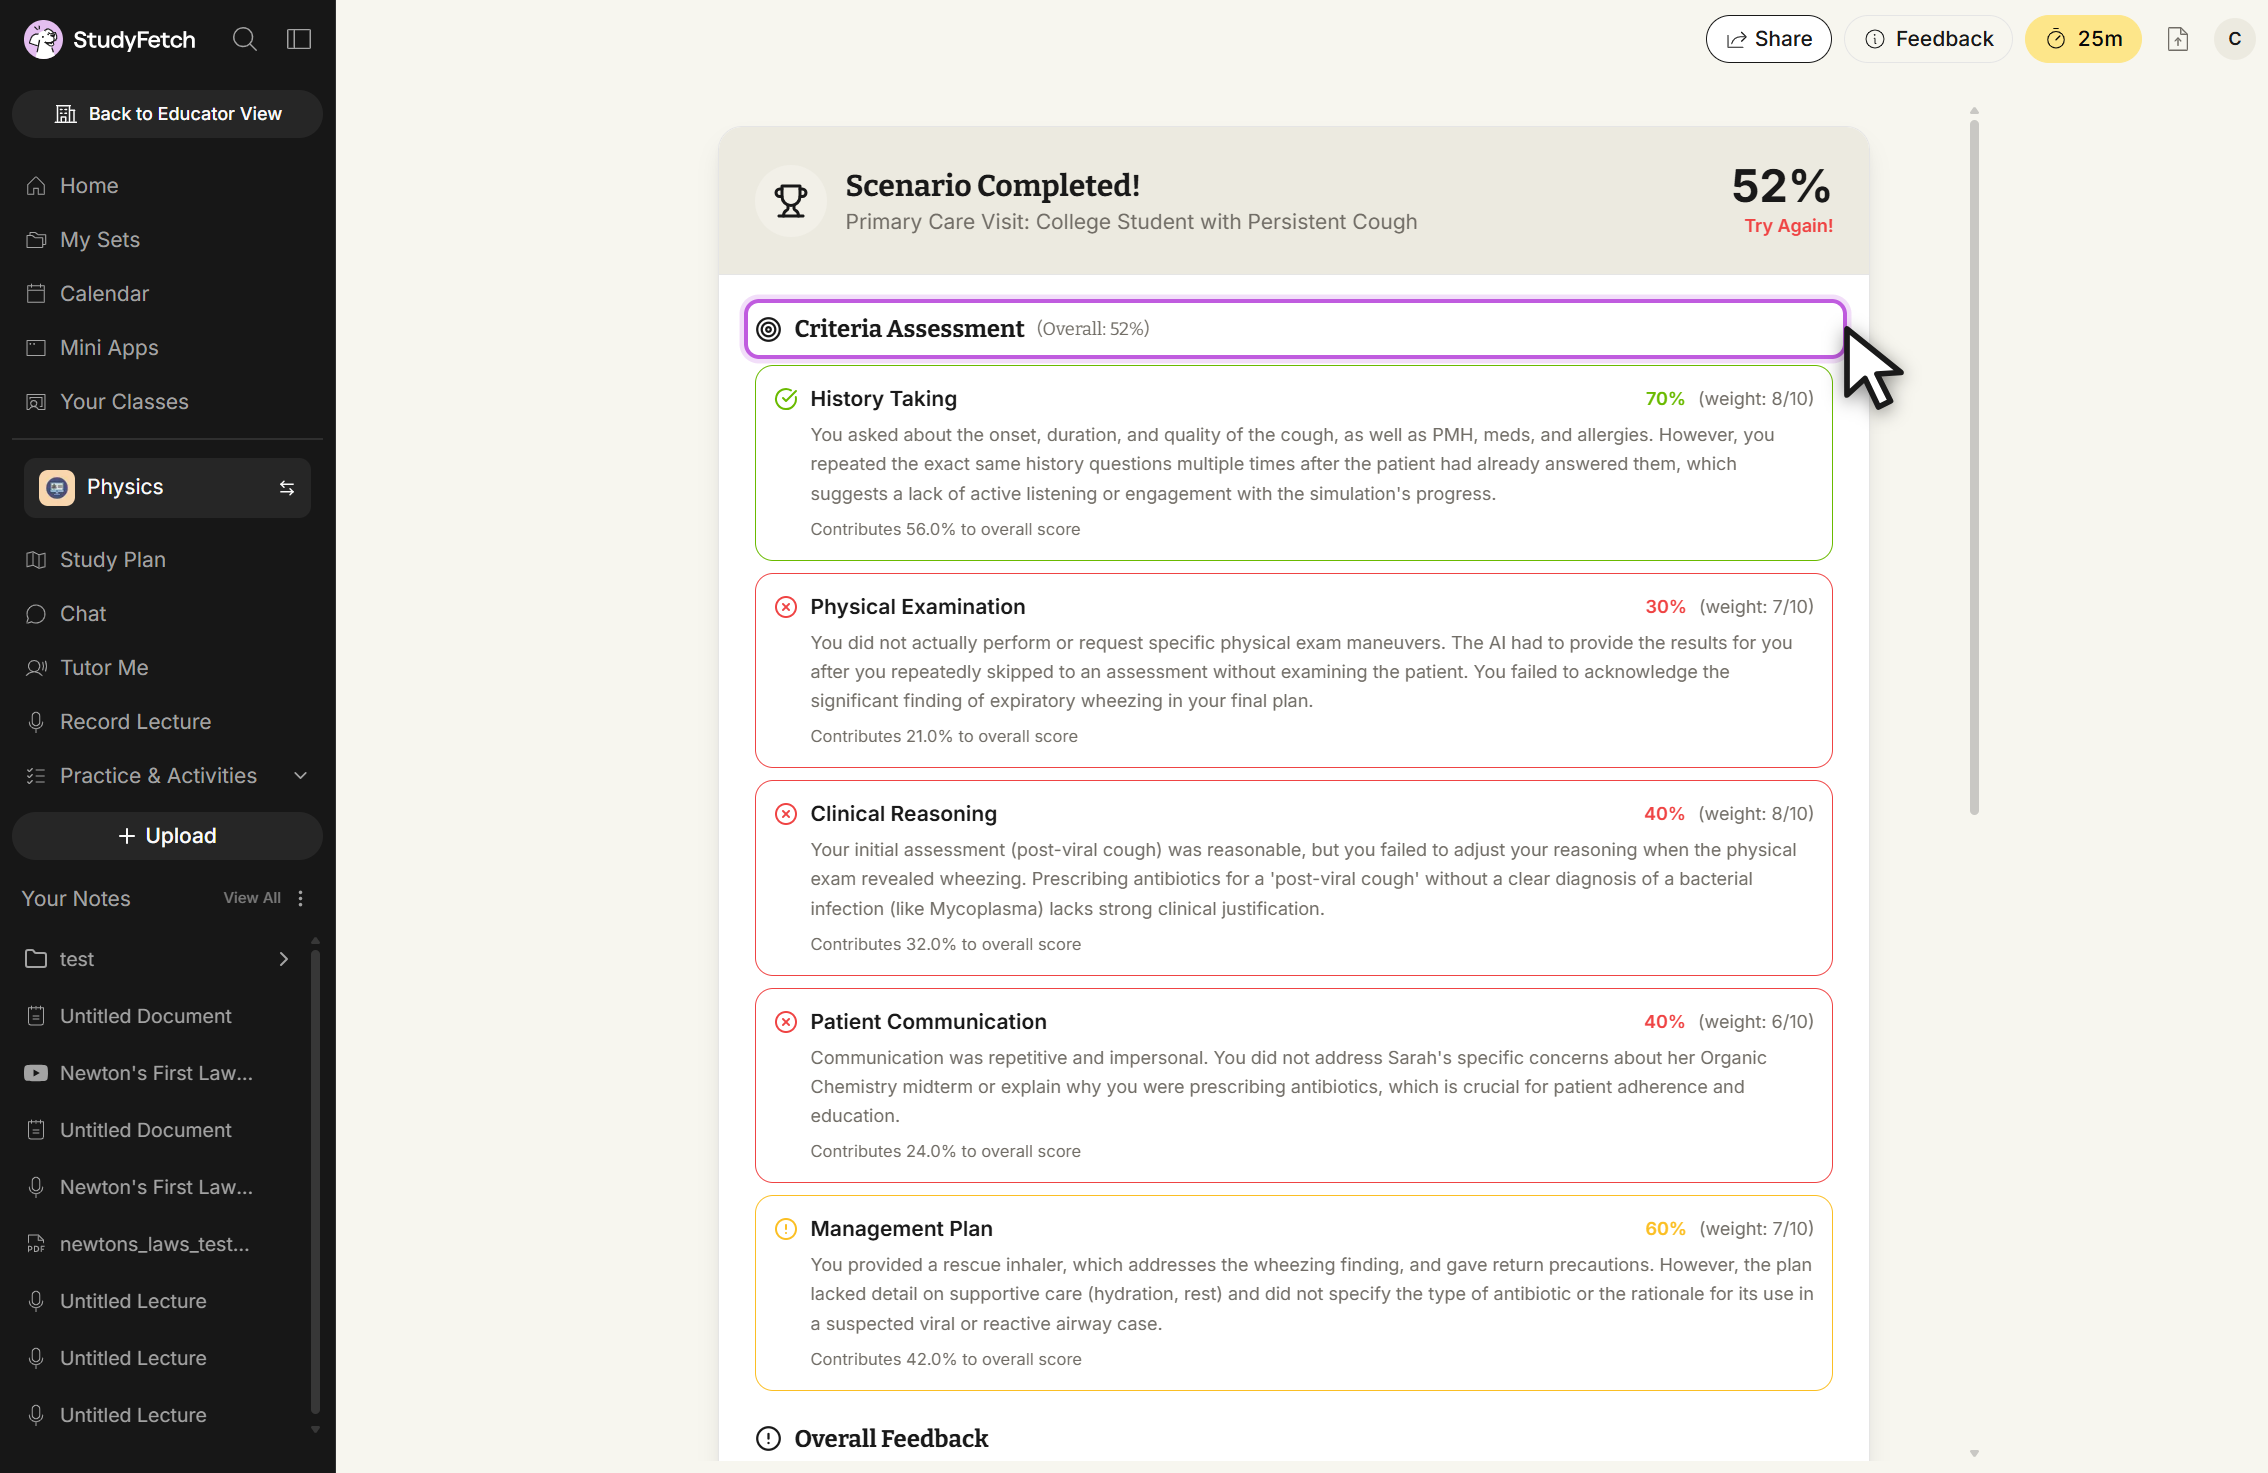
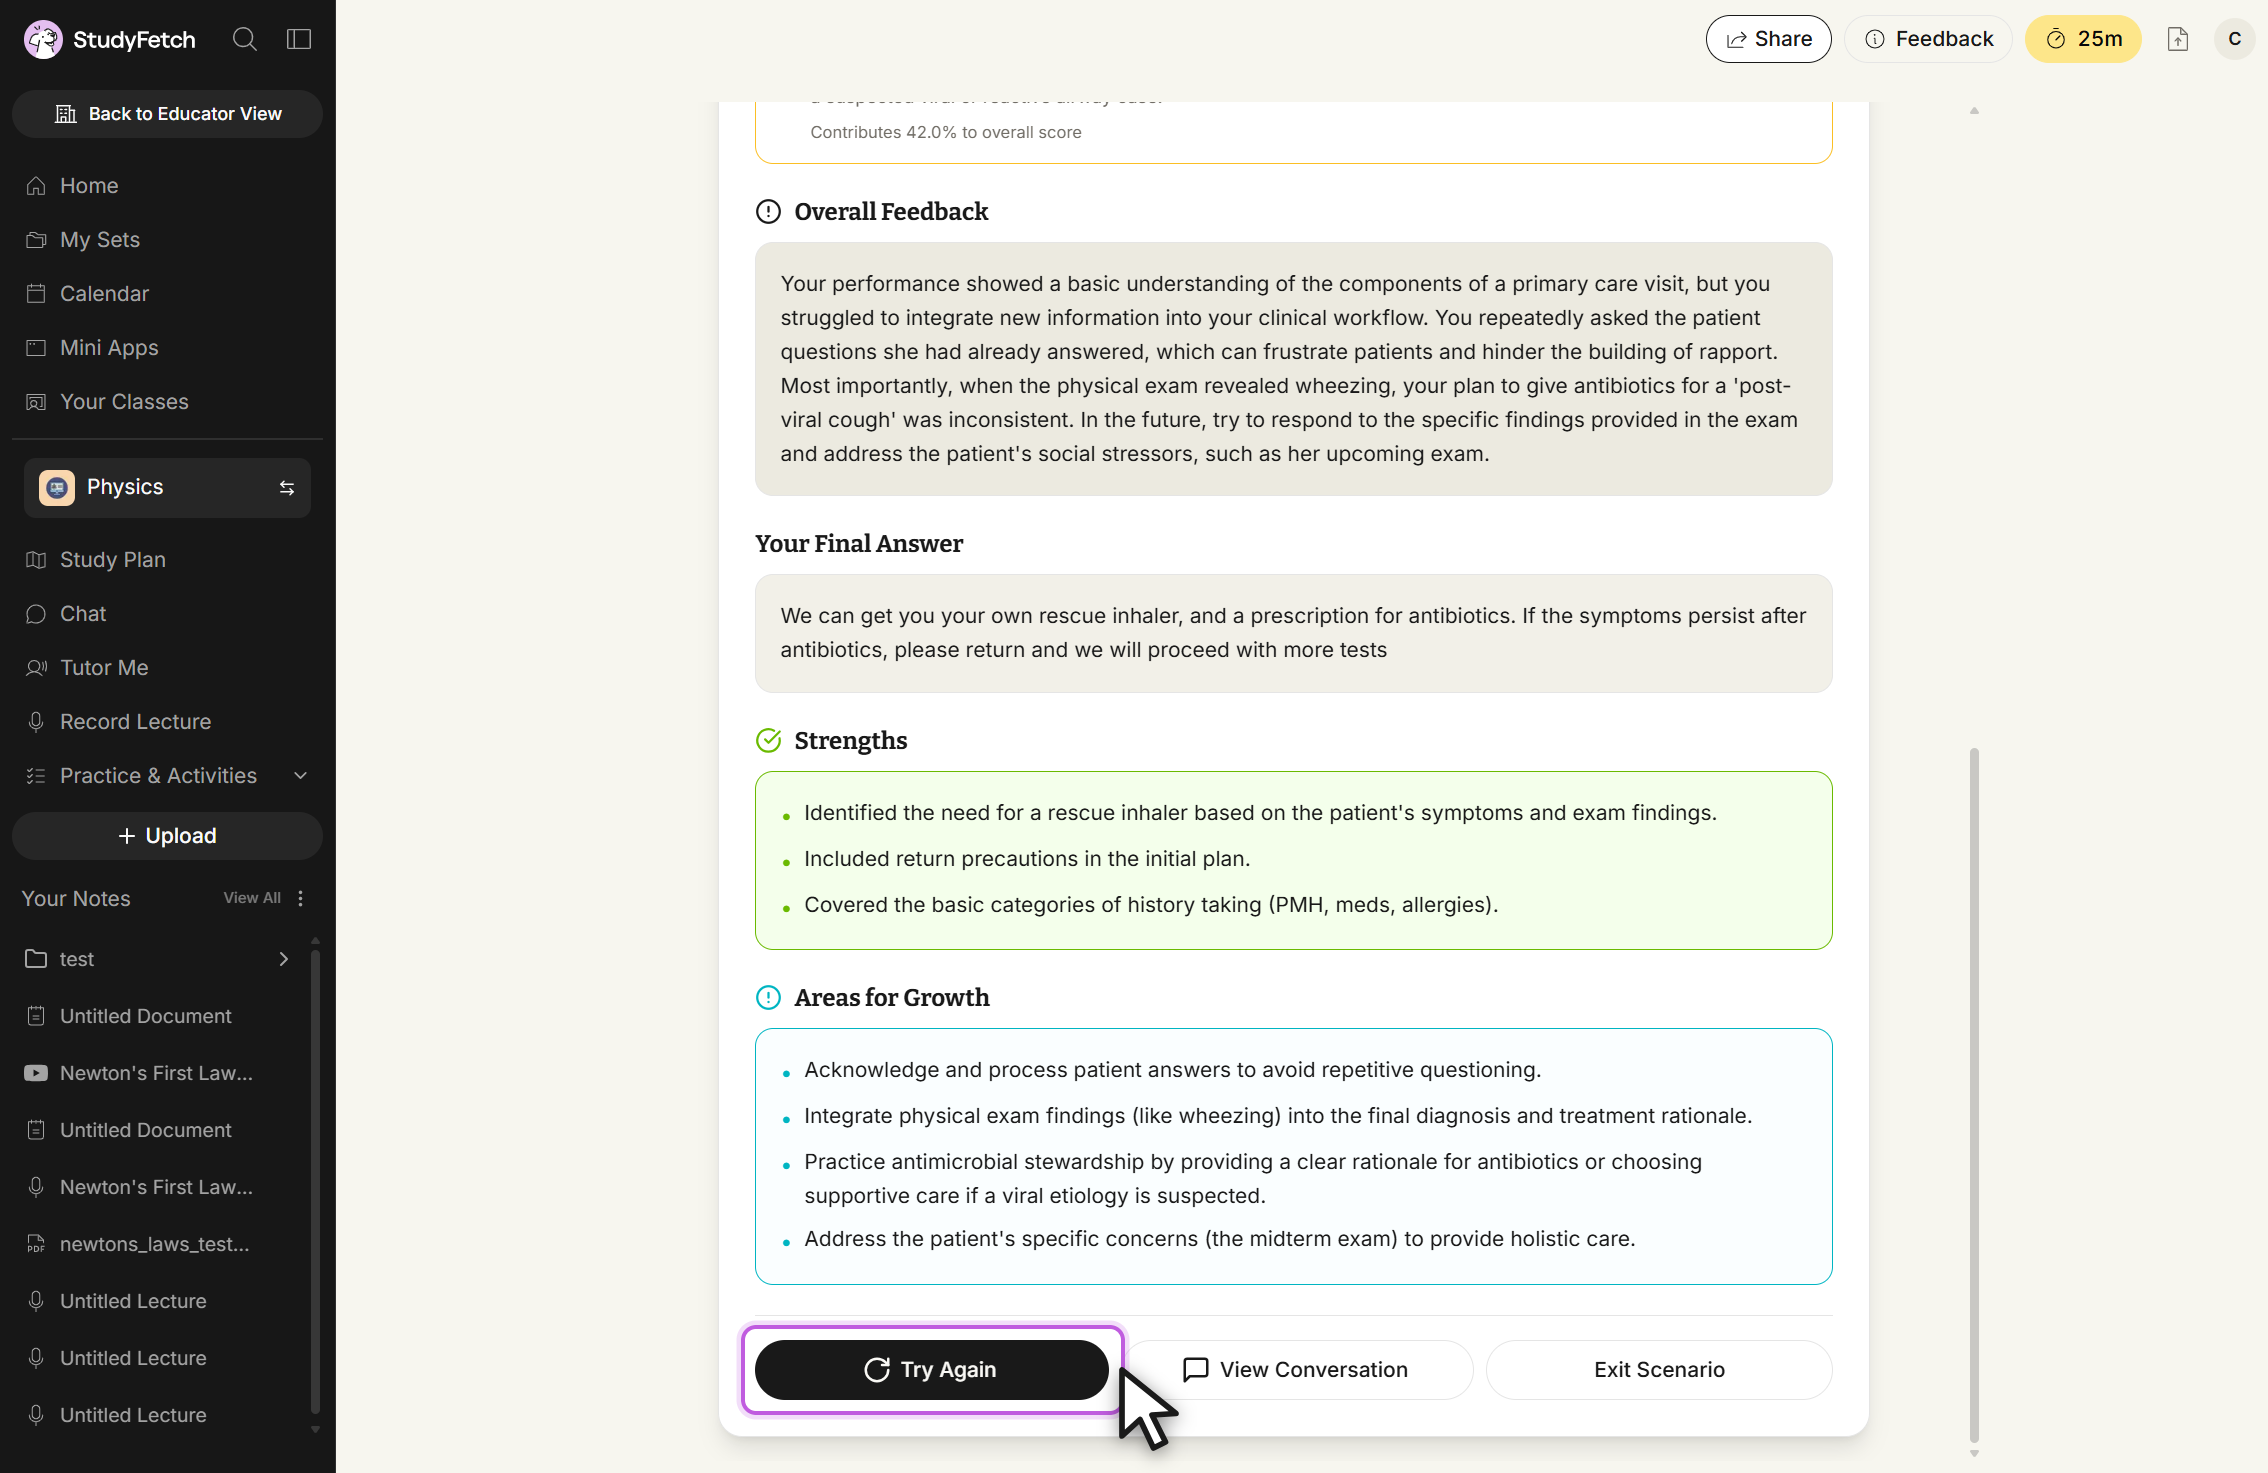
After you submit, you'll receive detailed feedback based on the scenario's rubric criteria: an overall score, a breakdown of how you did on each criterion, and specific strengths and areas for growth.
Scroll down to see your submitted final answer alongside a Strengths and Areas for Growth summary. From here you can select Try Again to retry the scenario, View Conversation to review the full chat, or Exit Scenario to leave.
Generate AI Scenarios
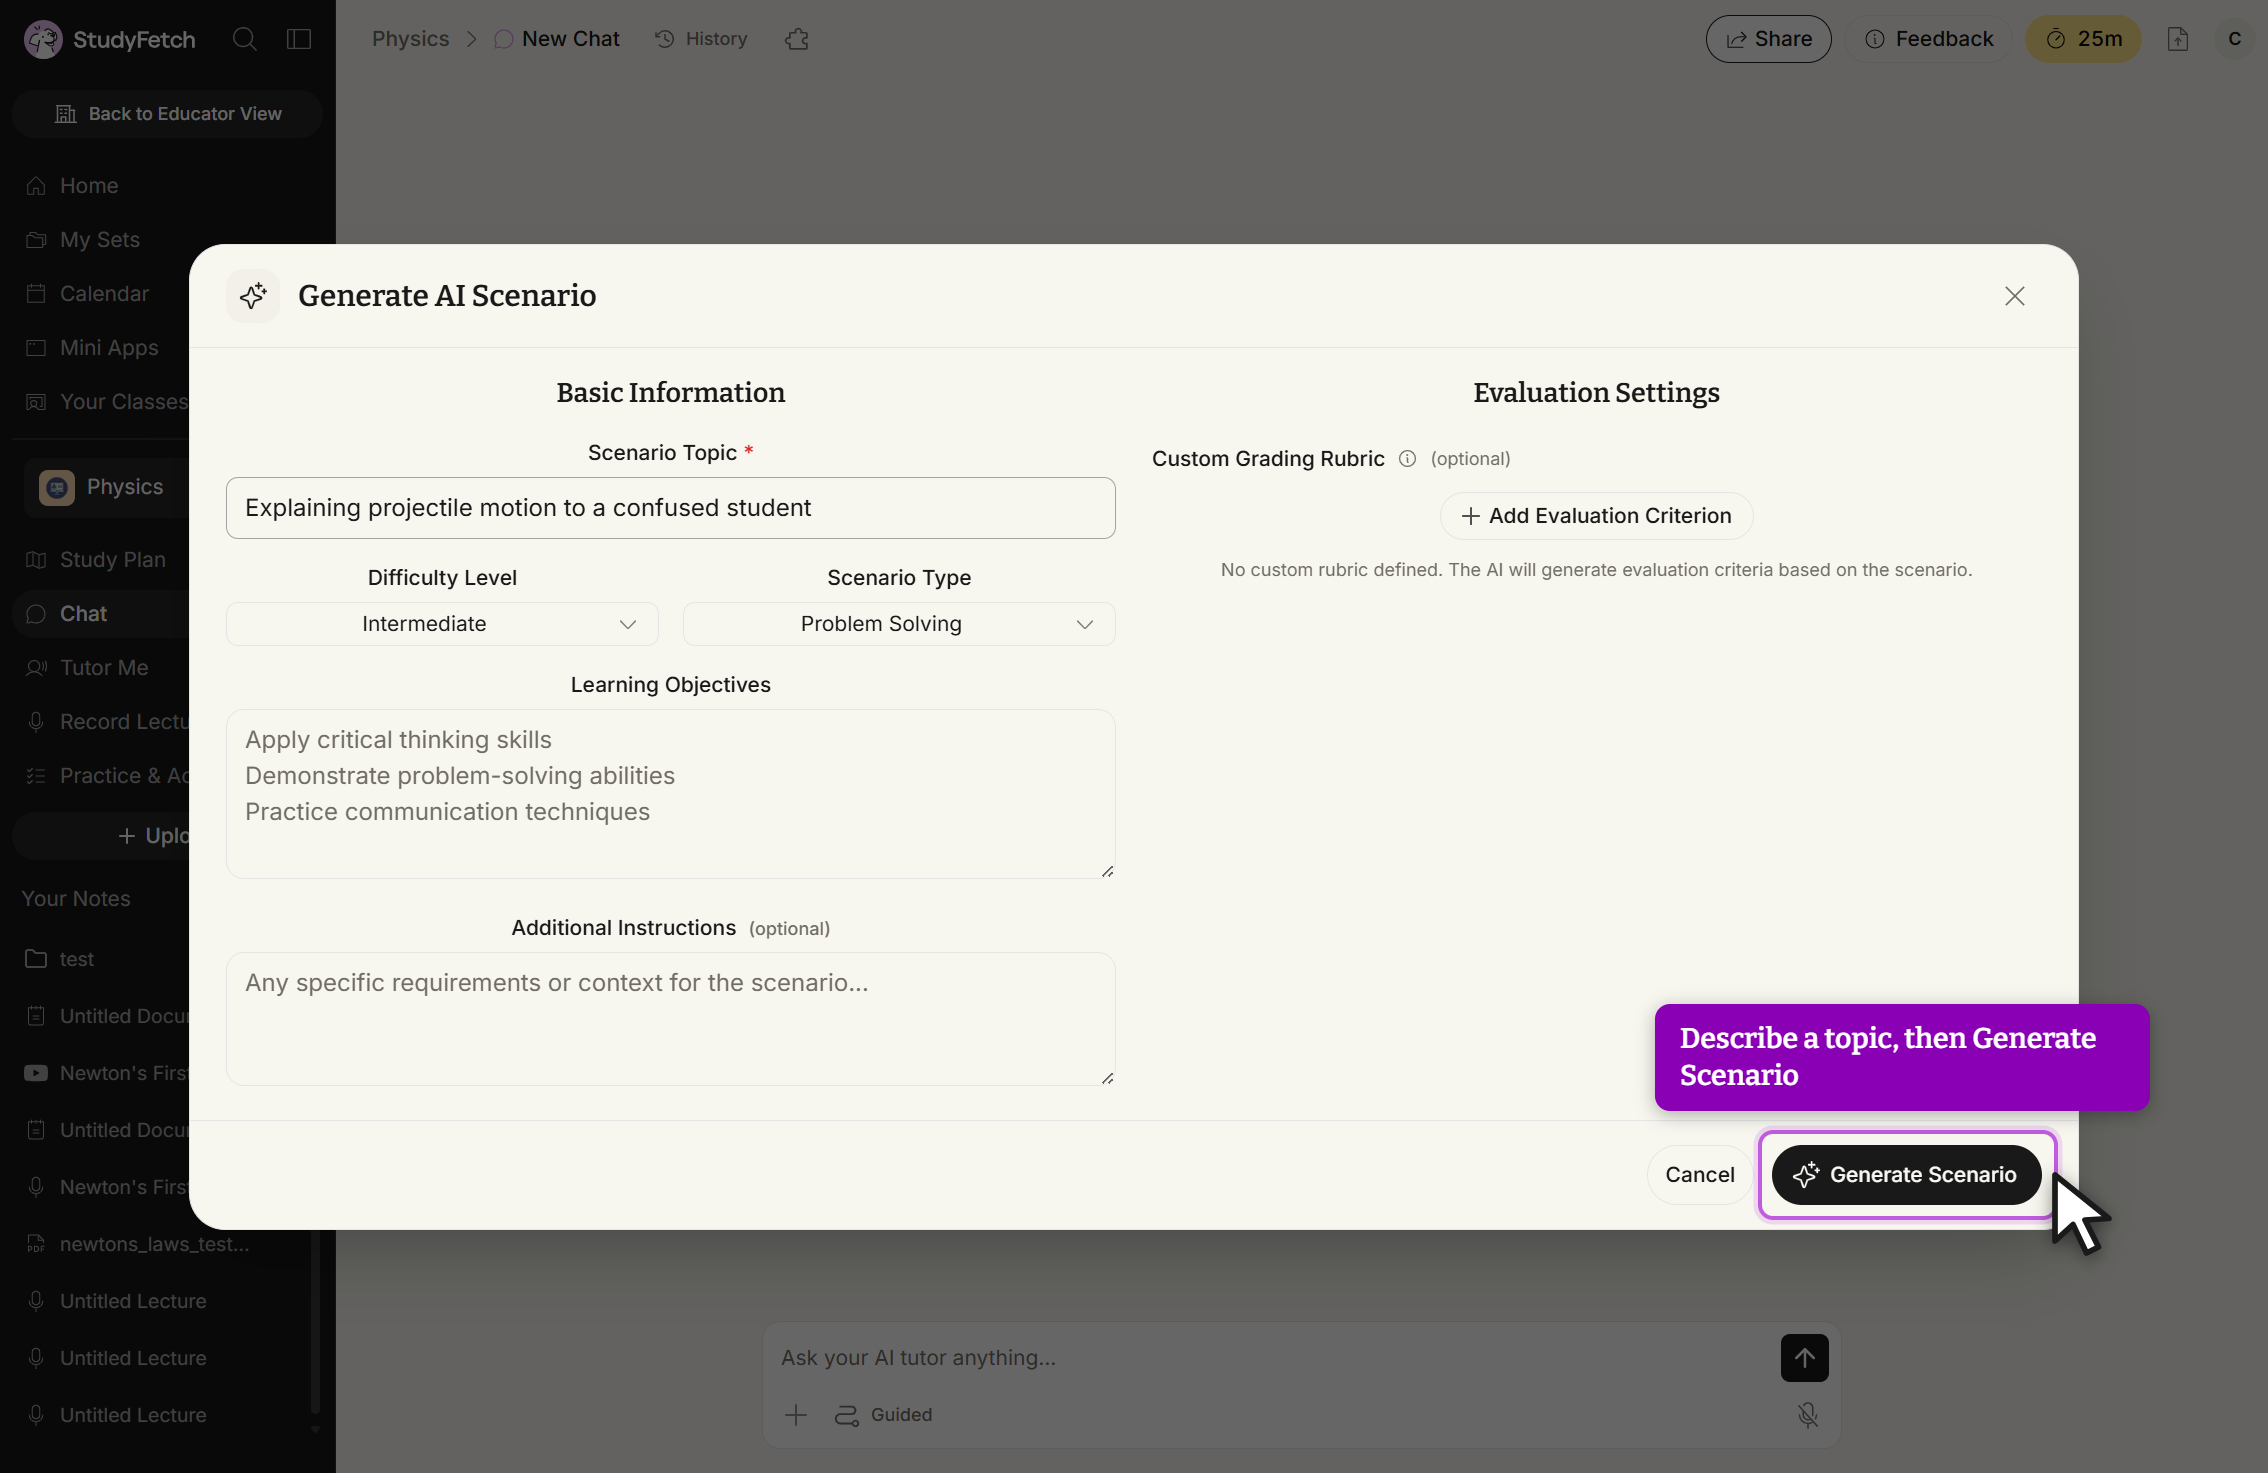
Can't find a scenario that fits your needs? Use the AI Generate option (top of the Scenario Library) to let AI instantly create a personalized scenario. Enter a Scenario Topic, choose a Difficulty Level and Scenario Type, describe your Learning Objectives, and optionally build a custom grading rubric under Evaluation Settings. Click Generate Scenario when ready.
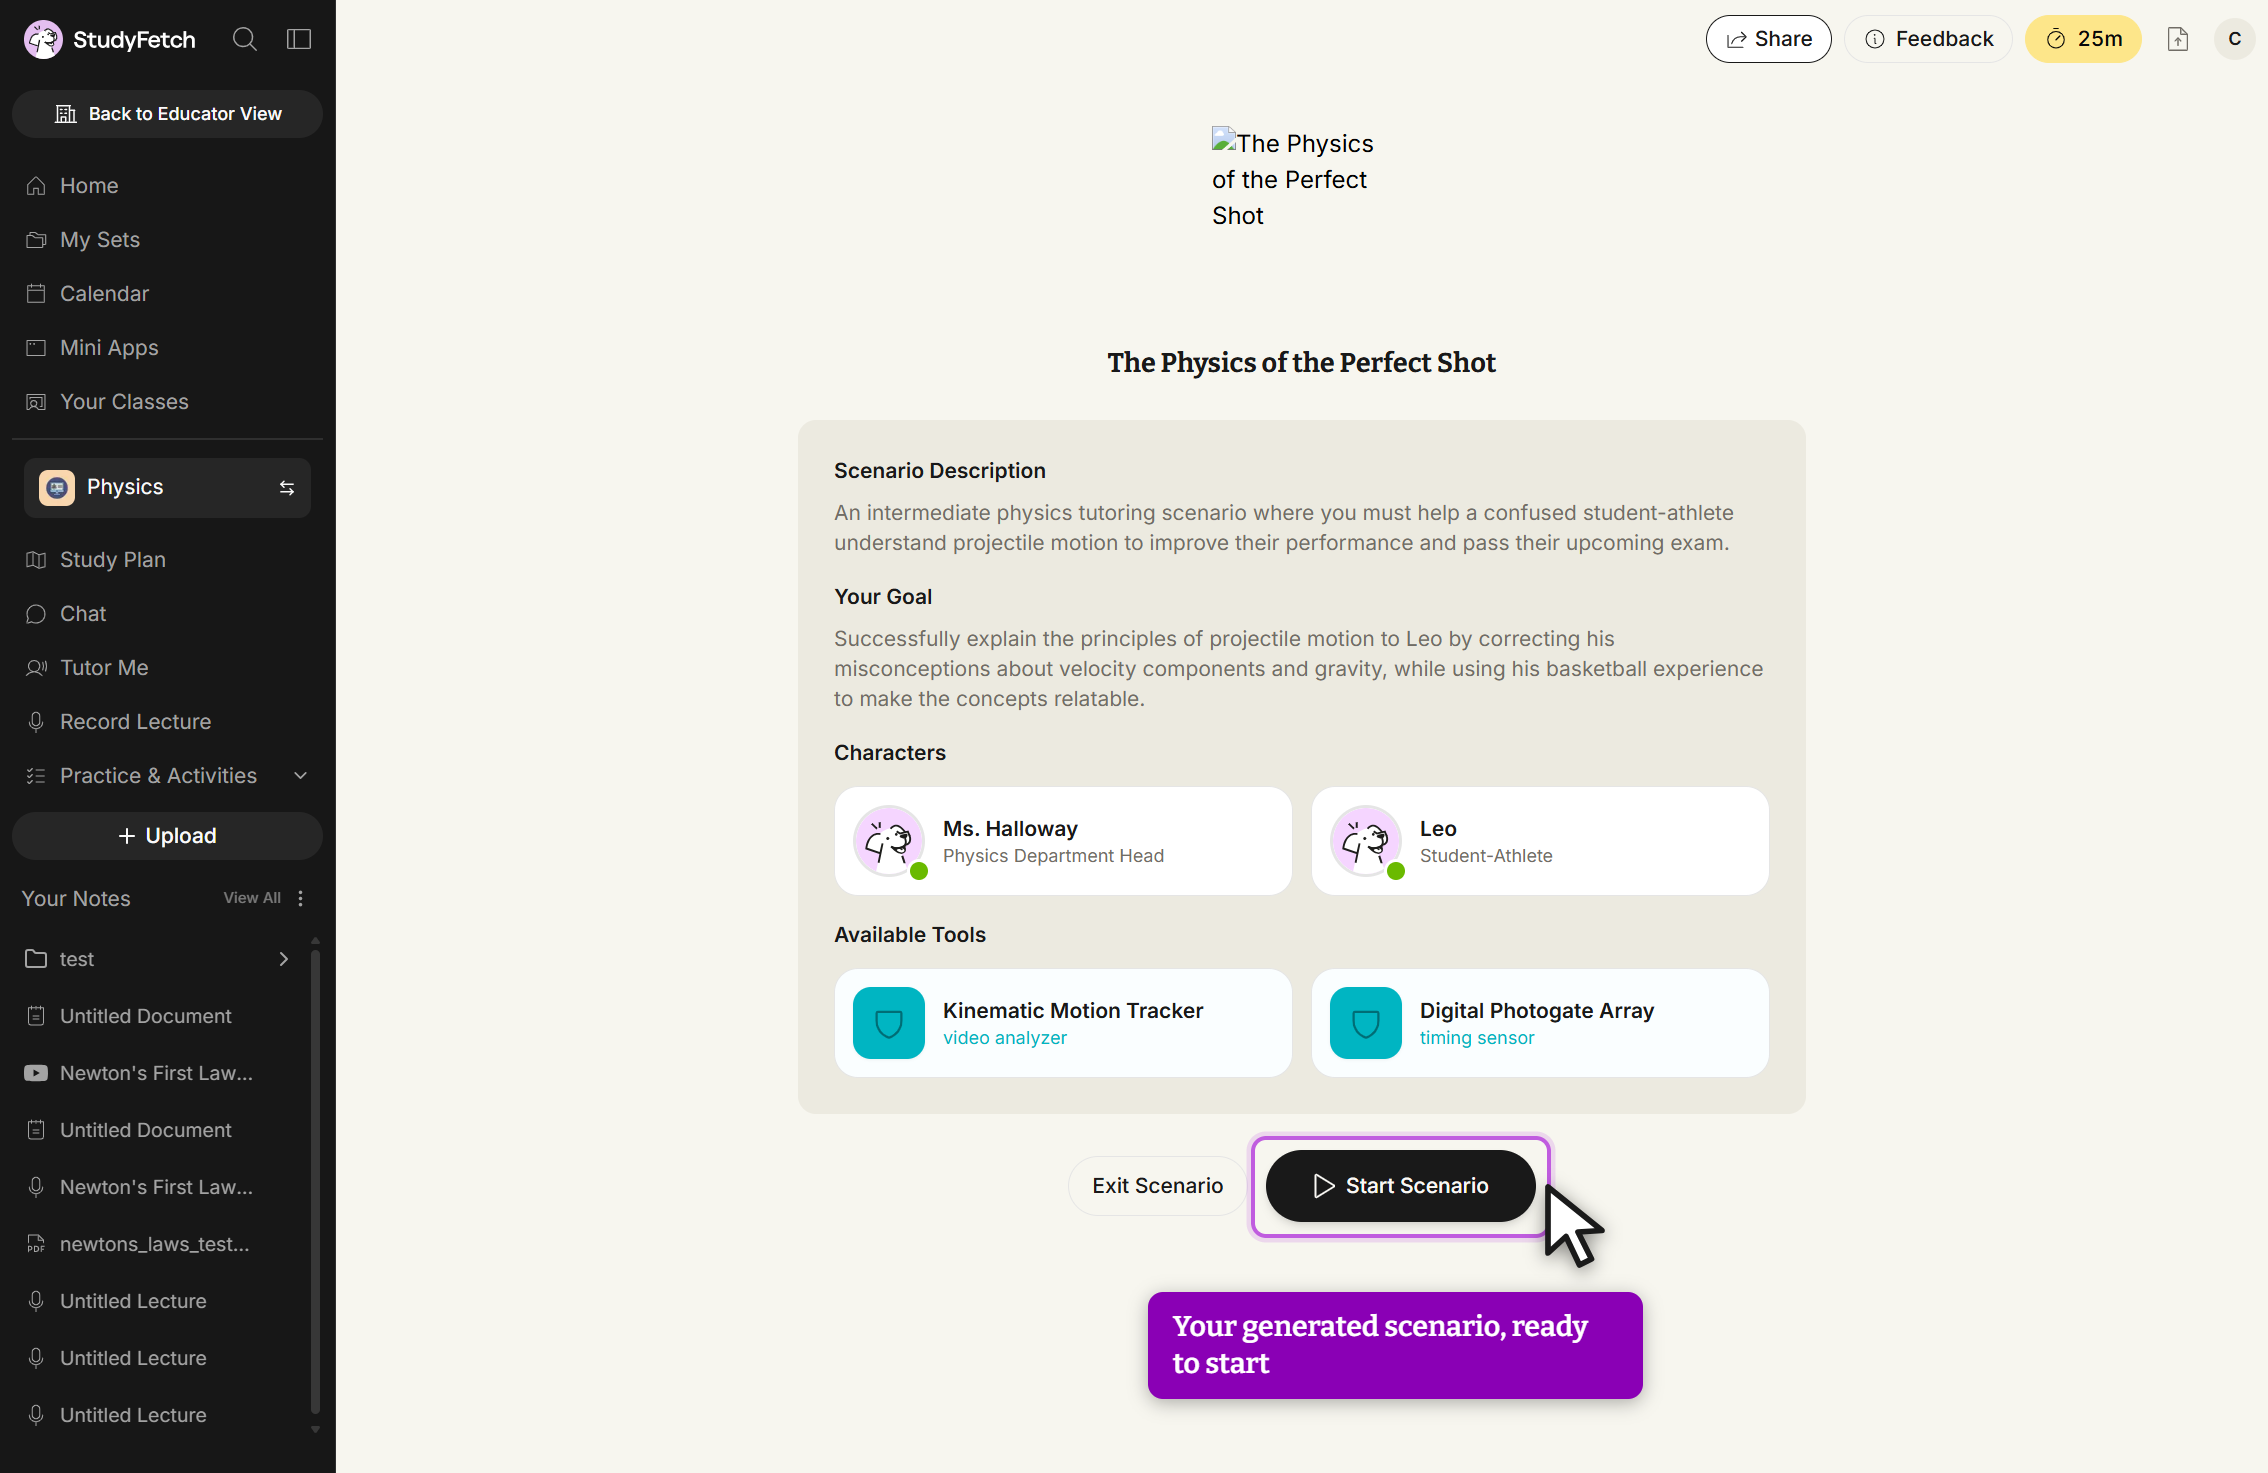
After a few moments, your AI-generated scenario — complete with characters and, where relevant, scenario tools — loads directly into the chat, ready to start.
Create a Scenario From Scratch
The Create Scenario option gives you full control over how your scenario is built and experienced — add detailed context, define characters and tools, and set requirements so the AI follows your instructions closely rather than improvising.
From the Scenario Library, select Create Scenario. Under Basic Information, enter a Scenario Name, Description, and a Greeting Message that will open the chat.
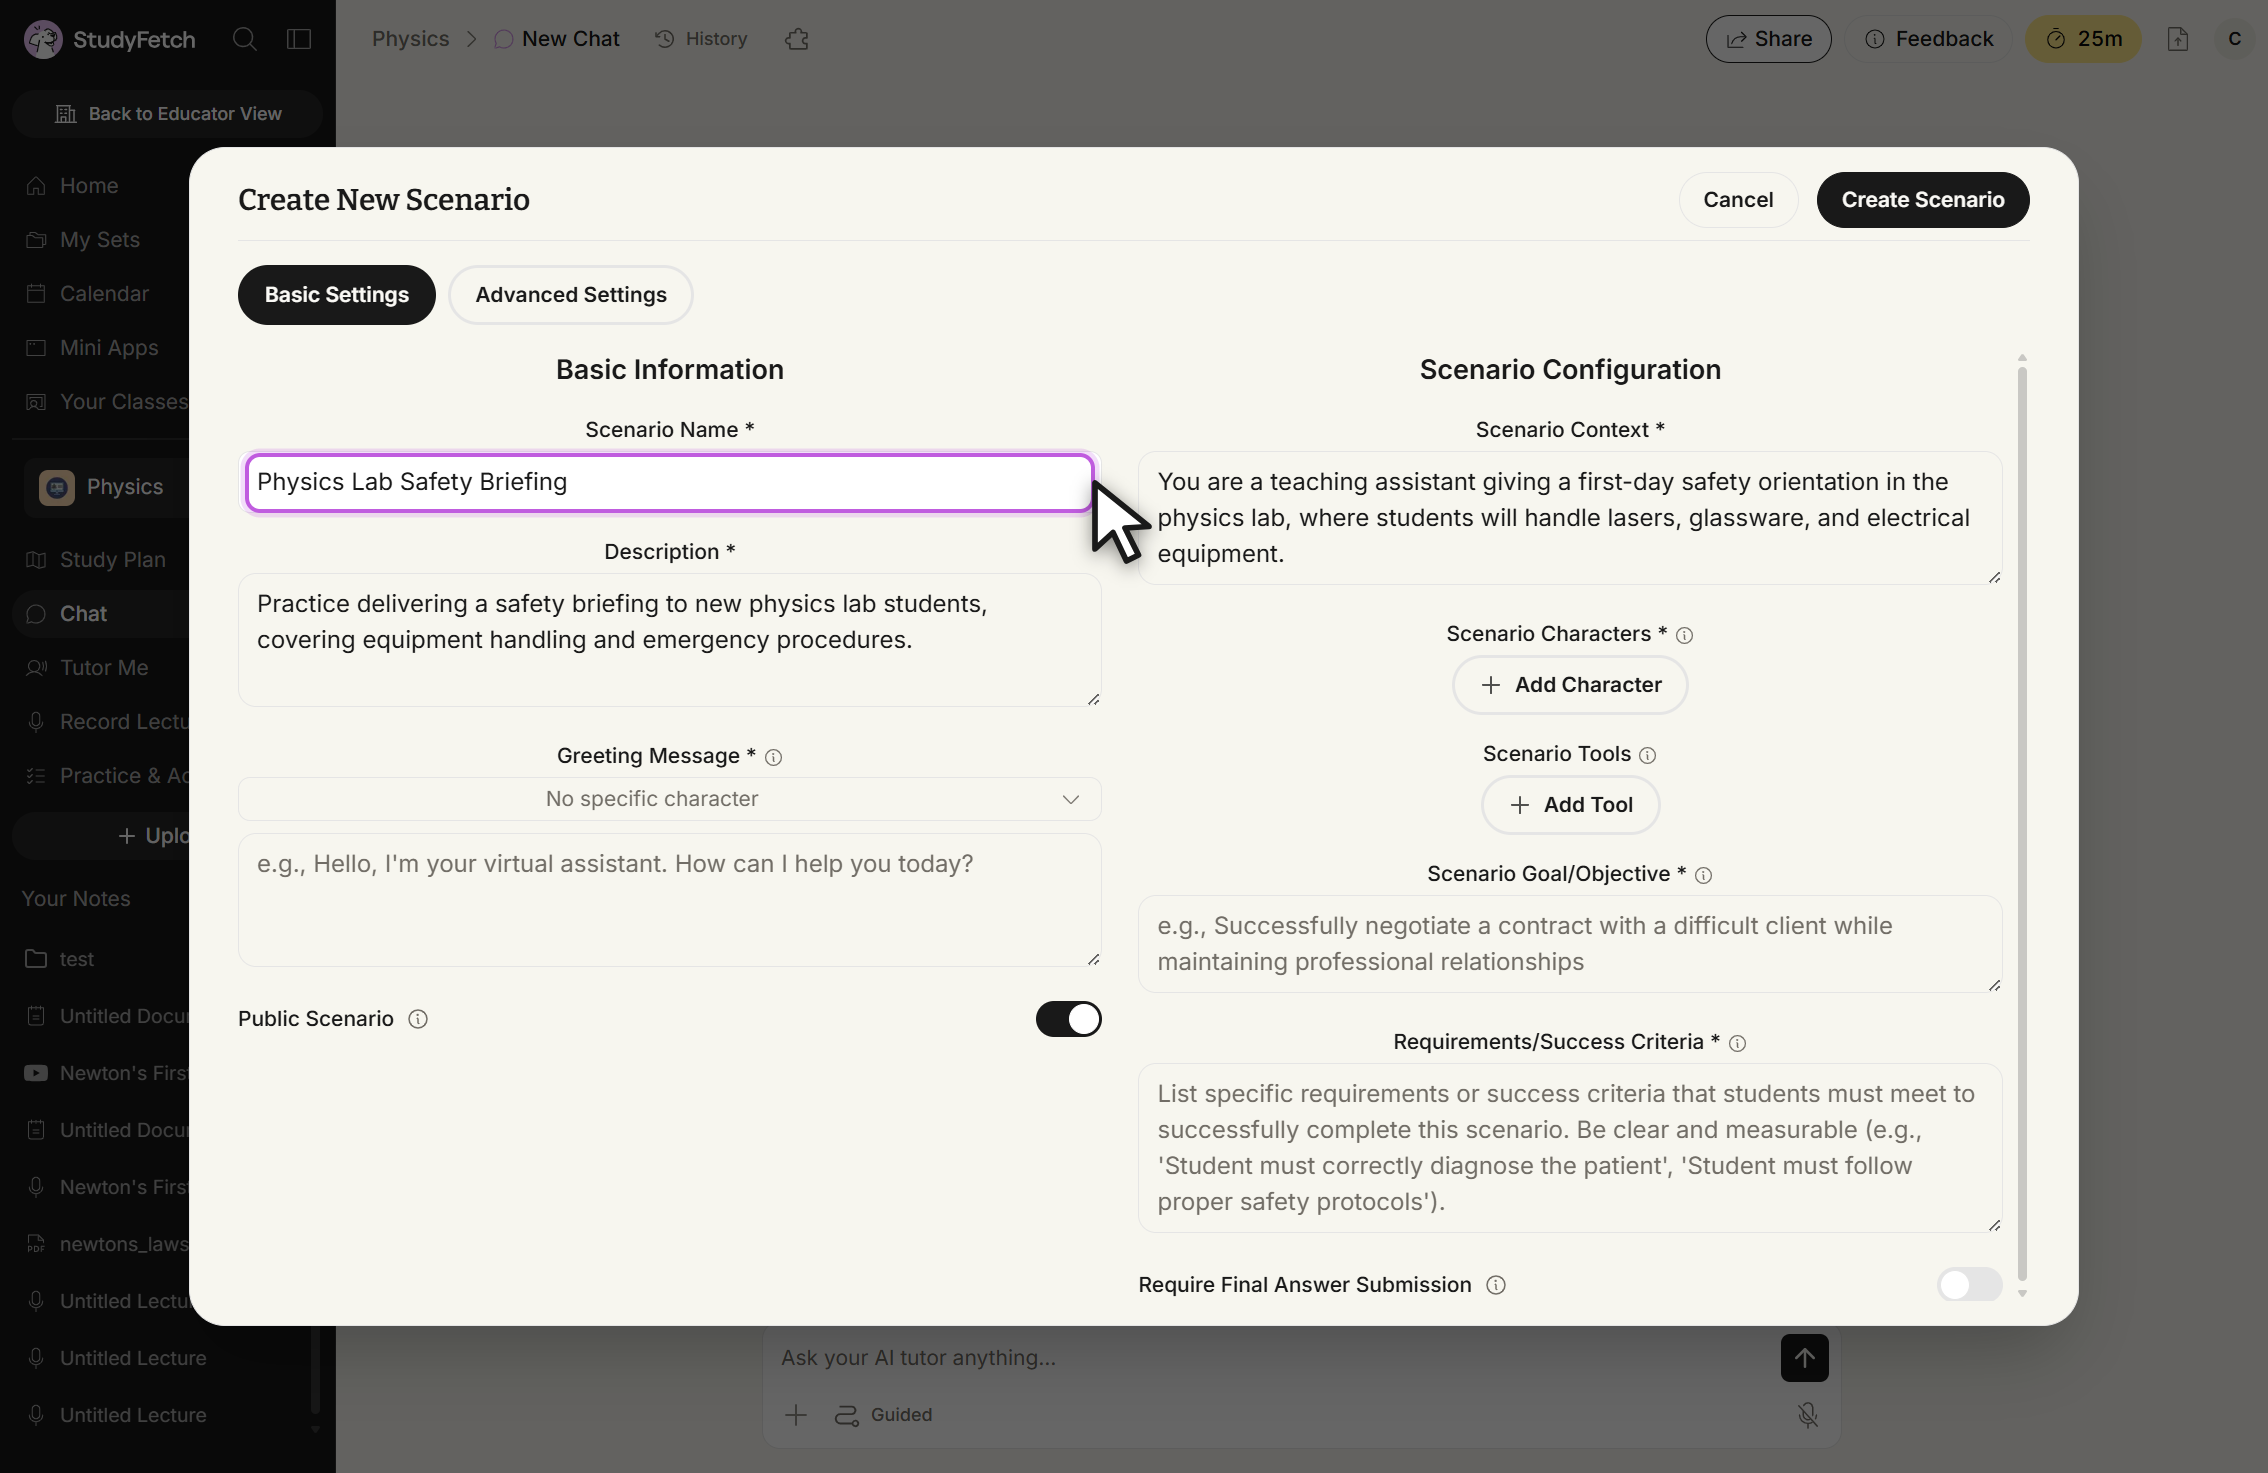
Create New Scenario, Basic Settings tab. Enter the Scenario Name and Description in the Basic Information column. Under Scenario Configuration, set the scene in Scenario Context, then select + Add Character for each character in the scenario (name, role, and a description of how they should respond). Optionally add tools via + Add Tool. Then describe the Scenario Goal/Objective and the Requirements/Success Criteria the learner needs to meet, and, if you want a graded final answer, enable Require Final Answer Submission.
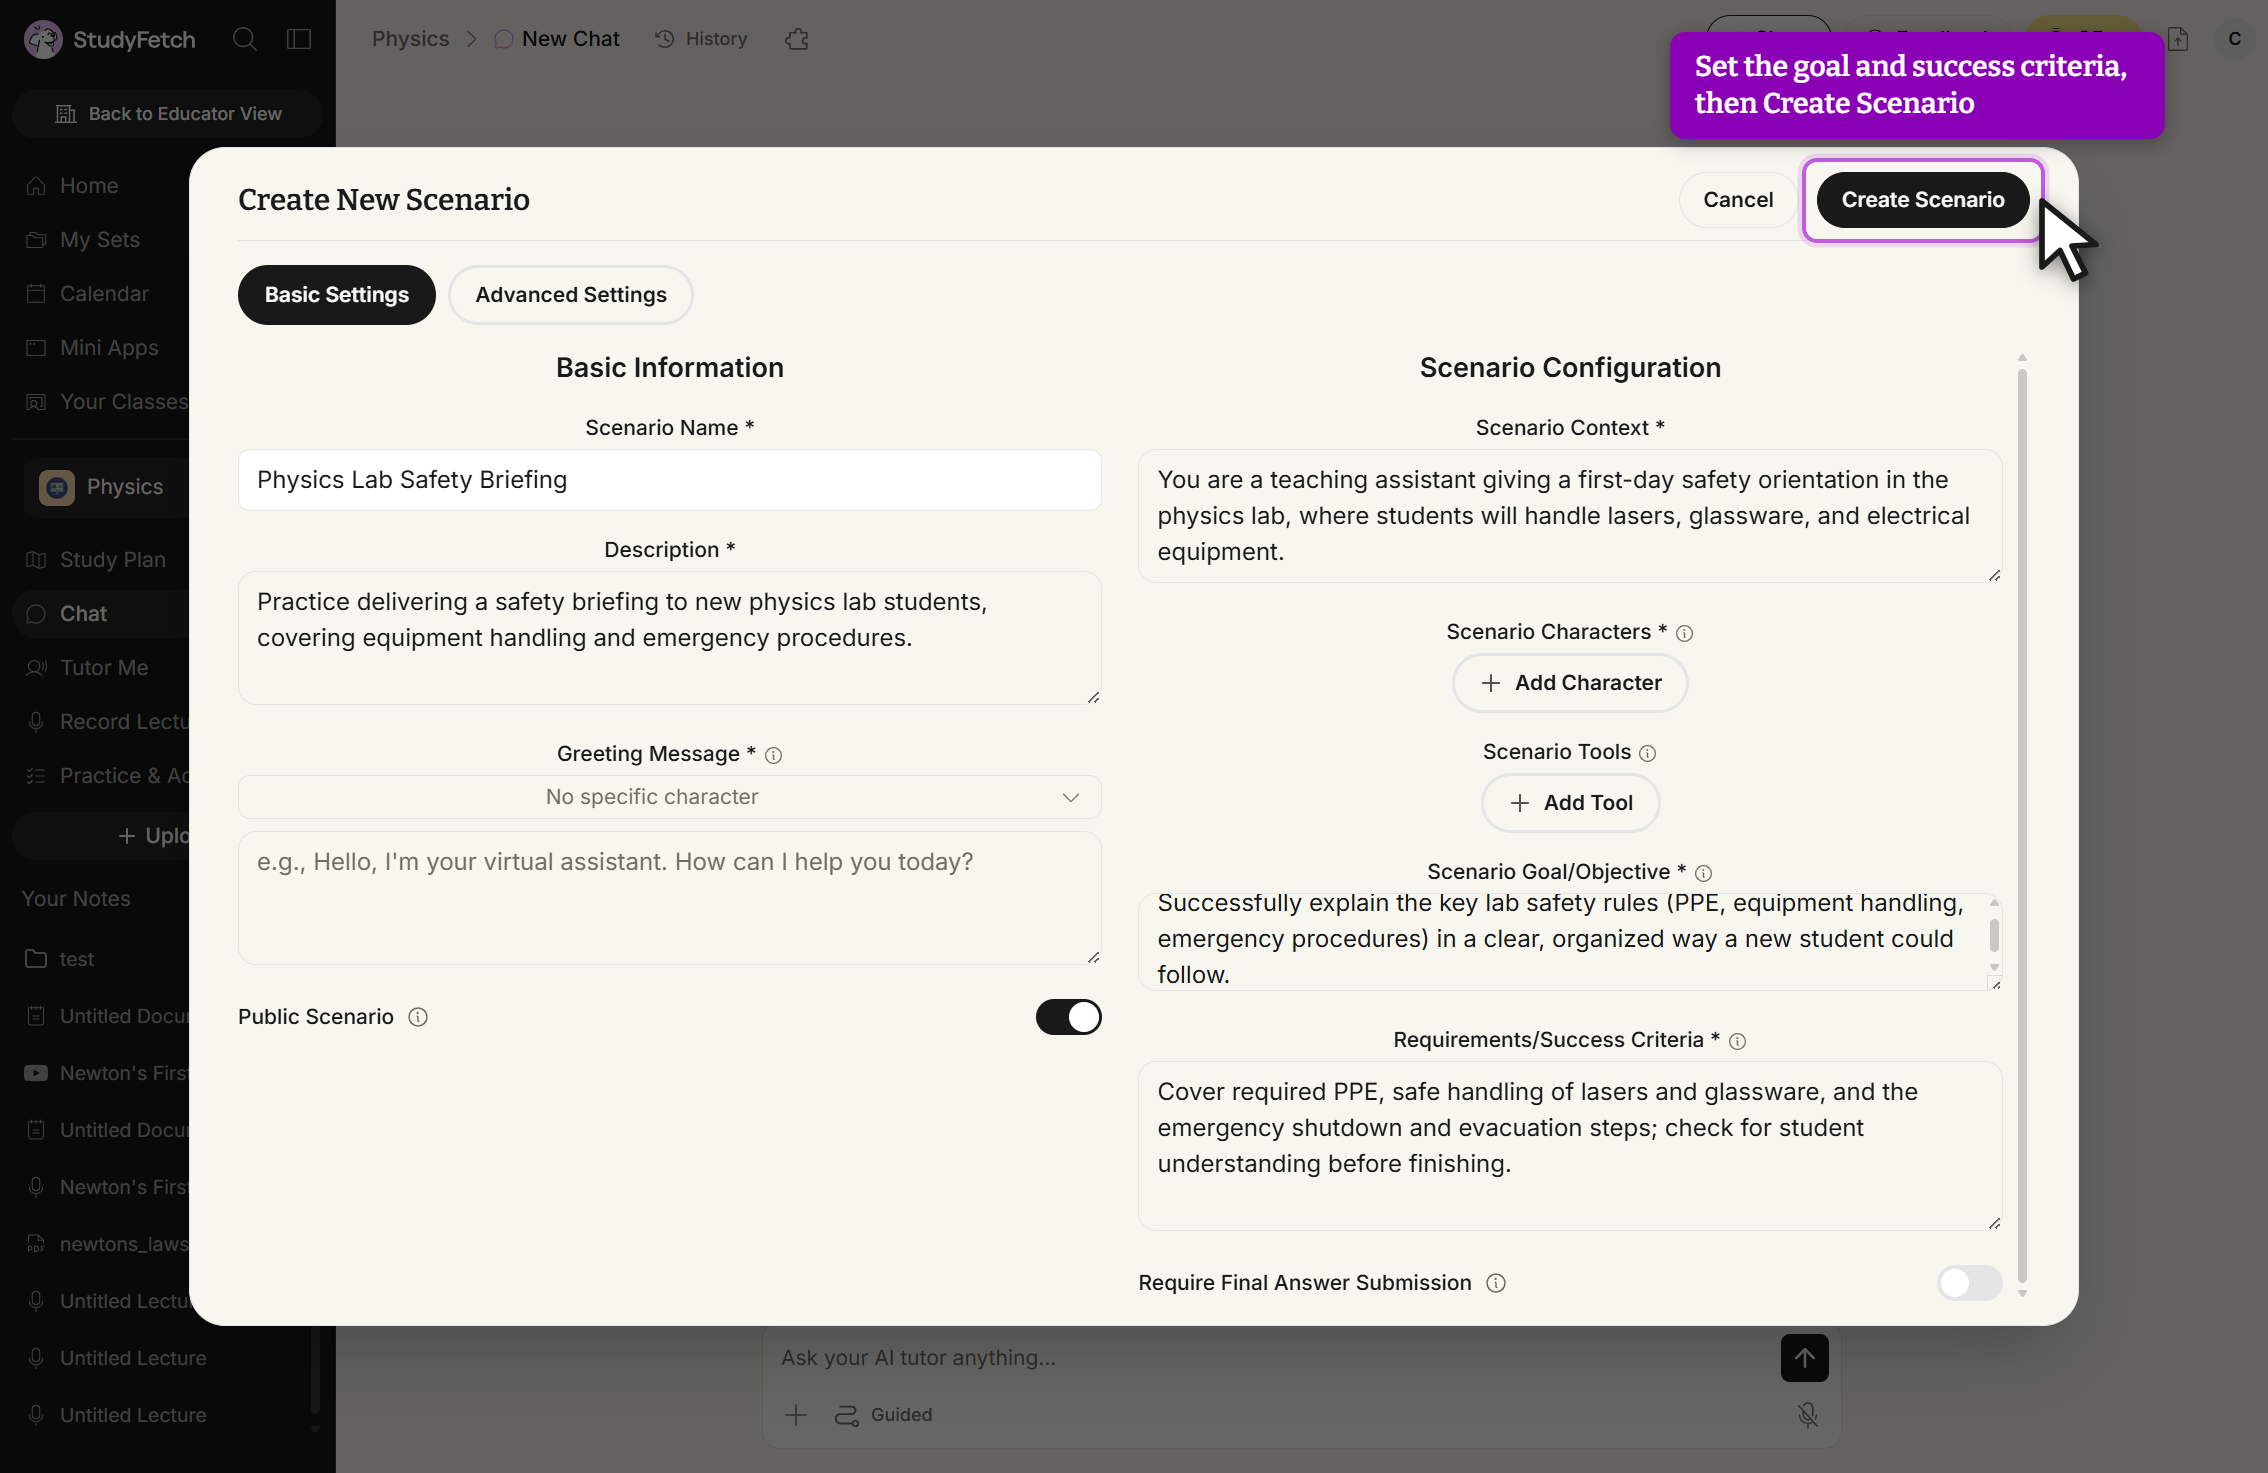
Create New Scenario, Basic Settings tab. Fill in Scenario Goal/Objective and Requirements/Success Criteria, then select Create Scenario. Toggle Public Scenario on if you'd like to share it with other StudyFetch users, then check the Advanced Settings tab for optional response-format instructions. Click Create Scenario to finish — your new scenario appears under the My Scenarios tab of the library, ready to select and start.
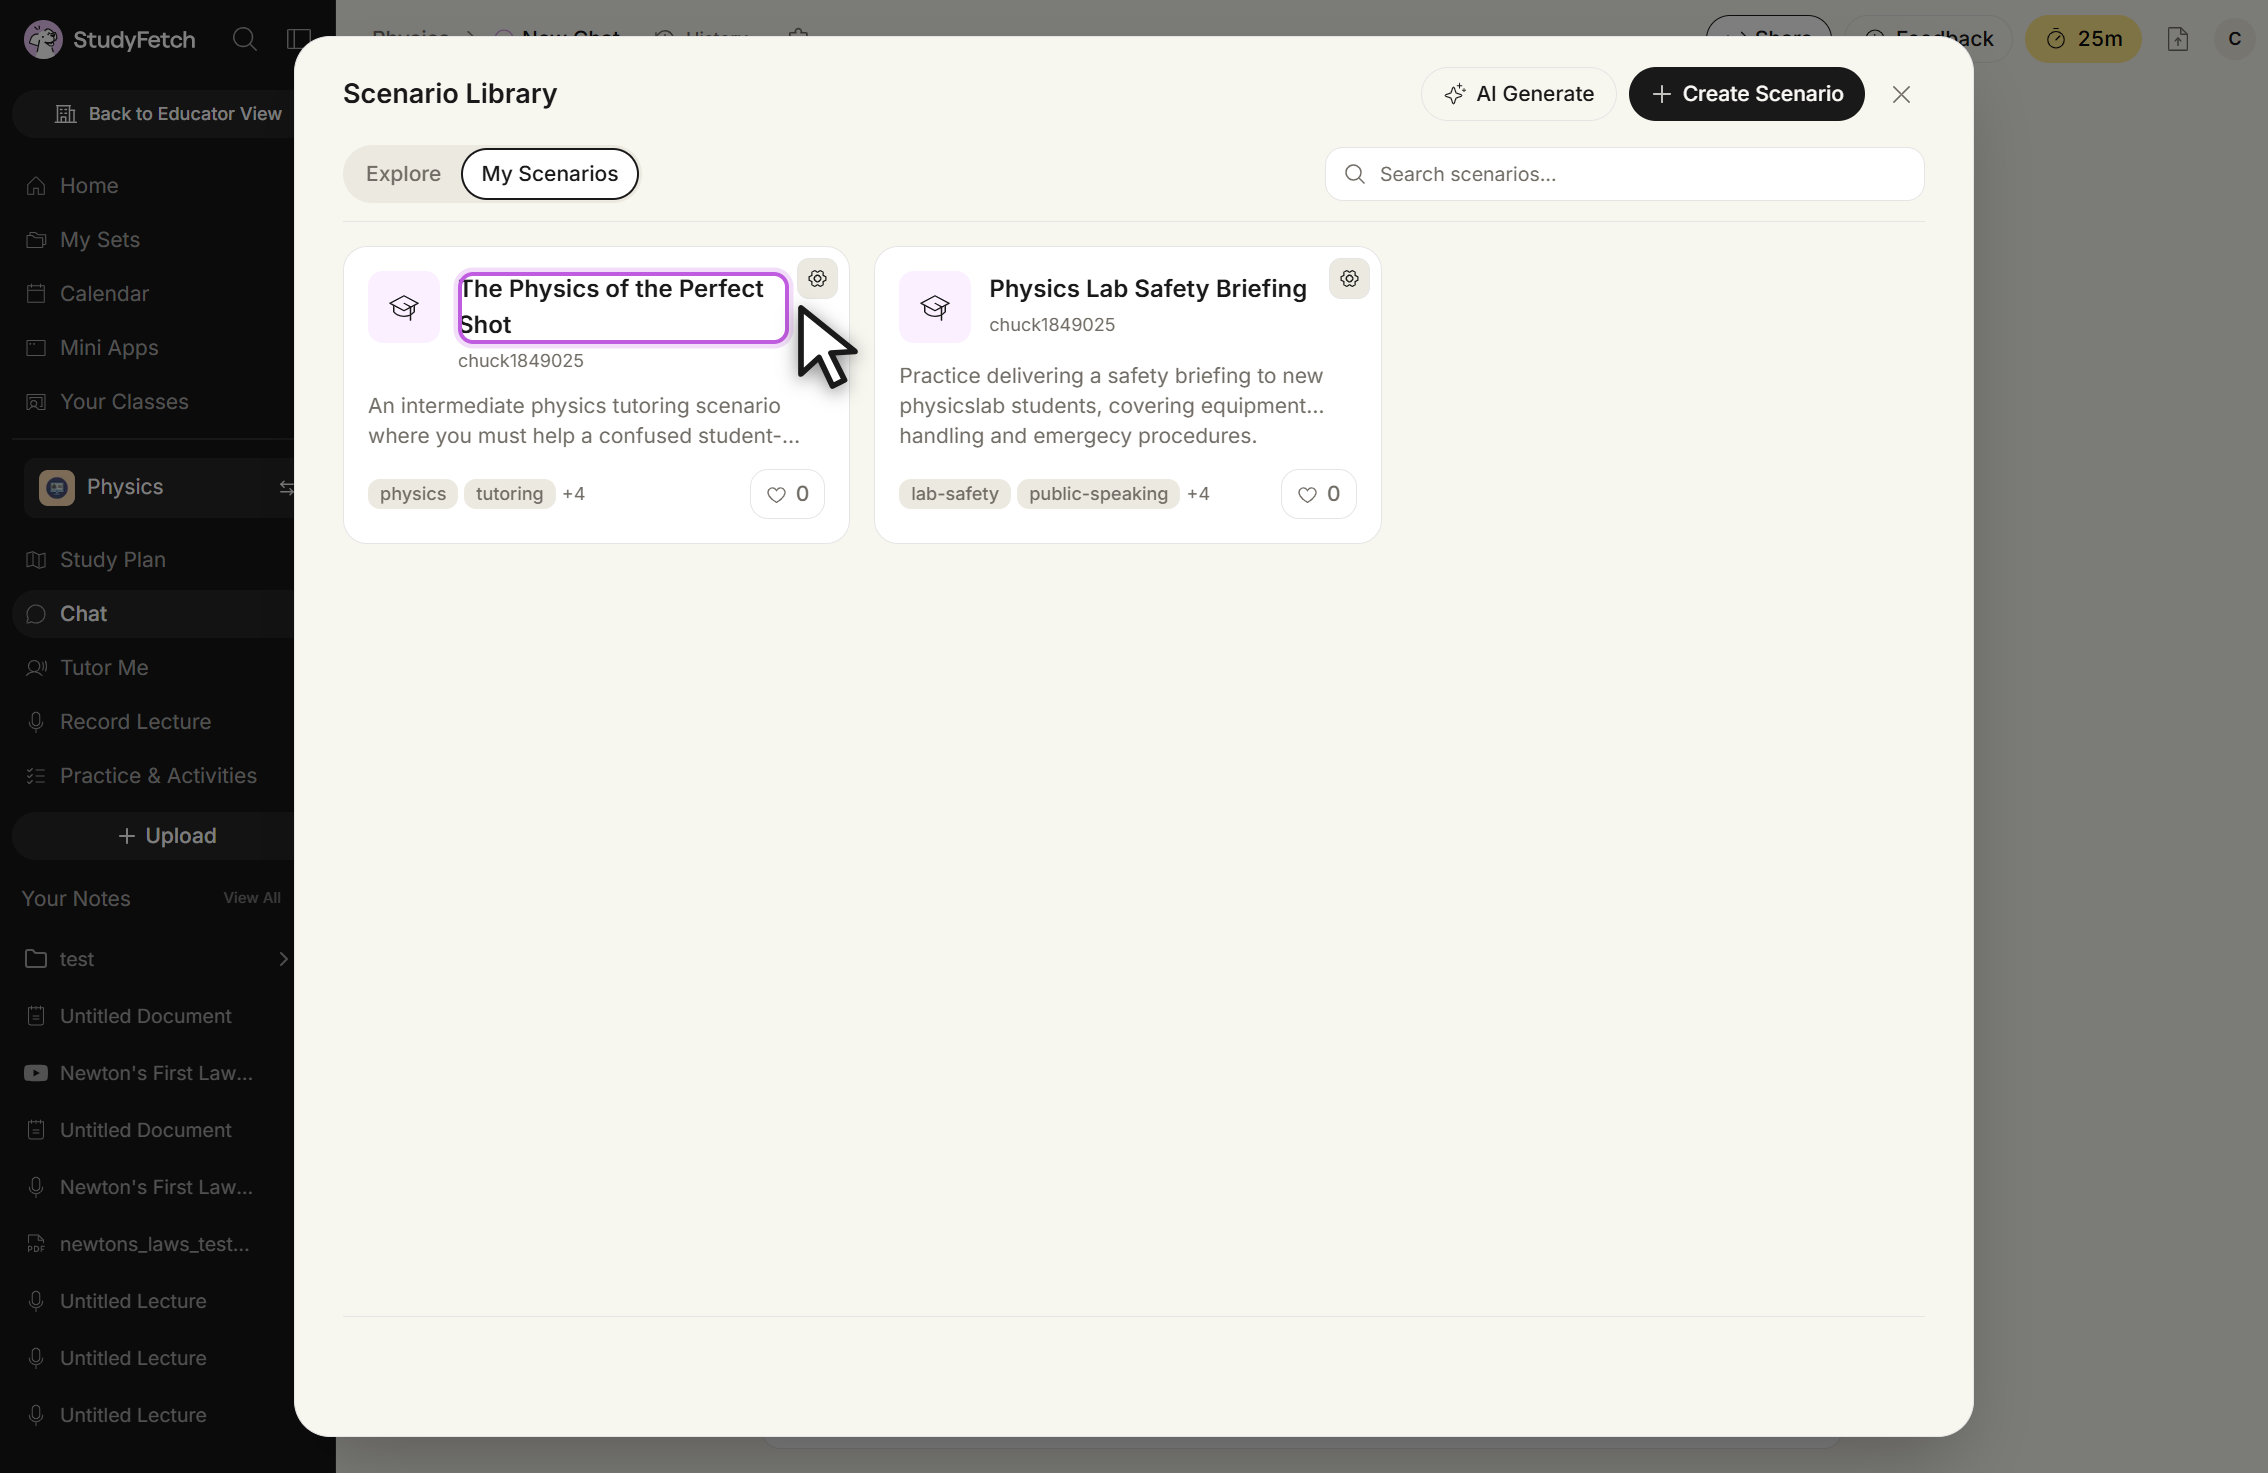
Scenario Library, My Scenarios tab. The scenarios you created are listed here, each with a gear button.