Skip to content
StudyFetch Academy

Product docs

Upload method guides

Material Upload Options — Step-by-Step Guide

The Upload any files from Class box supports several methods. Click View more upload types to see the full list.
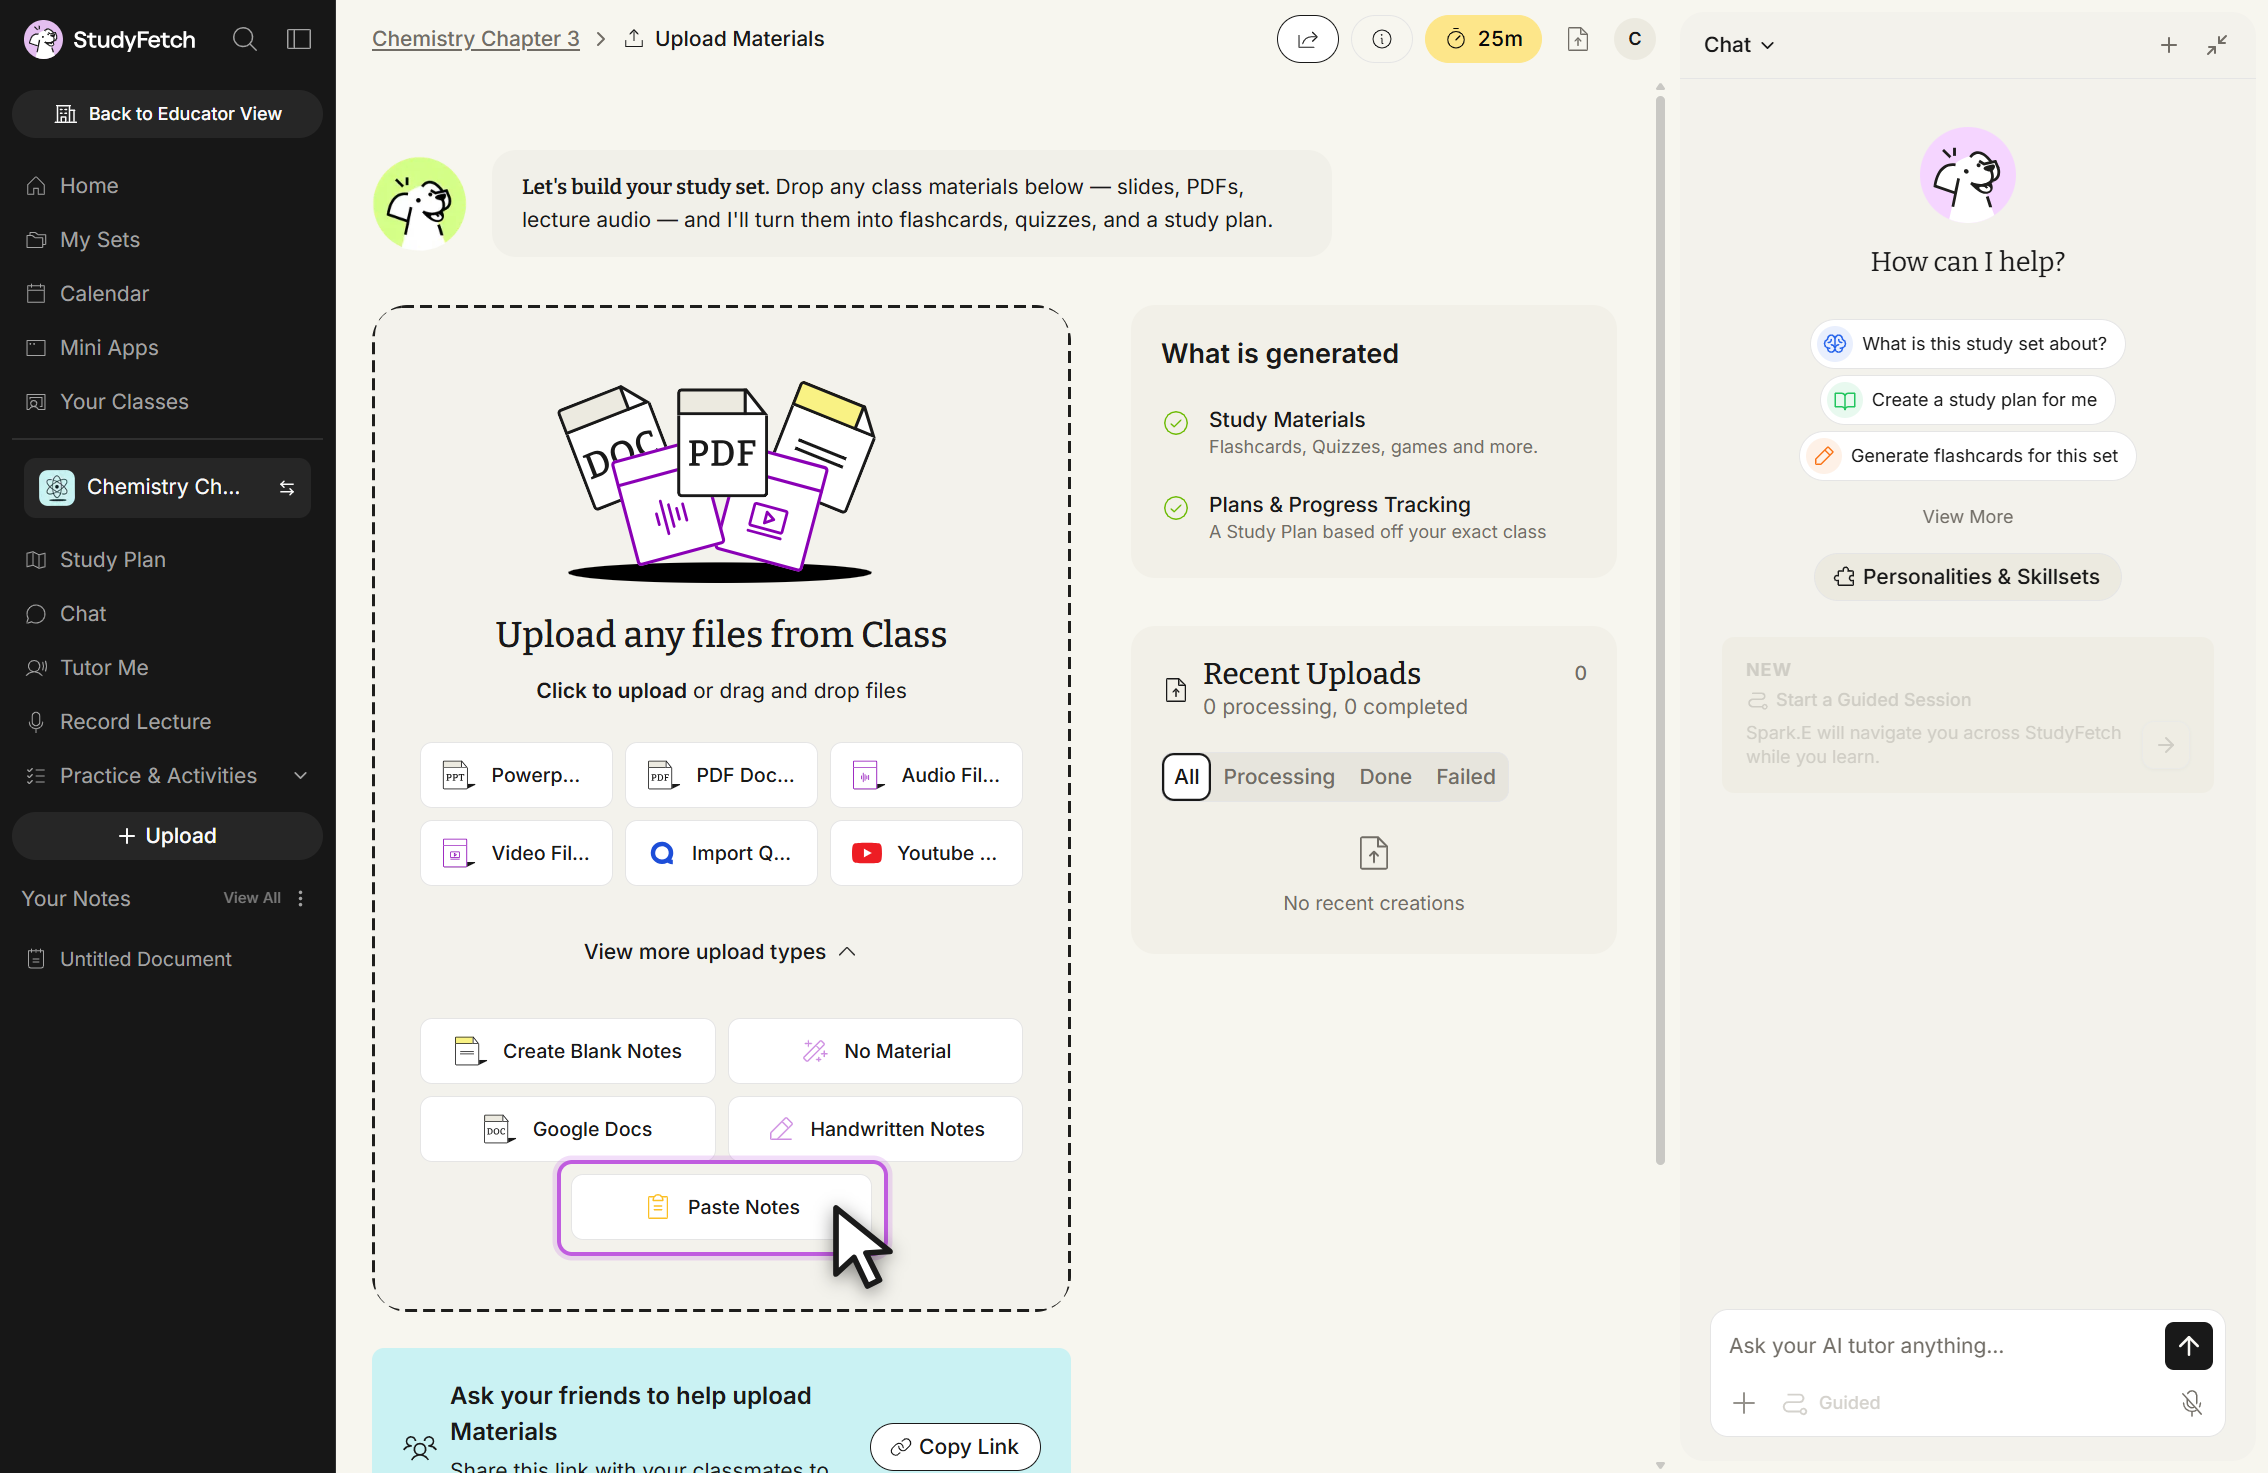
The Upload Materials page with View more upload types expanded. Above the link sit six file type tiles with truncated labels: Powerp..., PDF Doc..., Audio Fil..., Video Fil..., Import Q... and Youtube.... Below it are five more tiles: Create Blank Notes, No Material, Google Docs, Handwritten Notes and Paste Notes. The cursor is over Paste Notes.
Upload Materials, View more upload types expanded. The extra tiles are Create Blank Notes, No Material, Google Docs, Handwritten Notes and Paste Notes.

Upload Documents

Add school-provided files: PDF, DOCX, PPTX, TXT, PNG, and JPEG. After selecting a file, toggle Extract images from document to have AI pull and interpret embedded images, toggle Generate Study Notes and pick a format (Summarized, In-Depth, or Comprehensive), and under Advanced choose a Chapter Splitting option. When ready, click Upload file.

Record Live Lecture

Select Start Recording from the material upload screen to capture and transcribe a live lecture. See the separate Live Lecture Tutorial page for the full walkthrough.

YouTube Video

Paste a link into the YouTube Video URL field, optionally toggle Generate Study Notes, then click Import Video.
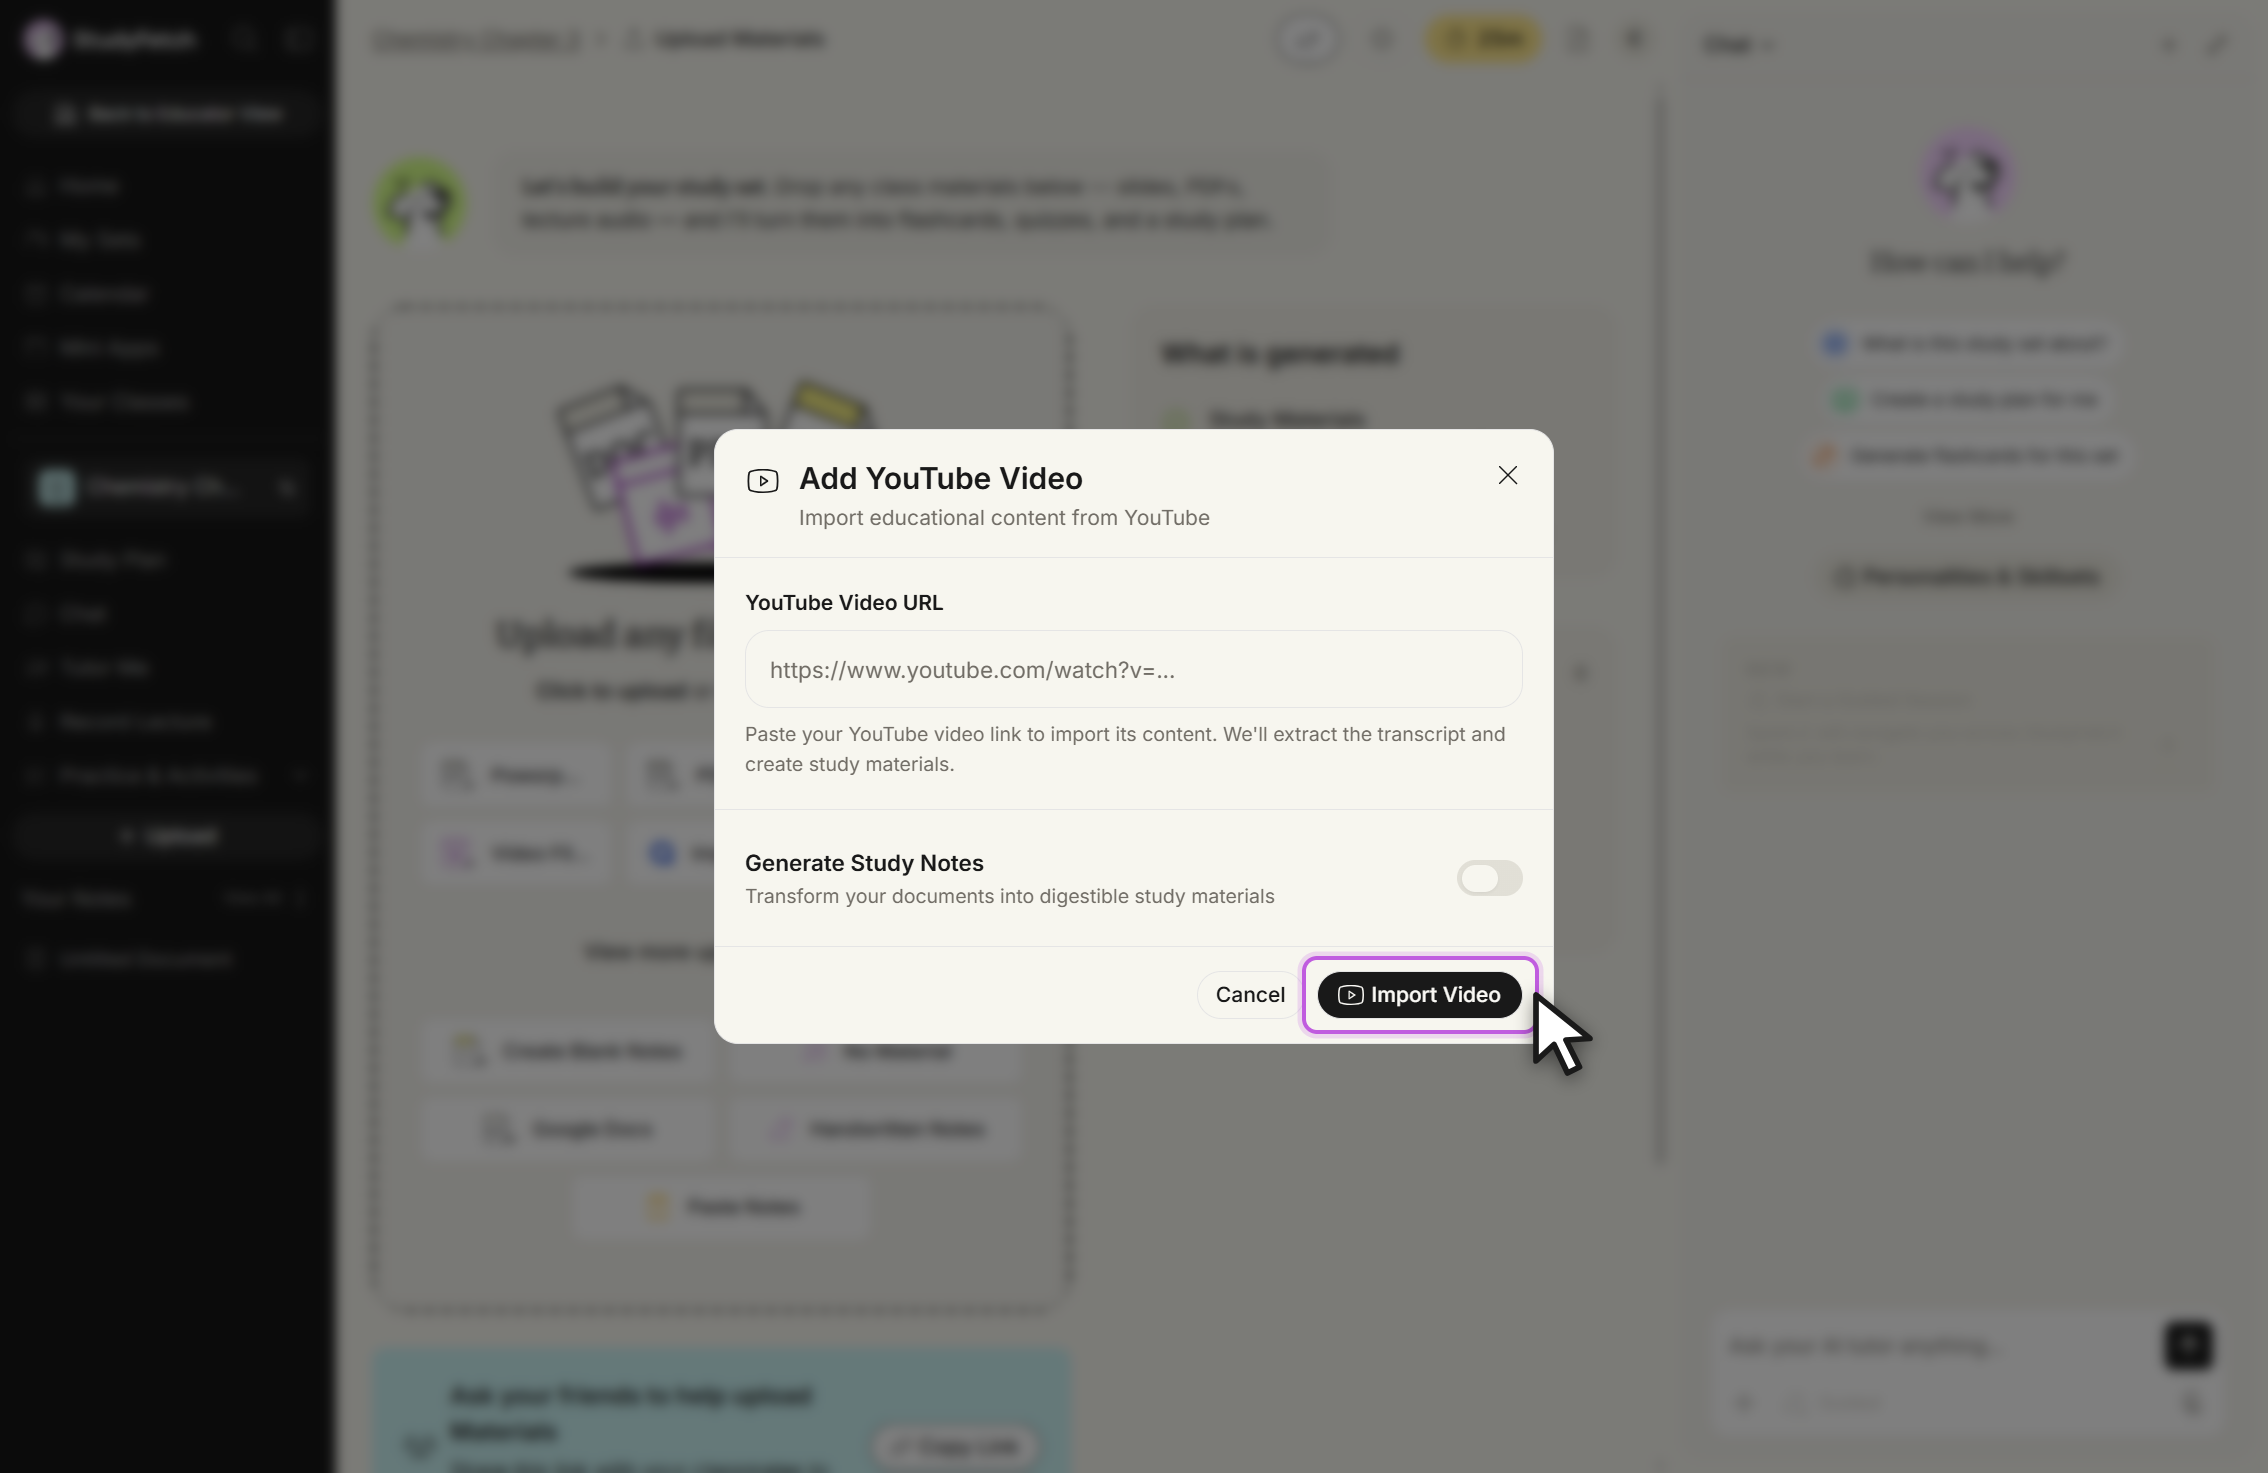
The Add YouTube Video modal, subtitled "Import educational content from YouTube". It has an empty YouTube Video URL field showing the placeholder https://www.youtube.com/watch?v=..., helper text saying the transcript will be extracted, a Generate Study Notes toggle that is switched off, and Cancel and Import Video buttons.
Add YouTube Video modal, empty URL field. Paste a link into YouTube Video URL, then click Import Video.

No Material — Generate from Topic

No materials? Tell Sparky what you want to learn instead. Enter a topic (or pick a suggested one), optionally add a subject area and skill level, then click Generate Materials. Sparky creates 3–8 study materials progressing from foundational concepts to advanced applications.
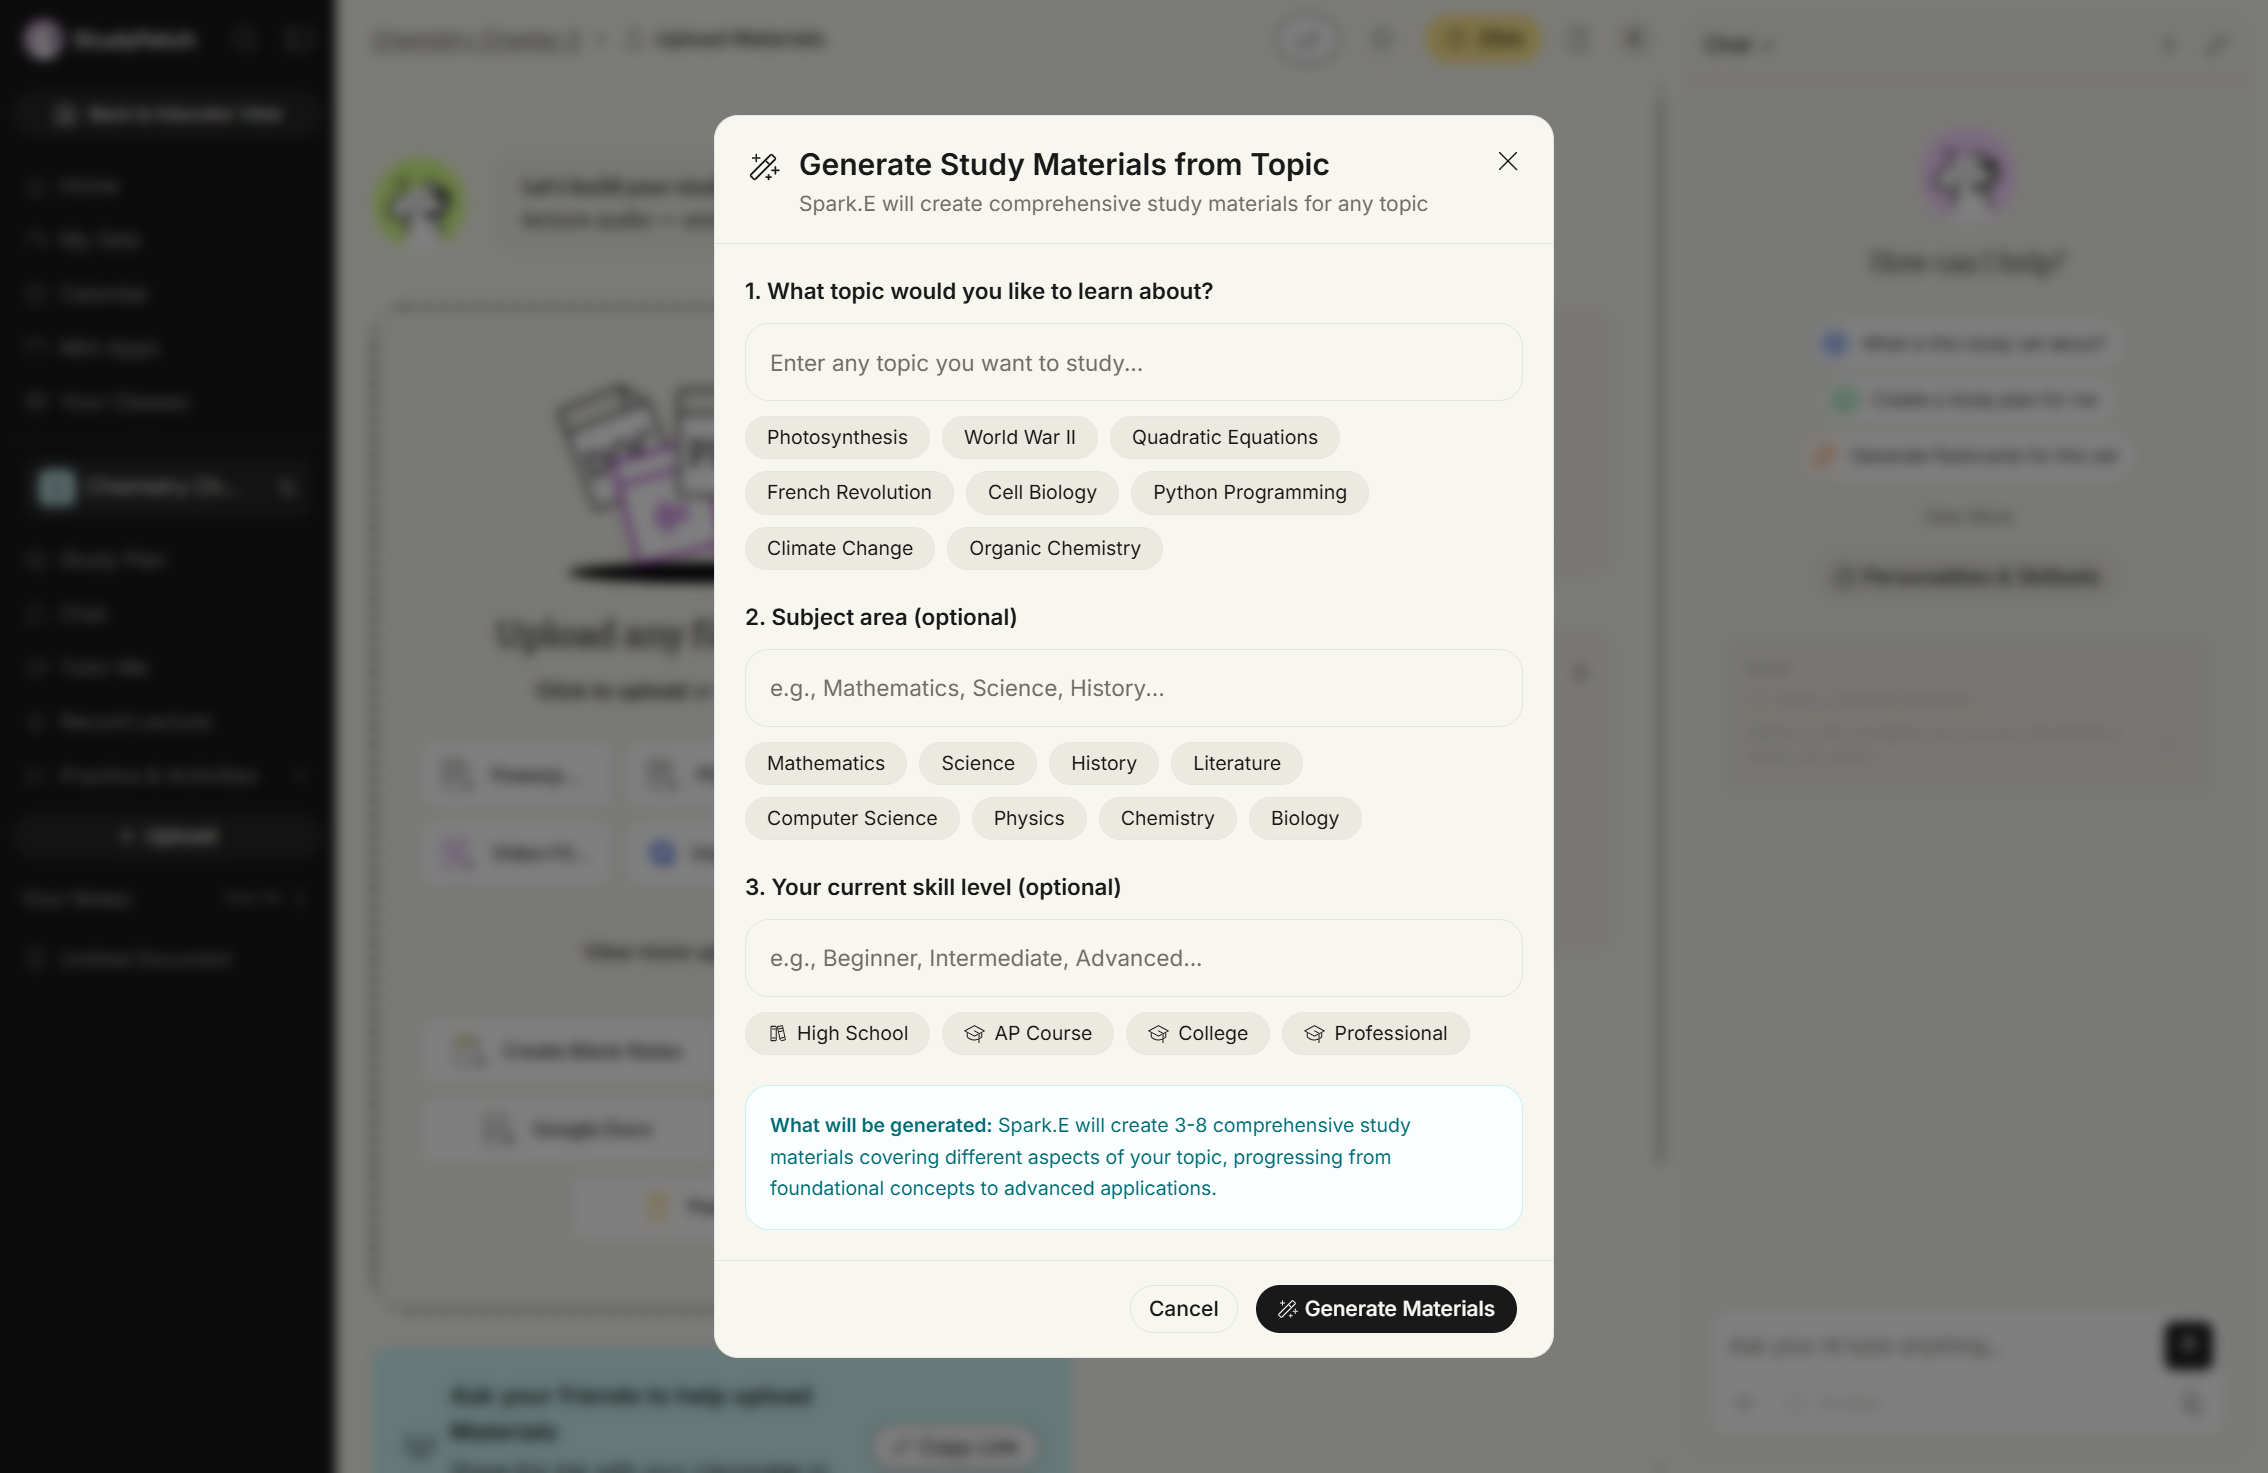
The Generate Study Materials from Topic modal, subtitled "Spark.E will create comprehensive study materials for any topic". It has three numbered sections: 1. What topic would you like to learn about?, an empty field with suggestion chips such as Photosynthesis, World War II and Organic Chemistry; 2. Subject area (optional), with chips such as Mathematics, Science and Chemistry; and 3. Your current skill level (optional), with High School, AP Course, College and Professional chips. A note reads "What will be generated: Spark.E will create 3-8 comprehensive study materials", and Cancel and Generate Materials buttons sit at the bottom.
Generate Study Materials from Topic modal, step 1: What topic would you like to learn about? Enter a topic or pick a suggestion, then click Generate Materials.

Upload Audio / Upload Video

Attach a pre-recorded lesson in MP3 (audio) or MP4 (video) format, optionally toggle Generate Study Notes, then click Upload File. The upload dialog mirrors the Documents flow above.

Handwritten Notes

Scan the on-screen QR code with your phone camera to open a mobile capture page, take photos of your notes, review/retake as needed, then choose In Depth Notes or Summarized Notes (plus optional Flashcards or a Practice Test) and click Upload to Set. Uploaded photos appear under Your Notes in the sidebar.
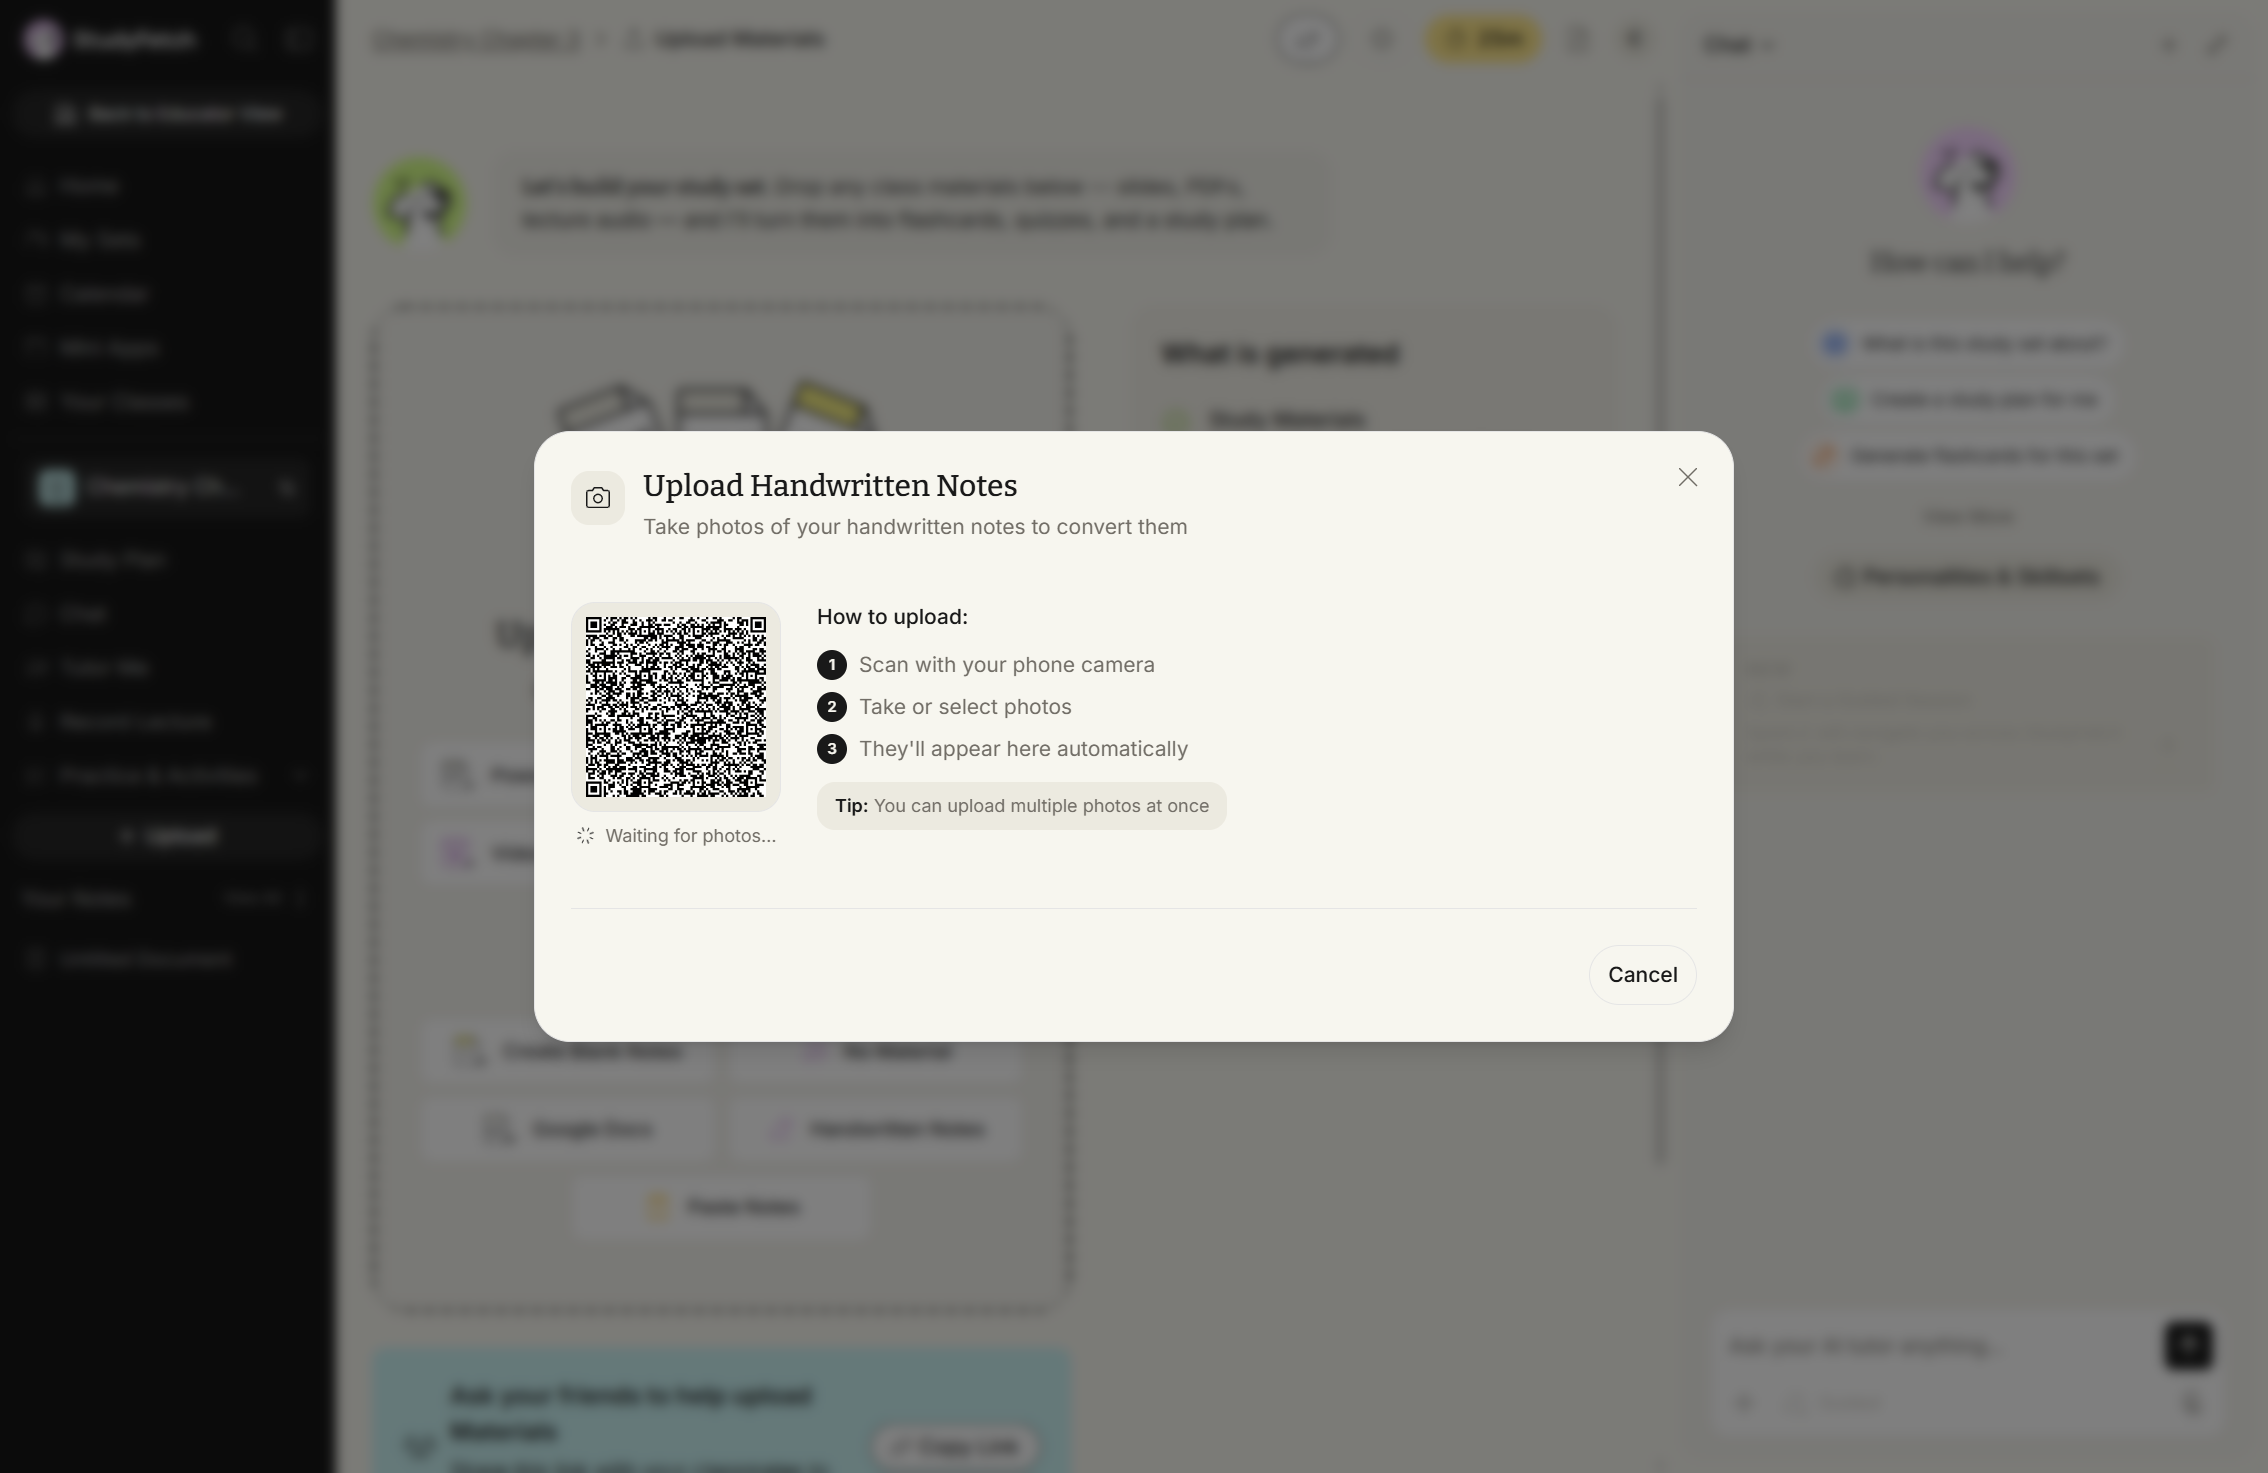
The Upload Handwritten Notes modal, subtitled "Take photos of your handwritten notes to convert them". A QR code sits on the left with the status "Waiting for photos..." beneath it. To the right, a How to upload list reads 1. Scan with your phone camera, 2. Take or select photos, 3. They'll appear here automatically, followed by the tip "You can upload multiple photos at once". A Cancel button sits at the bottom right.
Upload Handwritten Notes modal, waiting for photos. Scan the QR code with your phone camera, then take or select photos.

Paste Notes

Already have notes saved elsewhere? Paste them into the Your Notes box and click Create Materials to have them organized automatically.
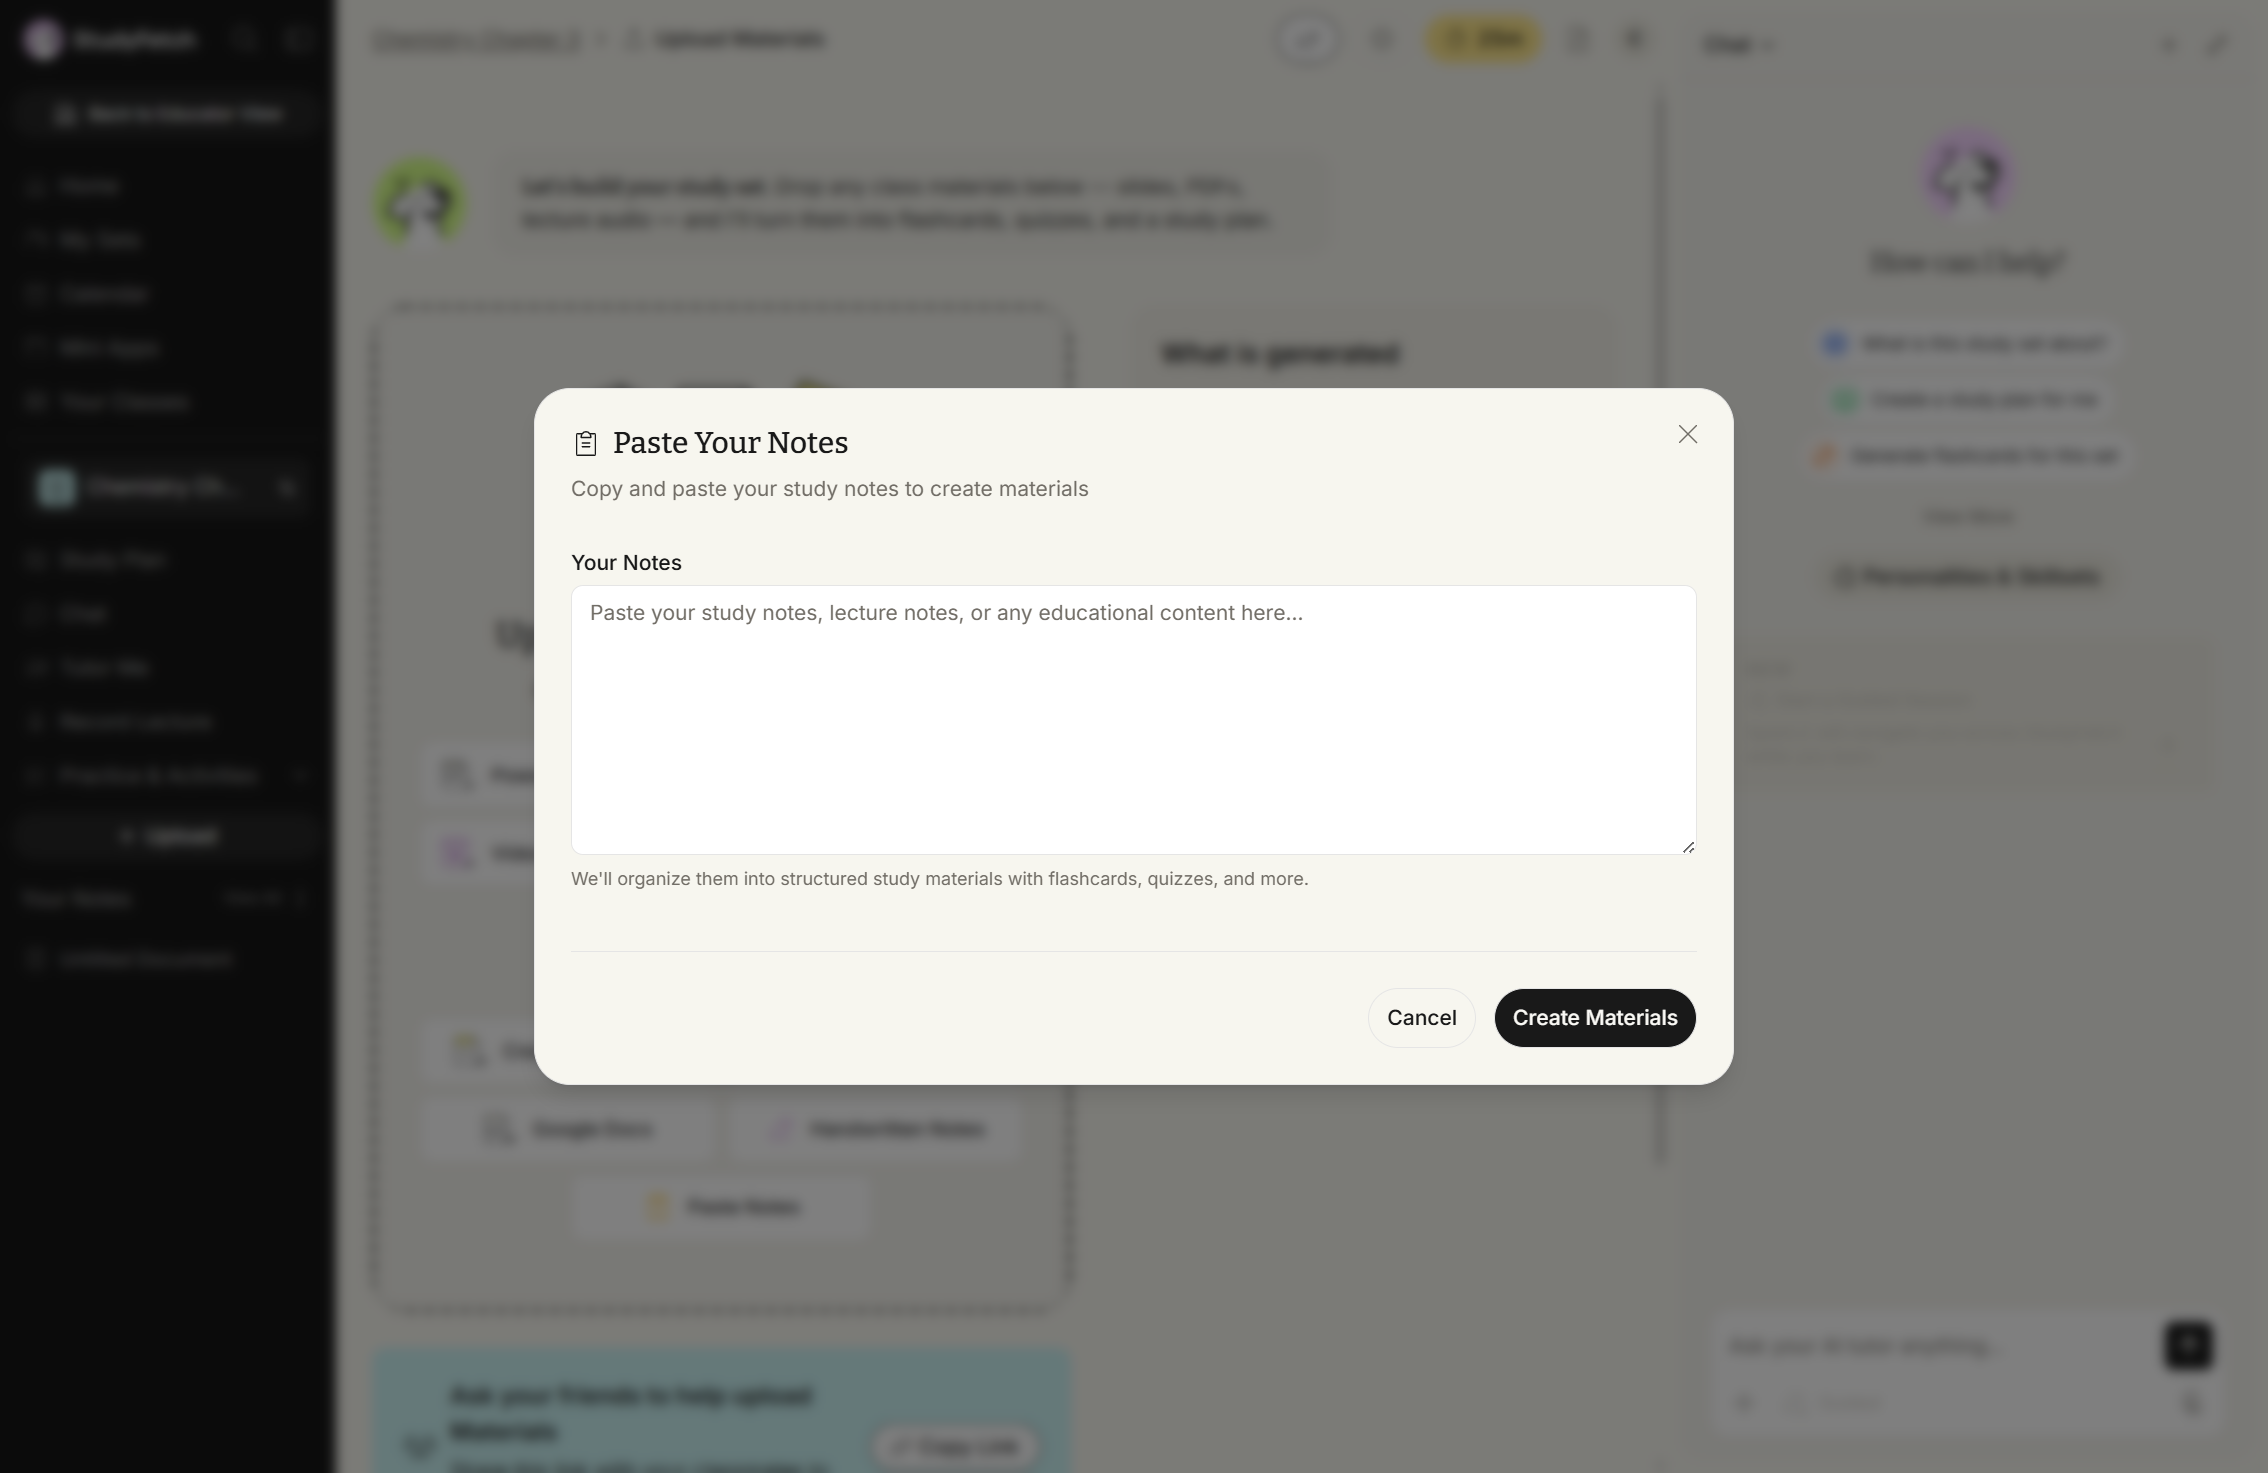
The Paste Your Notes modal, subtitled "Copy and paste your study notes to create materials". It holds a Your Notes text area with the placeholder "Paste your study notes, lecture notes, or any educational content here...", helper text saying the notes will be organized into structured study materials with flashcards, quizzes and more, and Cancel and Create Materials buttons.
Paste Your Notes modal, empty notes box. Paste your notes into Your Notes, then click Create Materials.

Blank Document

Select Create Blank Notes to open a new blank document for real-time note-taking while listening to a lesson.

Google Docs

Select Connect Google Drive to link your Google account and import files directly from Google Drive without downloading them first.

Quizlet Set

Paste a Quizlet link into the Quizlet Set URL field and click Import Set to use it as a reference.

Essay Grader

Get instant feedback on your writing with the built-in essay grading tool.

Brightspace, Canvas, Blackboard

If your school isn't using StudyFetch yet, this option generates an email template you can send to request LMS integration.