Create a folder
Start from My Sets, name the folder, then create it.
 StudyFetch Academy
Product docs
Use folders to organize Study Sets so students can keep related materials together and find what they need faster.
Start from My Sets, name the folder, then create it.
Drag Study Sets into the right folder and open folders to view their contents.
Rename or delete folders from the folder menu.
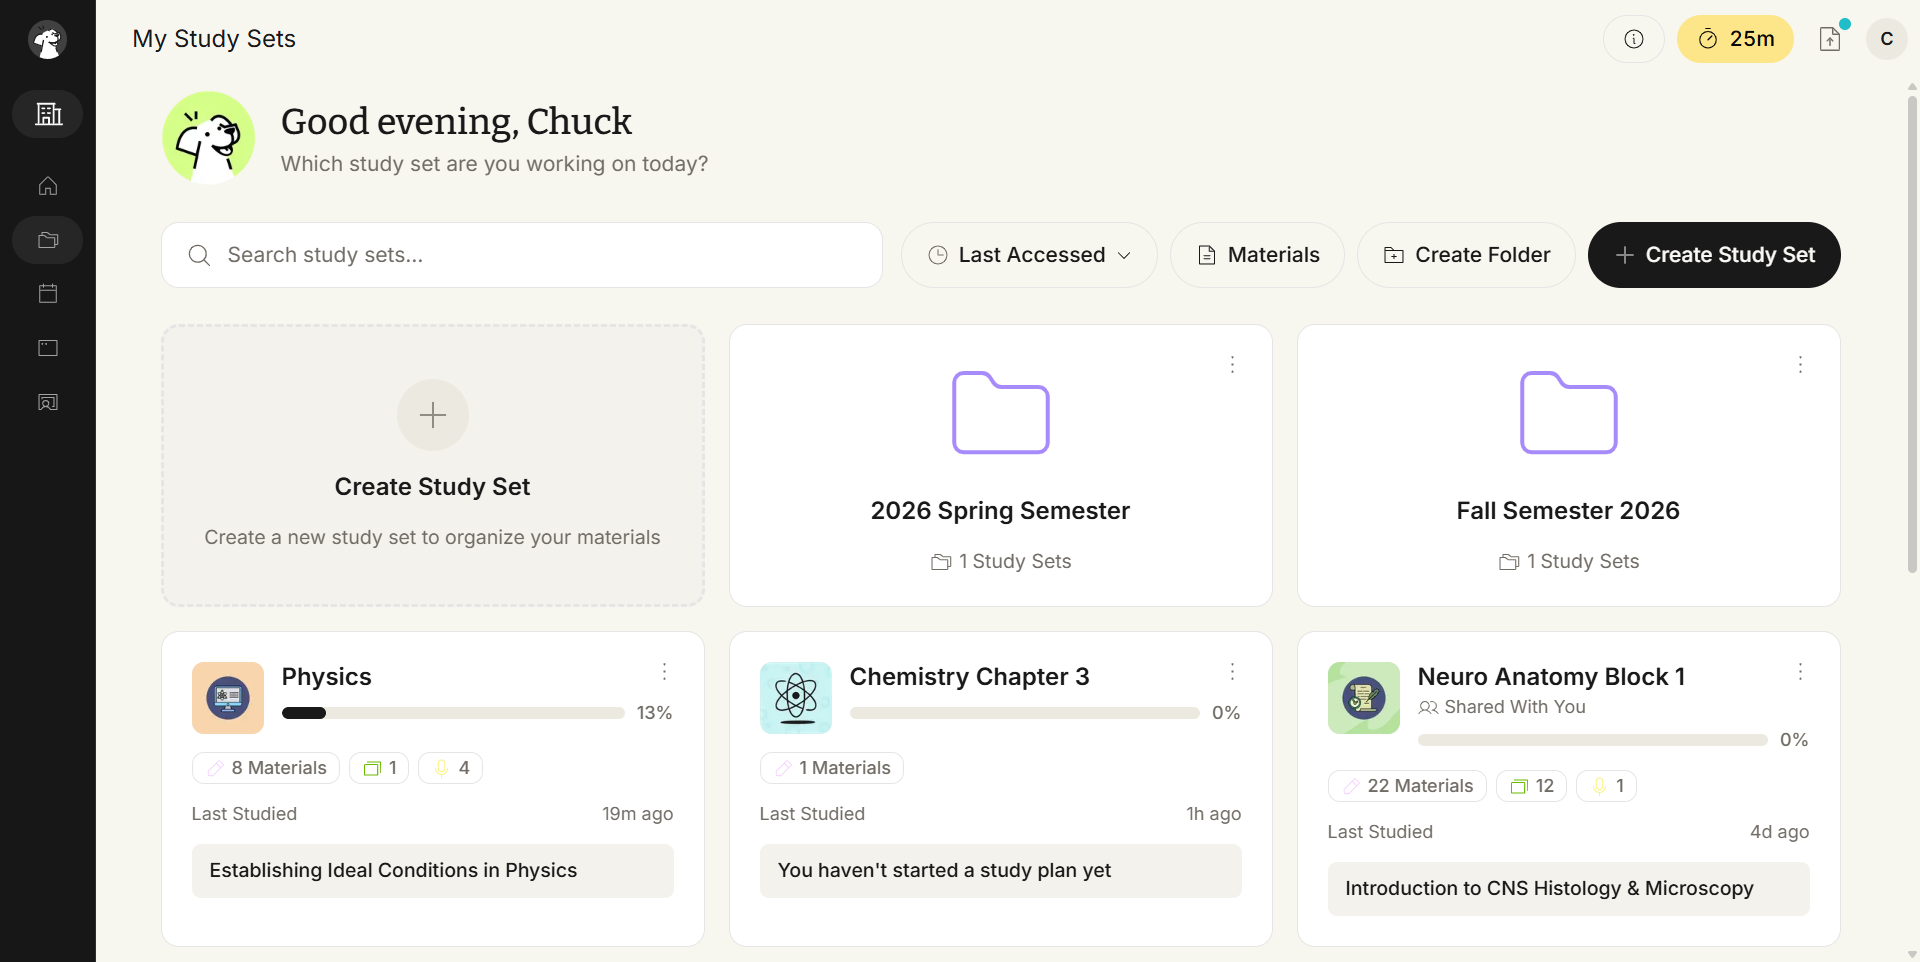
On the left-hand side of your dashboard, click My Sets. Existing folders appear at the top of the Study Set grid, alongside Create Folder and Create Study Set.
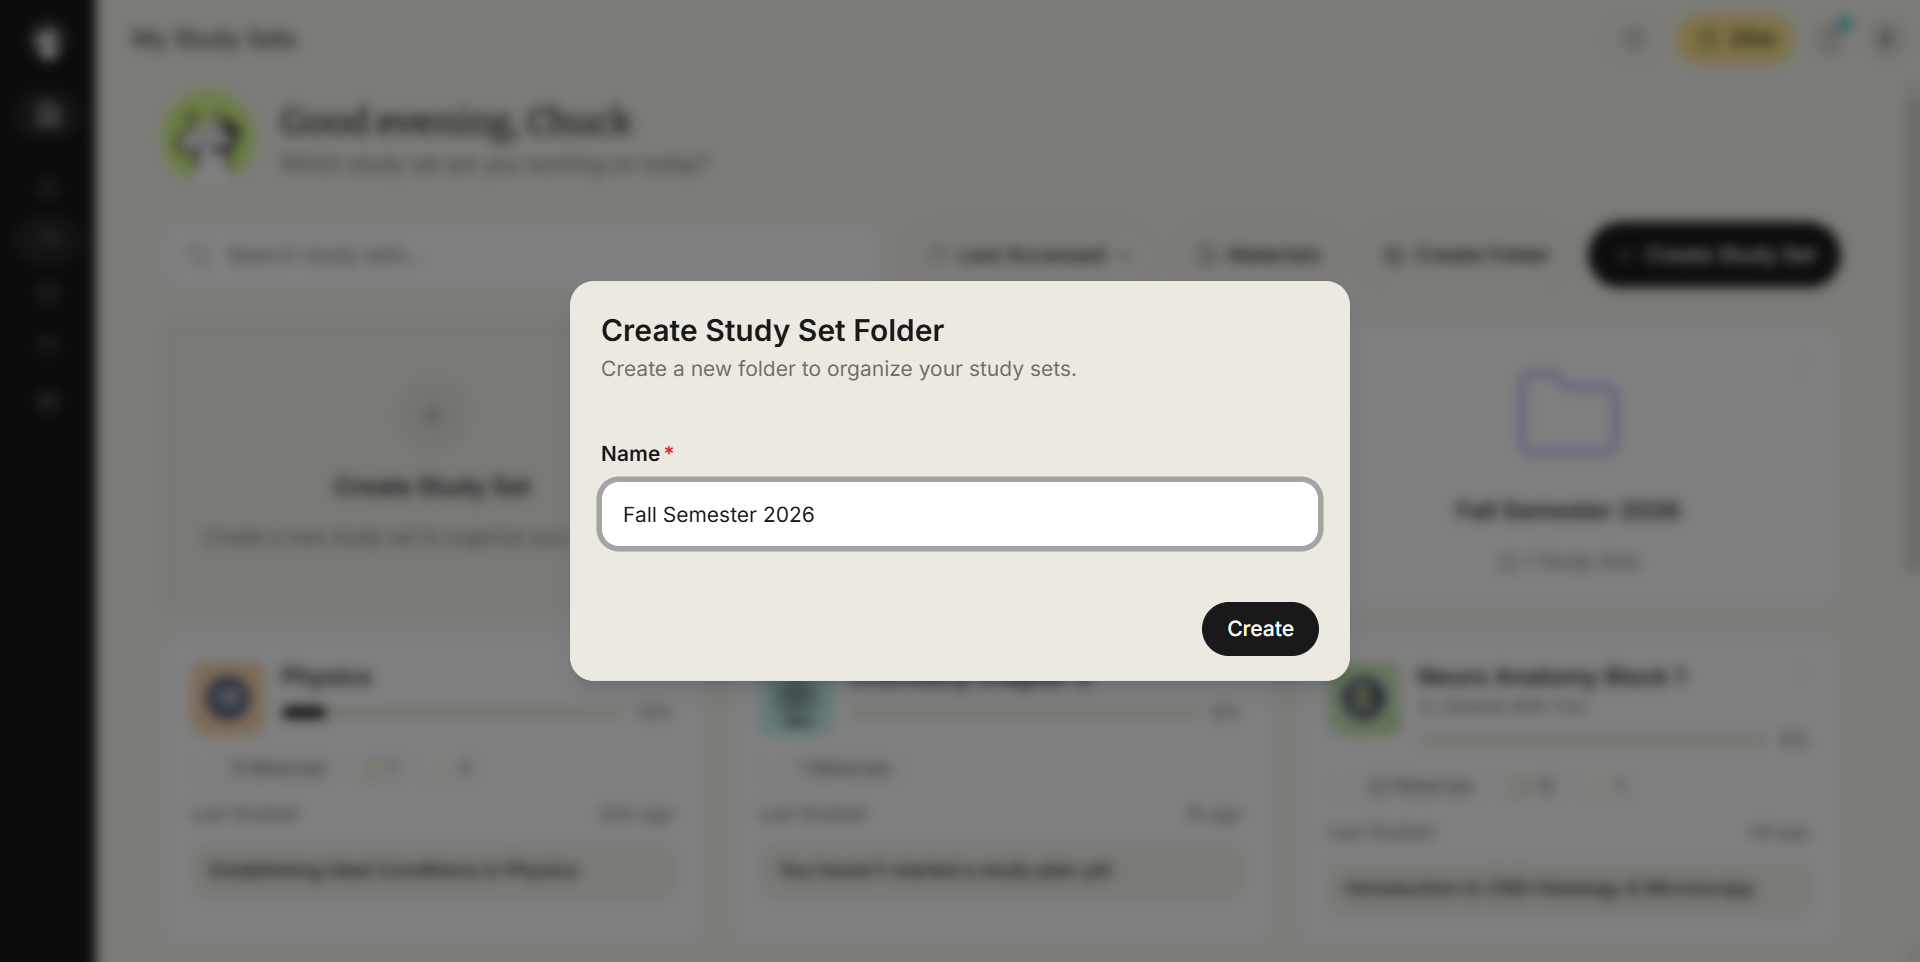
Click Create Folder, enter a name, and click Create.
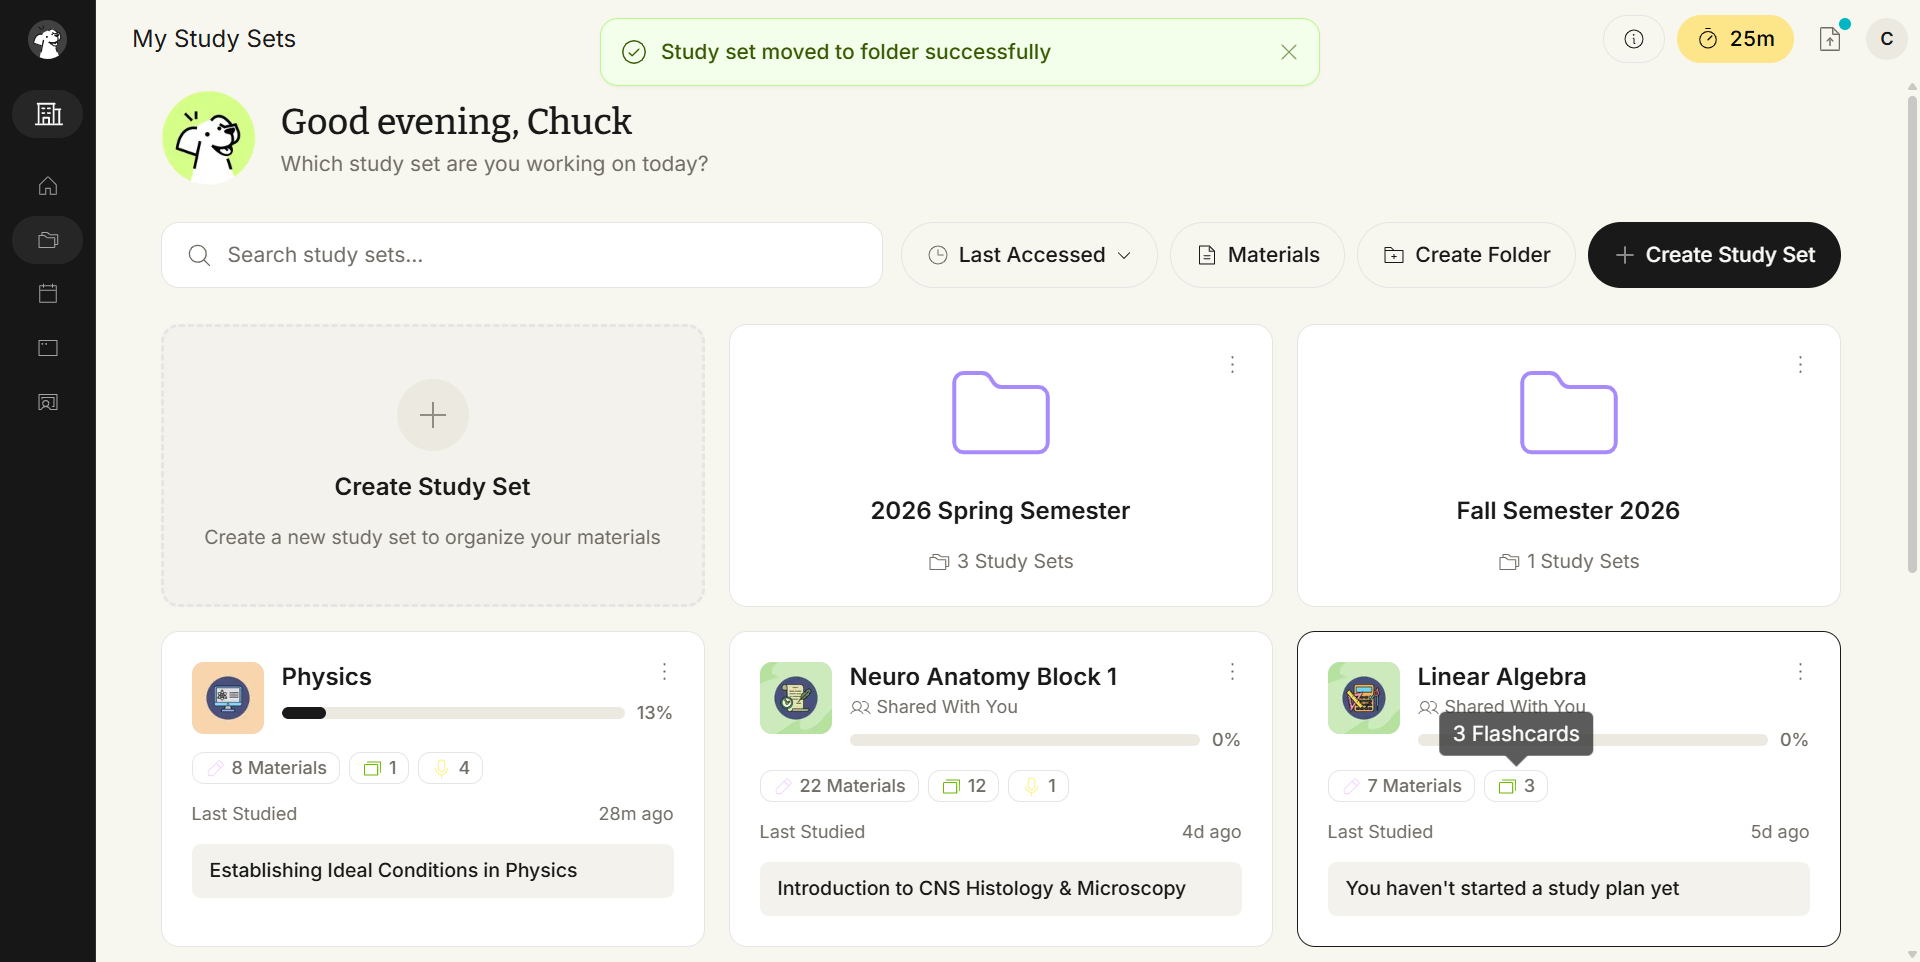
Drag and drop a Study Set card onto the folder where it belongs. A confirmation toast appears, and the folder's Study Set count updates.
Click a folder to view the Study Sets inside it. Click Exit Folder to return to the main list.
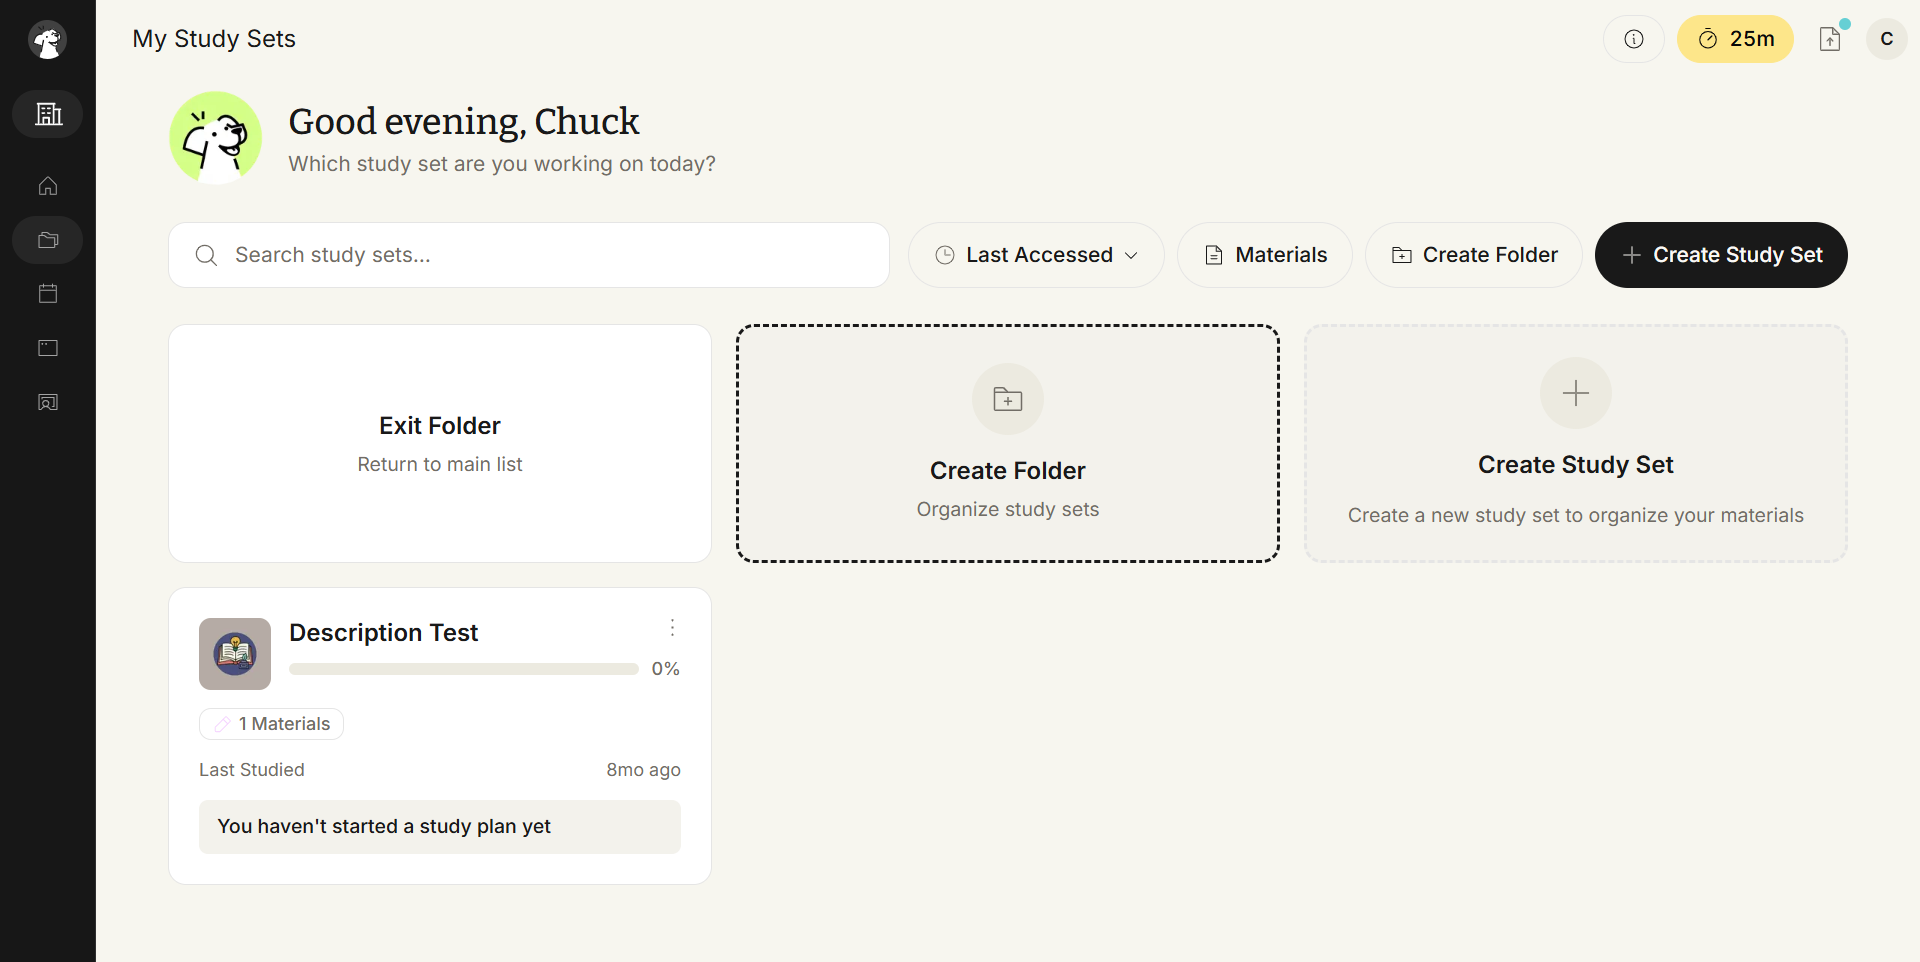
Click any Study Set inside the folder to open it to its home dashboard, same as opening a Study Set from the main grid.
From My Sets, click the three-dot menu in the top right corner of the folder card, then select Edit Folder.
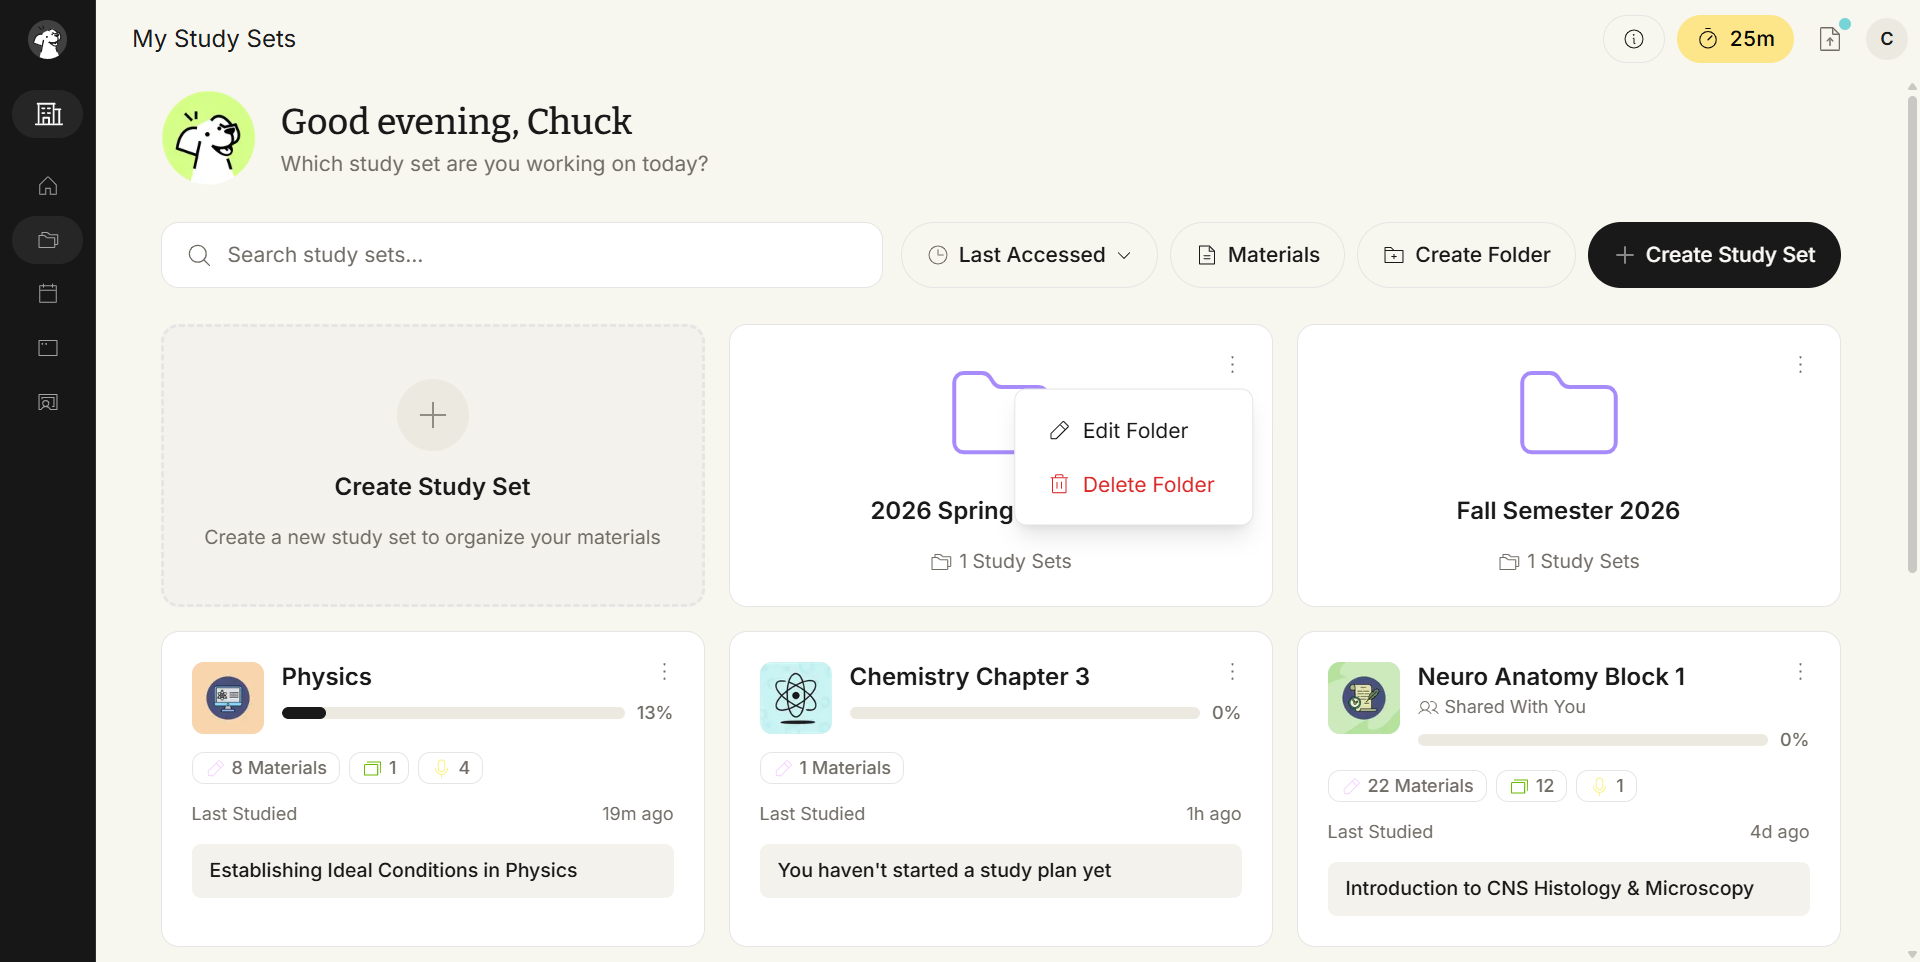
Update the name in the dialog and click Update Folder.
From the same three-dot menu, select Delete Folder.
Confirm the deletion in the browser's native confirmation dialog. Study Sets inside the folder are not deleted — only the folder itself is removed.